GIMP Chat http://gimpchat.com/ |
|
Using Gimp for screen captures http://gimpchat.com/viewtopic.php?f=8&t=19169 |
Page 1 of 1 |
Author: | IMZvonko [ Tue Feb 16, 2021 1:24 pm ] |
Post subject: | Using Gimp for screen captures |
GIMP Version: 2.10 Operating System: Windows OS Version: Windows 10 Home GIMP Experience: New User At work, I used Snagit for all my screen capture needs and basic modifications. For the things I was doing, Snagit was more than enough so I got a copy for home as well. However, now that I'm retired, I'm trying to learn how to do more advanced image modifications. Thought that using Gimp for screen captures would help me learn Gimp by forcing me to always go into it instead of Snagit. One of the things I really liked about Snagit was the ability to take many screenshots in a row and it would automatically create a new file (using a naming template) and put it in a folder. That allowed me to go through a process and take a screenshot at each step without having to stop, go to a capture program, save file and then go back to what I was doing. So my questions are: 1) Can Gimp be used to take screen shots? 2) If so, is there a way to configure it so it automatically saves each to a separate file? 3) If not out of the box, is that something that could be scripted? I haven't done anything with scripting in Gimp, but I have a lot of experience as a developer so I'm sure I can figure something out if it's possible. Thanks in advance for any help. |
Author: | PKHG [ Tue Feb 16, 2021 3:13 pm ] |
Post subject: | Re: Using Gimp for screen captures |
Hmmm, Python in itself is rather powerfull and can probably doe what you described. Bat the Python available in Gimp (after installation) is surely NOT containing the stuff you may need (e.g. Flask and Flask_Admin, which probably could be used ...) I think investing some (40) Euro for a professional version to get what you want ... my advice |
Author: | mahvin [ Tue Feb 16, 2021 3:16 pm ] |
Post subject: | Re: Using Gimp for screen captures |
viewtopic.php?f=23&t=7695#p99577 Using the PrtScr button shortcut, or Alt + PrtScr buttons shortcut, you could utilize a script to capture an entire screen or a window and designate a folder location. ![]() 
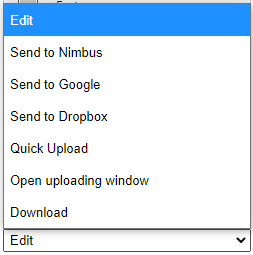
For a specific selected capture, GIMP might not be the answer. I use Nimbus and it sorts all my screenshots according to how I specify it to. See example below: ![]() The after the capture options: ![]() SaulGoode created a snapshot screenshot script years ago, that still works today, that will take a screenshot of your visible layer(s) in GIMP. I have attached that here, if you want to look at it for ideas. Attachment: So far Nimbus is free and does what I want, but you might need something more. |
Author: | racer-x [ Tue Feb 16, 2021 5:15 pm ] |
Post subject: | Re: Using Gimp for screen captures |
The Linux distro I use already has an excellent screen capture utility included. You can set delay, include/exclude mouse and even have it open in Gimp automatically if you're too lazy to use paste. All you need to do is use the PrtScrn key. |
Author: | rich2005 [ Wed Feb 17, 2021 6:45 am ] |
Post subject: | Re: Using Gimp for screen captures |
Not Gimp, use IrfanView. Attachment: iview.jpg [ 127.82 KiB | Viewed 6153 times ] Set up output. Start. Minimise Iview. Use the hot key combo. Edit: That was a on the short side, As I see it the problem with using Gimp for screenshots is avoiding the screenshot dialogue, making use very tedious Set up the delay, start, minimise Gimp, Gimp pops up, export the screenshot. There is a pdb for screenshot and in linux a command such as gimp -b '(plug-in-screenshot 0 FALSE 0 0 0 0 0)' will open Gimp with the screenshot dialogue, but then you still have to go through the start / minimise / export procedure. Not very convenient for an an easy workflow. Might be possible in a script to, export / close Gimp as well. Maybe one of the clever guys can tell you. |
Author: | sallyanne [ Wed Feb 17, 2021 7:22 am ] |
Post subject: | Re: Using Gimp for screen captures |
I find print screen is quicker and then you can edit it to how you want, after Printing Screen 'paste as a new image' in Gimp. |
Author: | IMZvonko [ Mon Mar 08, 2021 9:04 am ] |
Post subject: | Re: Using Gimp for screen captures |
Thanks for the replies, everyone. After doing some more playing around and research, I decided to go with Greenshot because it gives me the ability to do screen captures of the whole screen or just a region, automatically save each screenshot using a file-naming template. Then, for those I want to edit, I just open the files in Gimp. Greenshot works almost exactly as Snagit (but it's FREE) and Gimp is now my "editor" for images instead of using Snagit Editor. I know I can do a lot more with Gimp than Snagit Editor, but it's a steep learning curve right now. One thing I'm struggling with now is how to simply highlight part(s) of an image. My main use case for this is simulating using a yellow highlighter to highlight a portion of text on the image. Doing a search in the community on this resulted in some hits showing how to do it by drawing a rectangle, then filling it, and using transparency for that rectangle. I haven't gotten that to work perfectly yet, but even if I did, I wonder if there is a simpler way. I was hoping there would actually be a highlight tool. Anyone else have this requirement? How are you doing it? |
Author: | rich2005 [ Mon Mar 08, 2021 10:55 am ] |
Post subject: | Re: Using Gimp for screen captures |
All depends on the image but for regular black text on white then suitable brush and size-to-suit / pencil tool / Mode = Burn in the tool options. Click, hold shift, move tool pointer, click again for straight lines. Attachment: highlight.jpg [ 153.22 KiB | Viewed 5559 times ] Experiment with the tool modes. |
Author: | AlSchemist [ Thu Nov 11, 2021 8:44 am ] |
Post subject: | Introducing HighlightText.scm 1.0 |
Hello IMZvonko According to the rich2005's solution above, if you choose a circular brush of the size of the height of the text, you can burn the background in yellow with a rounded corner-like effect at the beginning and the end of the straight line drawn by ![]() Let us suppose that you do not wish to change the current color of the pencil or the brush. IMZvonko wrote: I wonder if there is a simpler way.
The text "Greenshot" has been highlighted by Greenshot with a rectangular selection. ![]() Other yellow highlighted texts have been emphasized by Script-Fu HighlightText.scm ![]() Attachment:
![]() Let us comment the main lines of code in Script-Fu: IMZvonko wrote: drawing a rectangle let* defines the local variables: Let us retrieve the rectangular selection: ![]() Code: Select all (boundSel (cdr (gimp-selection-bounds image))) LAYER-MODE-MULTIPLY will burn the background. Code: Select all (layerHiT (car (gimp-layer-new image widthSel heightSel RGB-IMAGE "HighlightTxt" 100 LAYER-MODE-MULTIPLY))) in yellow: ![]() Code: Select all (gimp-context-set-foreground "#ffff00") ; yellow IMZvonko wrote: then filling it Code: Select all (gimp-edit-bucket-fill-full layerHiT BUCKET-FILL-FG 0 100 0 FALSE TRUE 0 0 0) IMZvonko wrote: and using transparency for that rectangle. Code: Select all (gimp-drawable-fill layerHiT TRANSPARENT-FILL) Related topic: Gimp menu "DX" > "Highlight selected area..." github: DX Screenshot Fix the original condition that displays a warning: Code: Select all (if (= (or draw-border fill-area) FALSE) (gimp-message "Nothing to do - check 'Draw border' and/or 'Fill area'.")) by: Code: Select all (if (and (= draw-border FALSE) (= fill-area FALSE)) (gimp-message "Nothing to do - check 'Draw border' and/or 'Fill area'.")) TRUE is the numeric value 1 but not a boolean: ![]() ![]() Code: Select all (or FALSE TRUE) ;-> 0 is displayed by the Script-Fu console Disjunction of opposite boolean values: ![]() Code: Select all (or #f #t) ;-> #t |
Author: | ofnuts [ Thu Nov 11, 2021 5:41 pm ] |
Post subject: | Re: Using Gimp for screen captures |
Hmm. So instead of few steps using the UI, one has to type arcane commands that can backfire. And this is "simpler"? |
Author: | PixLab [ Fri Nov 12, 2021 3:32 am ] |
Post subject: | Re: Using Gimp for screen captures |
ofnuts wrote: Hmm. So instead of few steps using the UI, one has to type arcane commands that can backfire. And this is "simpler"? ![]() I cannot agree more, this sounds extremely daunting and exhausting just for a screenshot. BTW I'm using Ksnip (sudo apt install ksnip), crossplatform over there -> https://github.com/ksnip/ksnip It has all the tools needed like aut-numbering, arrows, double arrows, rectangle, circle, annotation, highlight, blur, pixelize, and so, and so, also like draw a rectangle to screenshot that part, it recall always your last setting, and so much more like opening a png or jpg independently to put arrows or whatever you want. a screenshot of that screenshot app ![]() Attachment: screenshot_20211112-162528.png [ 282.84 KiB | Viewed 1840 times ] |
Author: | Pocholo [ Fri Nov 12, 2021 10:00 am ] |
Post subject: | Re: Using Gimp for screen captures |
I use a free version of PhotoScape X for windows.http://x.photoscape.org/ |
Author: | AlSchemist [ Fri Nov 12, 2021 3:06 pm ] |
Post subject: | Reductio ad absurdum |
PixLab wrote: ![]() I cannot agree more, this sounds extremely daunting and exhausting just for a screenshot. PixLab, it's not even "just for a screenshot" ![]() but for highlighting text with a yellow background, aka annotation. Into the bargain, the subject is "Using Gimp" ![]() However, according to proof by contradiction, AlSchemist will supply the usage with the external tool GreenShot quoted by IMZvonko for comparison. Let us suppose that "to simplify" ![]()
Alternatively GreenShot would be able to run Gimp but the loading of Gimp would be too slow. With the Script-Fu HighlightText.scm script in Gimp: AlSchemist wrote:
![]() ![]() ![]() ![]() ![]() ![]() ![]() ![]() ![]() |
Author: | ofnuts [ Fri Nov 12, 2021 6:39 pm ] |
Post subject: | Re: Using Gimp for screen captures |
Ah, that was a script.... Btw, no need to restart Gimp after installing a script-fu, just do "Filters > Script-fu > Refresh scripts" Let us suppose that "to simplify" ![]() Of course not. The deal in that case is that you can do everything without using Gimp. This said to highlight something in yellow in Gimp, set your FG to yellow, your brush to Multiply mode, adjust the size of the brush, then: 1. Click on the start of the highlighted text 2. Depress shift, and move to the end of the text (you can in addition depress Control to make sure the highlighting is horizontal) then click again. Of course, you can save your brush settings as a preset: Attachment: BrushPreset.png [ 14.64 KiB | Viewed 1785 times ] So highlighting is just restoring the preset and a couple of clicks. |
Author: | PixLab [ Sat Nov 13, 2021 2:07 am ] |
Post subject: | Re: Reductio ad absurdum |
AlSchemist ![]() Sorry, I felt I was obliged to do it ![]() More seriously (but not so ![]() AlSchemist wrote: PixLab wrote: ![]() I cannot agree more, this sounds extremely daunting and exhausting just for a screenshot. PixLab, it's not even "just for a screenshot" ![]() but for highlighting text with a yellow background, aka annotation. Into the bargain, the subject is "Using Gimp" ![]() So it's even worse than I thought.... Not only you are cluttering the top menu with a script that needs 1 more click than doing it WITHOUT script, but also that person will not learn GIMP properly nor use the proper tool to do it. AlSchemist wrote: However, according to proof by contradiction, AlSchemist will supply the usage with the external tool GreenShot quoted by IMZvonko for comparison. So to highlight something on a screenshot in GIMP the OP will always be dependent of you? AlSchemist wrote: Let us suppose that "to simplify" ![]()
Oh my... you're not simplifying, at all! BTW your Click outside the image to merge the "Floating Selection (Pasted Layer) is wrong! clicking outside the image will NOT merge the pasted/floating selection (and happily it does not do this!) Also I just learn that on Windows OS when you hit the "PrintScreen / PrtScr" key, Windows copy it to the clipboard (yeah.. I needed to do some searches -> I'm using only Linux) Attachment: screenshot_20211113-143502.png [ 97.33 KiB | Viewed 1769 times ] In the end why all those copy/paste and back and forth between greenshot and gimp? Why not Highlight directly in GIMP as the OP asked? Hit that "PrintScreen / PrtScr" key = clipboard, then in GIMP > File/Create/From clipboard, then >> New layer in multiply mode >> make your selection >> drag n drop the color from FG or BG >> DONE! and this method can protect from mistakes as well... Or use the brush as suggested by @Ofnuts, big advantage of Ofnuts brush, you got a preset that you just call once and highlight as many time as you need just with a brush, also next time when you re-open GIMP it's there and accessible in just 1 click. AlSchemist wrote: Alternatively GreenShot would be able to run Gimp but the loading of Gimp would be too slow. With the Script-Fu HighlightText.scm script in Gimp:
OK, it's a GIMP native tool AlSchemist wrote: OK, it's a GIMP native tool AlSchemist wrote: No script needed for that >> Just drag n drop the FG or the BG color on the image... Oh you DO NOT EVEN NEED to drop it in the selection as it will fill ONLY the selection and if you use the multiple selection mode (addition/add) it will fill all at once, ![]() AlSchemist wrote: ![]() ![]() ![]() ![]() OK that's nice, as an exercise it can be good to learn tiny script, ![]() but as a utility script, no, it's not even re-inventing the wheel, it's making things more complex as they should be. |
Author: | AlSchemist [ Sat Nov 13, 2021 9:54 am ] |
Post subject: | Auto-numbering |
It's amazing how around twenty tiny lines of Scheme could generate as secondary effects. PixLab, AlSchemist particularly appreciated the pythonesque quote of the movie! ![]() ![]() ![]() Into the bargain, you mentioned about ksnip the key feature of auto-numbering enough interesting also in GreenShot. Attachment: MarkNbrCirclePathTool.png [ 178.26 KiB | Viewed 1737 times ] Ten years ago, Silas Silva created mark-number-circles.scm in github under GNU license. In the 2021 version, some original "TODO" have been fixed by AlSchemist. Attachment: Usage:
![]() Hereafter enclosed is the process of migration in Gimp 2.10.28 because in the decade, some API were deprecated. The original gimp-path-get-points is "deprecated: Use 'gimp-vectors-stroke-get-points' instead." says PDB aka Gimp Procedure DataBase. The old API generated a longer vector translated into a list, hence: Code: Select all ; Other itens are repetitive for us, so drop it. About the drop function, Silas indicates: Code: Select all ; Quick (and dirty?) implementation of the drop function of SRFI 1 extensions to Scheme, It is the very first time that the abbreviation SRFI 1 standing for Service Request Feature for Implementation is ever written in GimpChat. Hope that AlSchemist will be not burnt alive on the stake for this taboo. That is why the function drop of SRFI 1 has been dropped in the 2021 version of mark-number-circles.scm. After all, for numbers in circle, there is SRFI 14 Unicode Character-Set. Attachment: SRFI14CharSet.png [ 38.14 KiB | Viewed 1737 times ] To be continued. |
Page 1 of 1 | All times are UTC - 5 hours [ DST ] |
Powered by phpBB © 2000, 2002, 2005, 2007 phpBB Group http://www.phpbb.com/ |