It is currently Fri May 03, 2024 11:15 am


All times are UTC - 5 hours [ DST ]


Post new topic Reply to topic  [ 30 posts ]  Go to page 1, 2  Next
Author Message
 Post subject: Glass Sphere: Can anyone try to recreate this tutorial?
PostPosted: Thu Aug 15, 2013 2:29 pm  (#1) 
Offline
GimpChat Member
User avatar

Joined: Jul 06, 2013
Posts: 2606
Location: California
Can anyone here try to recreate this tutorial for Gimp users?

The tutorial is here: http://forums.getpaint.net/index.php?/t ... -tutorial/

I've tried it in paint.net and I couldn't get past step 6. I think the author of this tutorial doesn't explain it well.

If this is in the wrong section or shouldn't be here, please remove it.


Share on Facebook Share on Twitter Share on Orkut Share on Digg Share on MySpace Share on Delicious Share on Technorati
Top
 Post subject: Re: Can anyone try to recreate this tutorial?
PostPosted: Thu Aug 15, 2013 4:55 pm  (#2) 
Offline
Global Moderator
User avatar

Joined: Apr 07, 2010
Posts: 14182
You are right, it is very confusing. He says to repeat step 4 then a few steps later he says to ignore that step and then it gets more confusing on down further. It would probably have to be rewritten step by step to try to figure it out. I think I will skip it :teeth

_________________
Image


Top
 Post subject: Re: Can anyone try to recreate this tutorial?
PostPosted: Thu Aug 15, 2013 5:20 pm  (#3) 
Offline
GimpChat Member
User avatar

Joined: Jul 06, 2013
Posts: 2606
Location: California
That's what I thought. I'm thinking of skipping it. Too long and confusing. If anyone wants to give it a shot, go ahead.


Top
 Post subject: Re: Can anyone try to recreate this tutorial?
PostPosted: Thu Aug 15, 2013 7:09 pm  (#4) 
Offline
Script Coder
User avatar

Joined: Apr 23, 2010
Posts: 1553
Location: not from Guildford after all
The following corresponds (somewhat) to the first ten steps of that tutorial.

  1. Create a new image 1600x1300 and fill the Background layer with black.
  2. Use the Elliptical Select Tool :elipse 
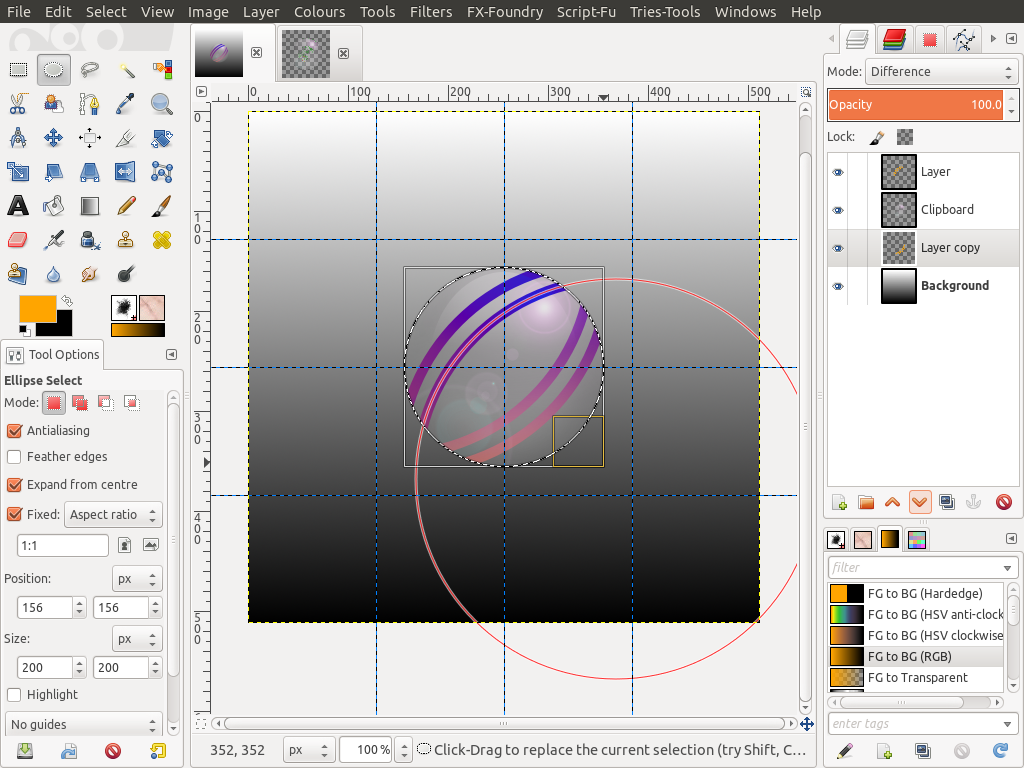
to select a circle that fits within the image (hold down the SHIFT key after clicking to make the ellipse perfectly circular).
  3. Create a new transparent layer and name it "Blur30".
  4. Add a layermask to the new layer, initializing it to the selection.
  5. Duplicate the "Blur30" layer and change the name of the new layer from "Blur30 copy" to "Blur17".
  6. Duplicate the "Blur17" layer and change the name of the new layer from "Blur17 copy" to "Spread41".
  7. Set the foreground color to white.
  8. Activate the "Blur30" layer by clicking on its thumbnail preview in the Layers dialog.
  9. Perform "Edit->Stroke Selection..." with a Line Width of 6.
  10. Apply a Gaussian Blur with a Radius of 30.
  11. Activate the "Blur17" layer by clicking on its thumbnail preview in the Layers dialog.
  12. Perform "Edit->Stroke Selection..." with a Line Width of 4.
  13. Apply a Gaussian Blur with a Radius of 17.
  14. Activate the "Spread41" layer by clicking on its thumbnail preview in the Layers dialog.
  15. Perform "Edit->Stroke Selection..." with a Line Width of 4.
  16. Apply a "Filters->Noise->Spread..." with an Amount of 41.
  17. Apply a Gaussian Blur with a Radius of 2.
  18. Set the foreground color to orange (#FF8000).
  19. Create a new layer fiiled with the foreground color and name it "Select Circle". Position this layer just above the Background layer in the layerstack.
  20. Add a layermask to the new ("Select Circle") layer, initializing it to the selection.
  21. Set the FG/BG colors to their defaults (foreground=black, background=white).
  22. Double-click on the Blend Tool icon :blend and change the Shape of the blend to "Radial" in the Options dialog that appears. Also, click on the Reverse icon :reverse (the gradient should be "FG to BG (rgb)").
  23. In the Image window, drag a Blend stroke from a position halfway between the edge of the circle and its center at about the 4 o'clock position to a point opposite the center in the 10 o'clock position (if you are unhappy with the result, UNDO and try again).

At this point your setup should appear similar to the following (the mouse pointer shows where I started my Blend stroke in step 23):

Attachment:
SSglobe.png
SSglobe.png [ 153.97 KiB | Viewed 3717 times ]

_________________
Any sufficiently primitive technology is indistinguishable from a rock.


Top
 Post subject: Re: Can anyone try to recreate this tutorial?
PostPosted: Thu Aug 15, 2013 7:44 pm  (#5) 
Offline
GimpChat Member
User avatar

Joined: Jul 06, 2013
Posts: 2606
Location: California
Nice, at least we know it can be recreated. I think the author who initially created it, missed a lot of steps. I couldn't even come close to what saulgoode produced in GIMP while I was in paint dot net.


Top
 Post subject: Re: Can anyone try to recreate this tutorial?
PostPosted: Thu Aug 15, 2013 7:49 pm  (#6) 
Offline
GimpChat Member
User avatar

Joined: May 16, 2010
Posts: 14709
Location: USA
Thought i would give the sphere a try. I didn't follow the tutorial i went by sight.
Here are my results. Just doesn't seem glassy enough to me. :)
I think if i would have gotten the orange gradient inside correct it would have been much better.
Image

_________________
Image
Edmund Burke nailed it when he said, "The only thing necessary for the triumph of evil is for good men to do nothing."


Top
 Post subject: Re: Can anyone try to recreate this tutorial?
PostPosted: Thu Aug 15, 2013 8:16 pm  (#7) 
Offline
GimpChat Member
User avatar

Joined: Jul 06, 2013
Posts: 2606
Location: California
Rod, I like it. I'm hoping to make a sphere in PDN & in Gimp and see which one is the better outcome. Sadly, I'm reworking the PDN tutorial since it's still confusing for me so we will see how it goes.


Top
 Post subject: Re: Can anyone try to recreate this tutorial?
PostPosted: Thu Aug 15, 2013 8:25 pm  (#8) 
Offline
GimpChat Member
User avatar

Joined: Jul 17, 2012
Posts: 2770
looks pretty good to me, Rod !


Top
 Post subject: Re: Can anyone try to recreate this tutorial?
PostPosted: Sat Aug 17, 2013 10:20 am  (#9) 
Offline
GimpChat Founder
User avatar

Joined: May 22, 2008
Posts: 5242
Location: Gimpville
Nice results, Rod. :yes

You inspired me to take a stab at glassy globes. I didn't follow the tutorial either, just attempted my own variation.

Image

_________________
“If you reach for the stars, you just might land on a decently sized hill.” - Stuart Hill


Top
 Post subject: Re: Can anyone try to recreate this tutorial?
PostPosted: Sat Aug 17, 2013 10:23 am  (#10) 
Offline
Global Moderator
User avatar

Joined: Apr 07, 2010
Posts: 14182
That is really cool, very nice job on the reflections.

_________________
Image


Top
 Post subject: Re: Can anyone try to recreate this tutorial?
PostPosted: Sat Aug 17, 2013 11:13 am  (#11) 
Offline
GimpChat Founder
User avatar

Joined: May 22, 2008
Posts: 5242
Location: Gimpville
molly wrote:
That is really cool, very nice job on the reflections.

:tyspin 
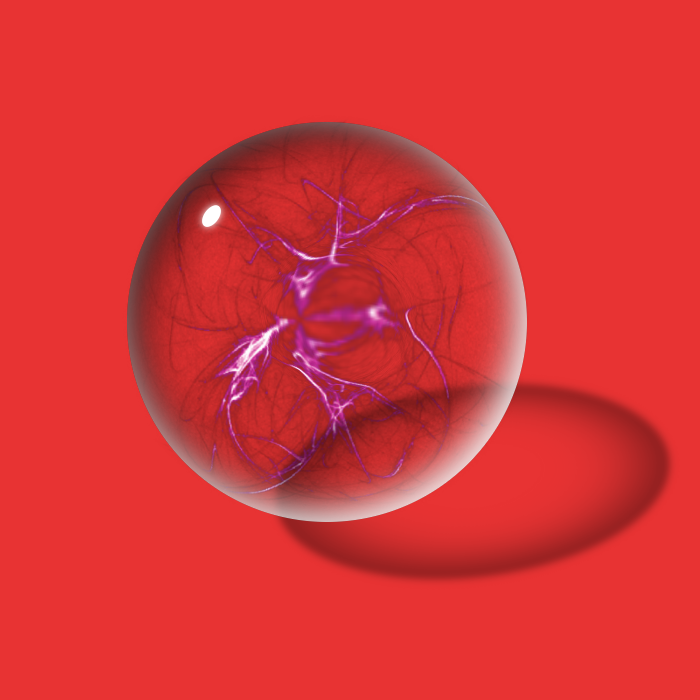
Molly. I used the Logo Toolbox & GC Shadow scripts to help create the glassy globe, then adjusted the highlights with GIMP's transform tools.

There are certainly some flaws in the render, but it was fun.

_________________
“If you reach for the stars, you just might land on a decently sized hill.” - Stuart Hill


Top
 Post subject: Re: Can anyone try to recreate this tutorial?
PostPosted: Sat Aug 17, 2013 11:50 am  (#12) 
Offline
GimpChat Member

Joined: Dec 27, 2012
Posts: 393
Location: England
Not the same effect but this is a good tutorial http://forum.croar.net/topic/63/ for making a glass ball. I'm sure the internal lines could easily be added to it.

Here's an attempt I made with some stuff on the inside that was made with the flame filter.
Image

_________________
Image

DeviantArt gallery


Top
 Post subject: Re: Can anyone try to recreate this tutorial?
PostPosted: Sat Aug 17, 2013 11:55 am  (#13) 
Offline
Global Moderator
User avatar

Joined: Apr 07, 2010
Posts: 14182
Very spiffy Caz...

_________________
Image


Top
 Post subject: Re: Can anyone try to recreate this tutorial?
PostPosted: Sat Aug 17, 2013 12:44 pm  (#14) 
Offline
GimpChat Member
User avatar

Joined: May 16, 2010
Posts: 14709
Location: USA
Nicely done Caz and Tux. :)

_________________
Image
Edmund Burke nailed it when he said, "The only thing necessary for the triumph of evil is for good men to do nothing."


Top
 Post subject: Re: Can anyone try to recreate this tutorial?
PostPosted: Sun Aug 18, 2013 4:29 am  (#15) 
Offline
GimpChat Member

Joined: Dec 27, 2012
Posts: 393
Location: England
Thanks Molly and Rod.
Spiffy, what a great old word, haven't heard it used in a long time. :cool

_________________
Image

DeviantArt gallery


Top
 Post subject: Re: Can anyone try to recreate this tutorial?
PostPosted: Sun Aug 18, 2013 10:09 am  (#16) 
Offline
GimpChat Member

Joined: Aug 27, 2010
Posts: 491
I've always been partial to the specular reflection method of creating glass spheres ...

Image


Top
 Post subject: Re: Can anyone try to recreate this tutorial?
PostPosted: Sun Aug 18, 2013 10:14 am  (#17) 
Offline
GimpChat Founder
User avatar

Joined: May 22, 2008
Posts: 5242
Location: Gimpville
Caz wrote:
Not the same effect but this is a good tutorial http://forum.croar.net/v:63 for making a glass ball. I'm sure the internal lines could easily be added to it.

Here's an attempt I made with some stuff on the inside that was made with the flame filter.

Thanks for the link to the tutorial. You managed to get the flame painter graphics to actually look like it's inside the ball.

_________________
“If you reach for the stars, you just might land on a decently sized hill.” - Stuart Hill


Top
 Post subject: Re: Can anyone try to recreate this tutorial?
PostPosted: Sun Aug 18, 2013 11:25 am  (#18) 
Offline
GimpChat Member

Joined: Dec 27, 2012
Posts: 393
Location: England
GnuTux wrote:
Thanks for the link to the tutorial. You managed to get the flame painter graphics to actually look like it's inside the ball.


Cheers. I wanted to post the link somewhere. I just stumbled on it by accident but I think it's probably one of the best glass sphere tutorials I've found so far, and it's for Gimp so there's none of that head scratching I get when trying to work out how to make a photoshop tutorial work. :bigthup

_________________
Image

DeviantArt gallery


Top
 Post subject: Re: Can anyone try to recreate this tutorial?
PostPosted: Sun Aug 18, 2013 12:10 pm  (#19) 
Offline
GimpChat Member
User avatar

Joined: Aug 30, 2012
Posts: 2174
Image

This was one of the first designs I did in gimp by following a tutorial but the tutorial was old and had no images (as most had expired or been deleted) so I fumbled my way through and ended up with the above.

_________________
Image


Top
 Post subject: Re: Can anyone try to recreate this tutorial?
PostPosted: Sun Aug 18, 2013 1:24 pm  (#20) 
Offline
GimpChat Member
User avatar

Joined: Aug 30, 2012
Posts: 2174
Thought I would share one way you could create the orange stripes, If you know the original diameter of your orb then create a path twice the size, In my example below the orb is 200px in diameter so I have created a circular path 400px in diameter. Then using the move tool, make sure it is set to path move and position your path, stroke path using desired settings, I selected the orb first so the path tool wouldn't stroke outside of the circle.
I finally duplicated the two lines I had created and rotated this new layer by 180 degrees and positioned under the orb to create the rear lines.

Image

_________________
Image


Top
Post new topic Reply to topic  [ 30 posts ]  Go to page 1, 2  Next

All times are UTC - 5 hours [ DST ]


   Similar Topics   Replies 
No new posts Attachment(s) Glass sphere.py

7

No new posts Attachment(s) How To Create Glass Balls PDF (from a Video Tutorial)

11

No new posts Los Vegas Sphere

0

No new posts Attachment(s) Pots & Bowls Using 'Map Object>Sphere'

41

No new posts Bevel Reflect logo and sphere

10


* Login  


Powered by phpBB3 © phpBB Group