Attachment:
Download, extract the plug-in and place it in your user plug-ins folder.
A pdf version of this guide:
Attachment:
The filter is located at:
Filters>>Custom Fonts>>Decorating Tools>>Custom Font Highlights v0.1 Tabbed...
A filter for adding (subtle) highlights to existing custom fonts.
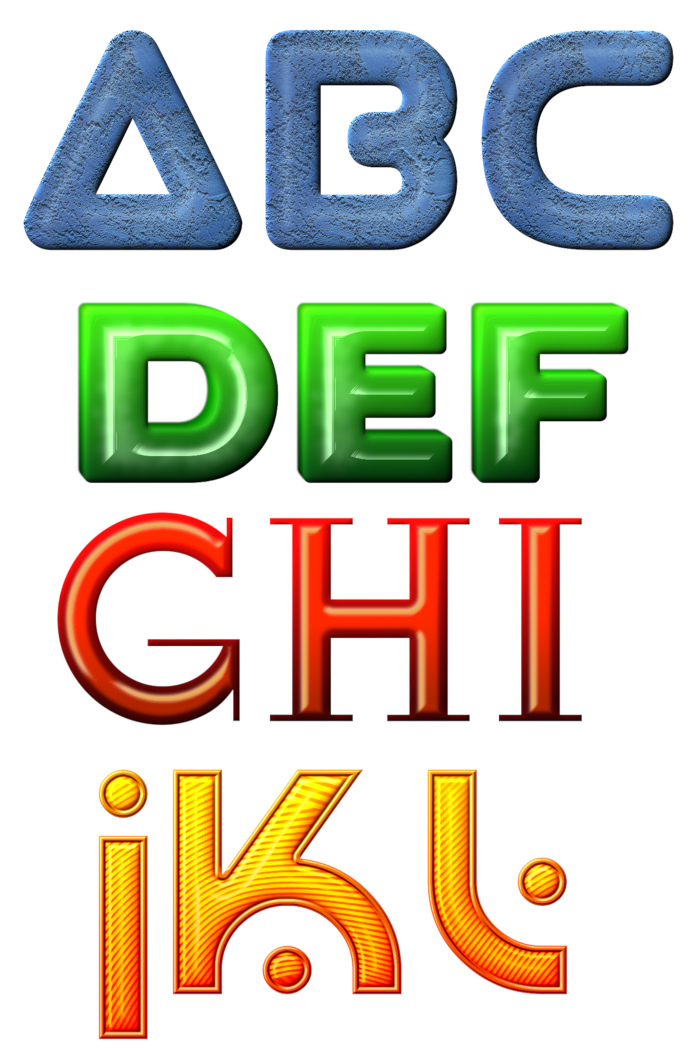
Some examples of recent fonts that have used test versions of the filter.
The plug-in works better with characters that have a wider, consistent thickness.
There are four dialog tabs each of which can be used to add layers of effects.
The following examples use a fairly plain font face to show more clearly the effects of the filter output.
Tab 1 Main Character
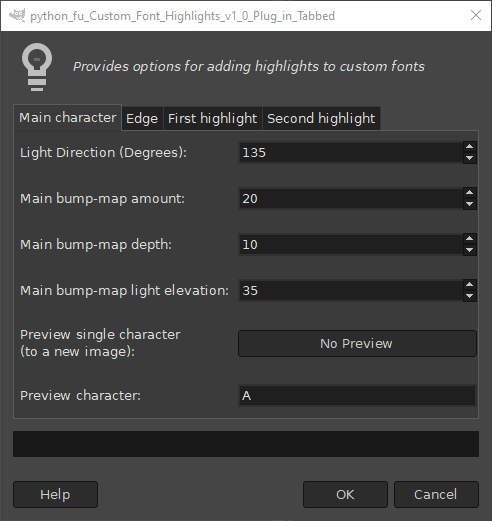
This tab can be used to make small changes to the initial bump-map effect applied to the main character. The default output:

Increase the bump-map depth value to add more emphasis (increased below to 30).

Use the ‘Preview’ option on this tab to gauge the outcome of any changes before committing to a whole set of characters.
Tab 2: Edge
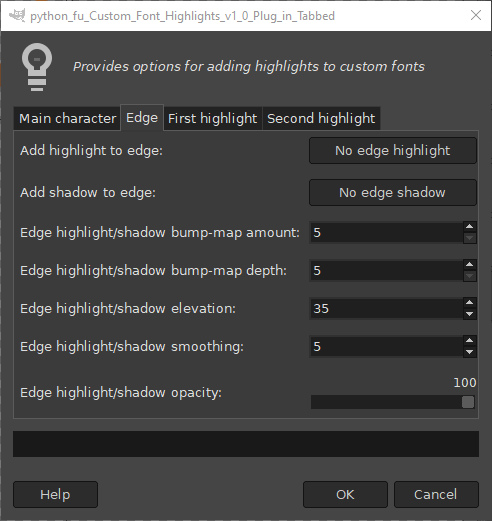
f you only wish to add highlights and/or shadows to the edges of characters use this tab. You can modify the outcome by altering the option values. Defaults values for highlights shown below:

Defaults values for shadows shown below:

Setting the bump-map depth to 30 to emphasize the darker edges:

Here the bump-map depth has been set to 30 and the smoothing option has been reduced to 2 for both highlights and shadows:

Tab 3: First highlight
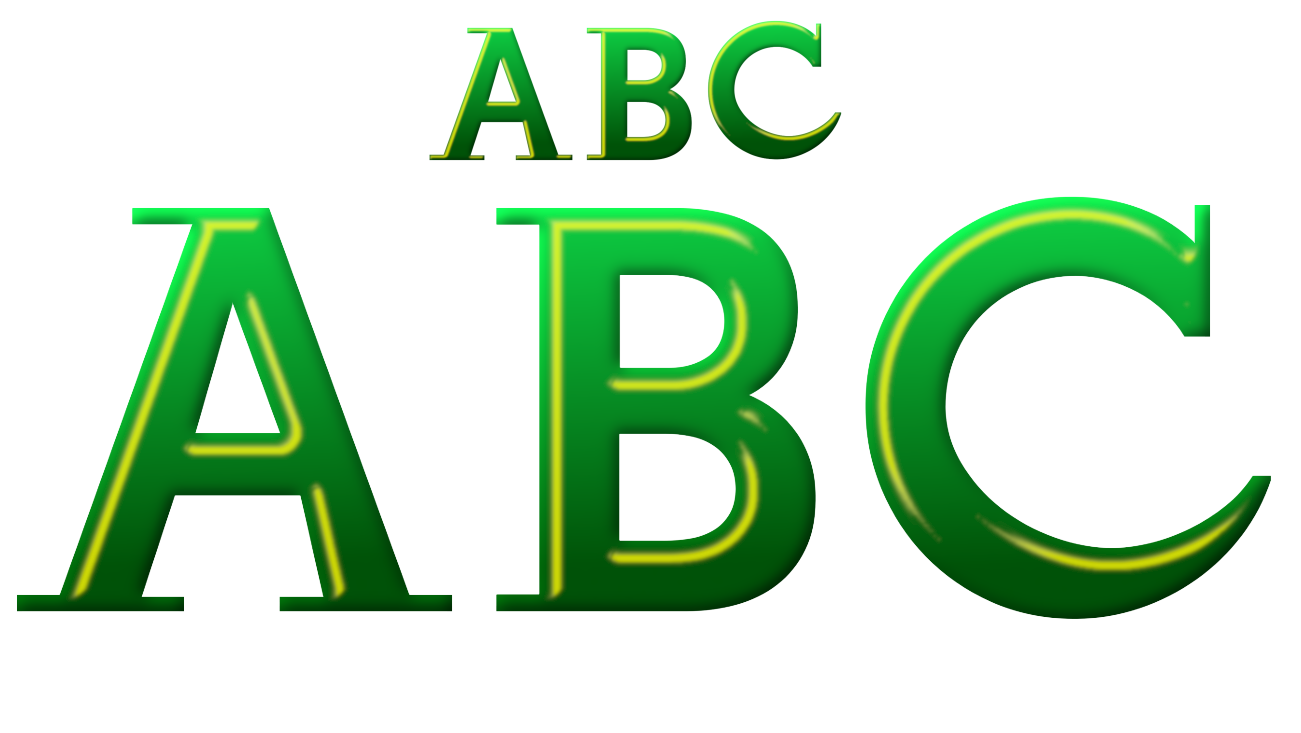
The real fun starts when you use the ‘Add a first highlight’ option.
The default options add a highlight to the bevelled edges nearest the light source:

Change the mode to something like Grainmerge to add softer edges to the highlights.

Hardlight mode has been used with each of the characters below adding a yellow, then orange, then red foreground colour for the highlight.

Increase the offset value to move the highlight closer to the middle of the characters.


Note that the last image above was pushed just a little too far. There is an option to intensify the highlight in situations like this – but it is probably better to just reduce the offset value again.

Tab 4: Second highlight
This option provides a way of broadening the effect of the first highlight; it will have no effect if the first highlight is off. Increase the value for the ‘Reduce second highlight area’ option to narrow the area used for the second highlight.
The image below shows the output of the first highlight tab before adding a second highlight...

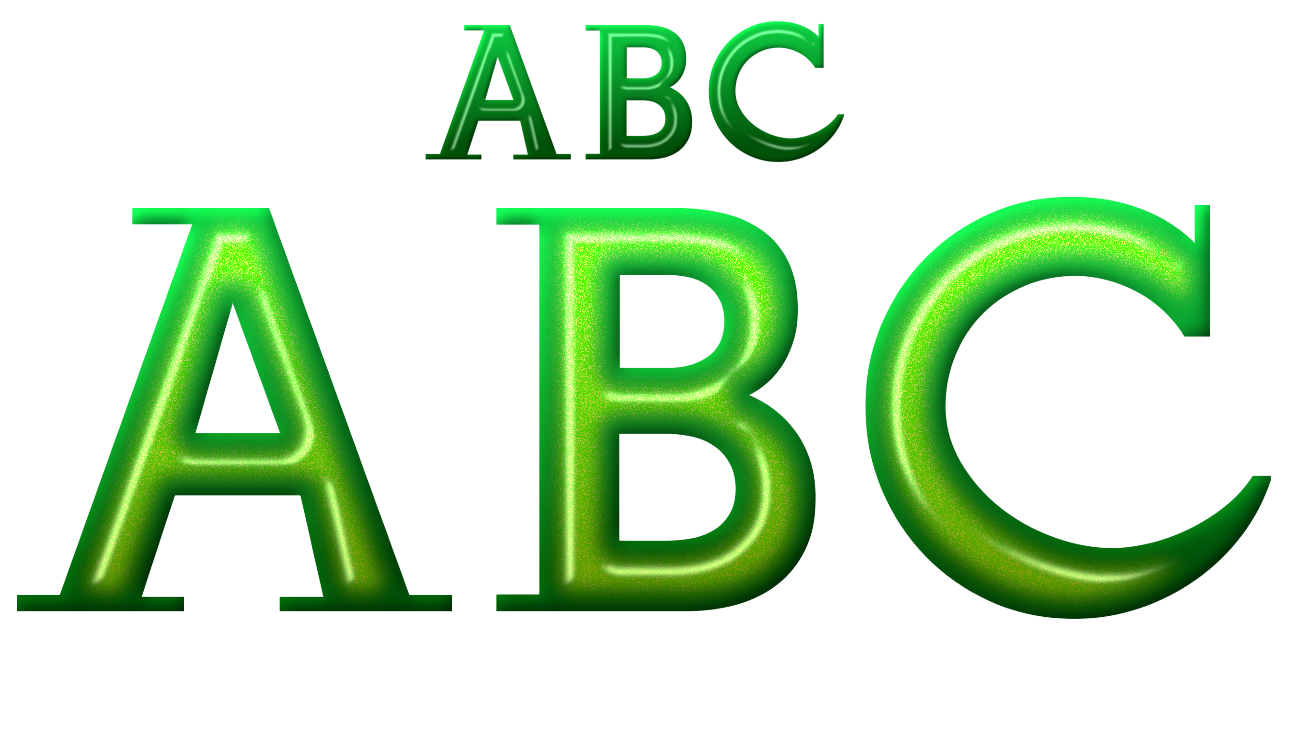
… and with the default second highlight (which affects most of the character) and the foreground colour set to yellow:

The value for the reduce area option has been increased below to 20.

Here the value for the blur option has been decreased to 1.

The distort option can be used with the second highlight. The split view shows how the highlight would appear without any blur and with blur.

And finally I have also provided an option to add noise (fairy dust) to the highlight for those who like a little bit of sparkle.
Closer view:

Be aware that if the ‘reduce area’ amount is too small then no second highlight can be applied.
Lots to play with; have fun!