It is currently Tue Apr 23, 2024 3:14 am


All times are UTC - 5 hours [ DST ]


Post new topic Reply to topic  [ 33 posts ]  Go to page 1, 2  Next
Author Message
 Post subject: Hatch Selection Layer Script
PostPosted: Mon May 25, 2015 11:30 pm  (#1) 
Offline
Script Coder
User avatar

Joined: May 07, 2014
Posts: 3975
Location: Canada
This is an experimentation script.

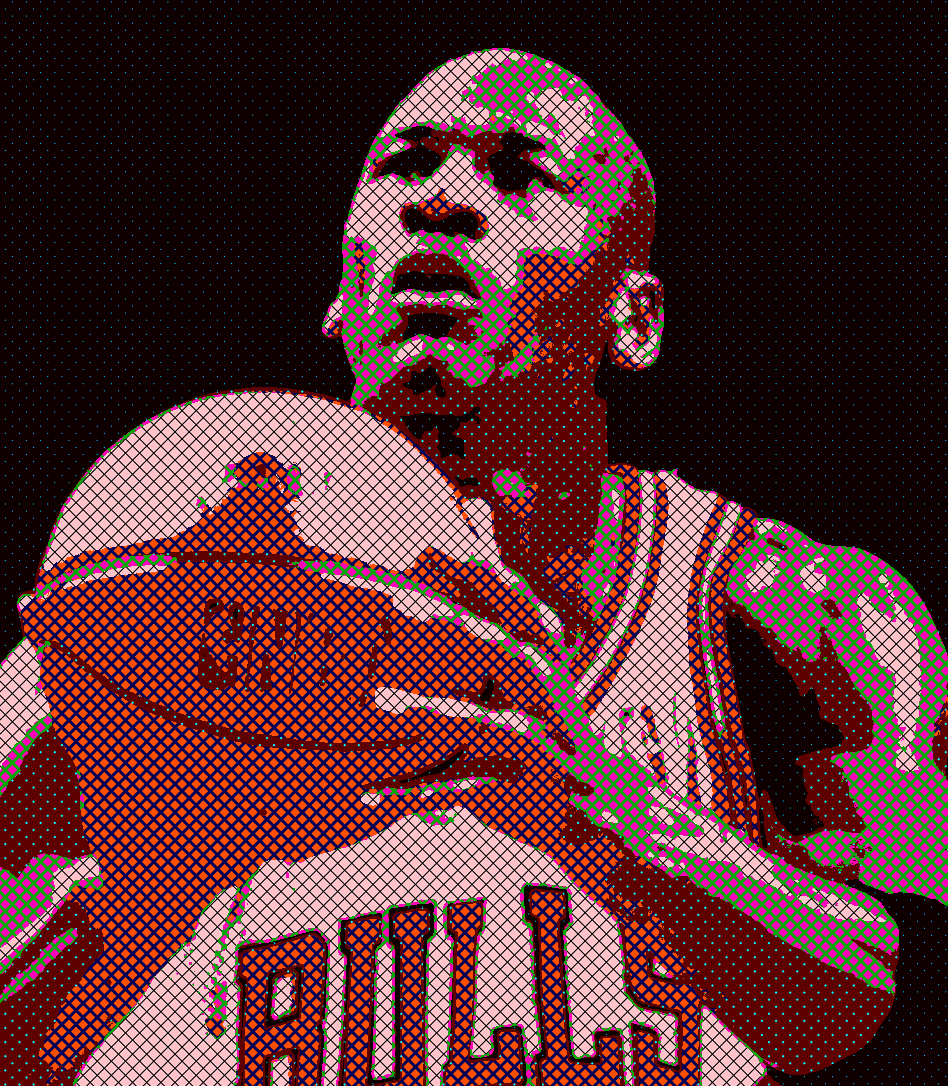
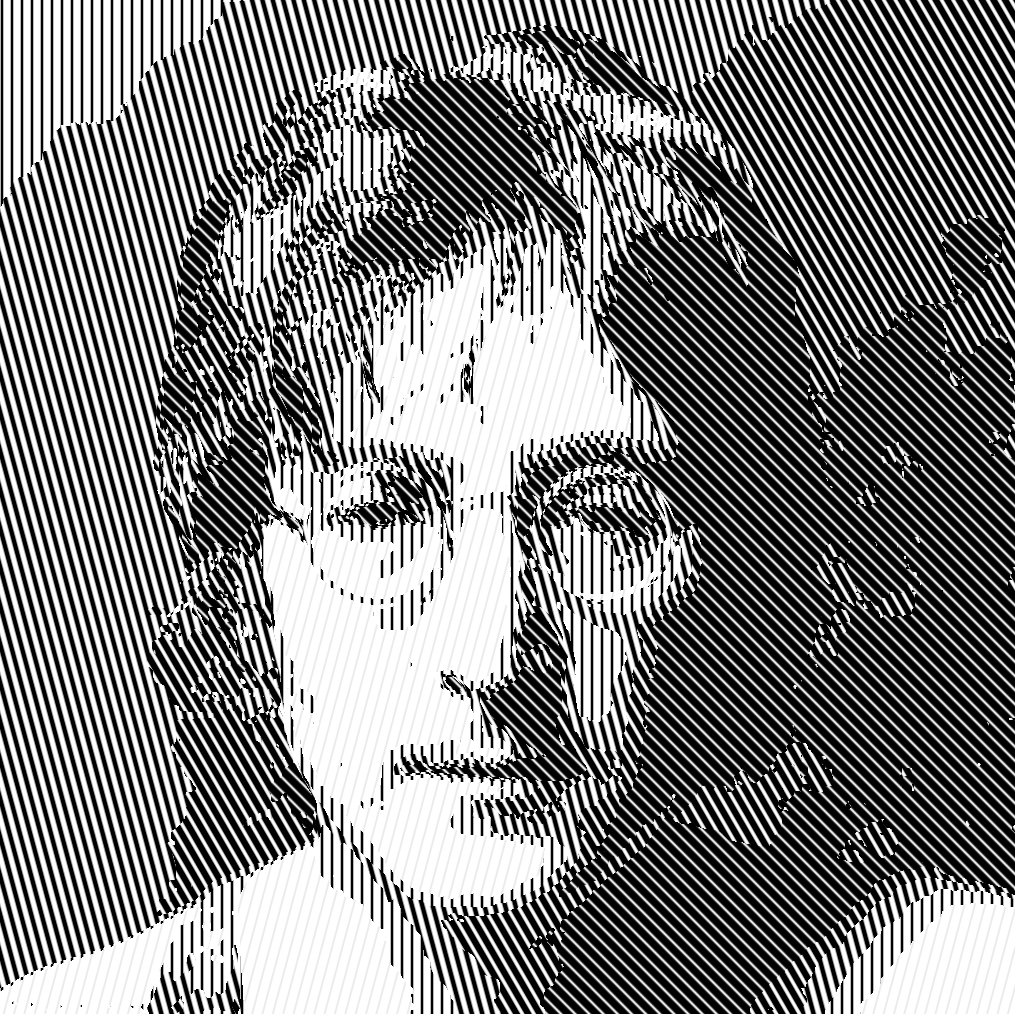
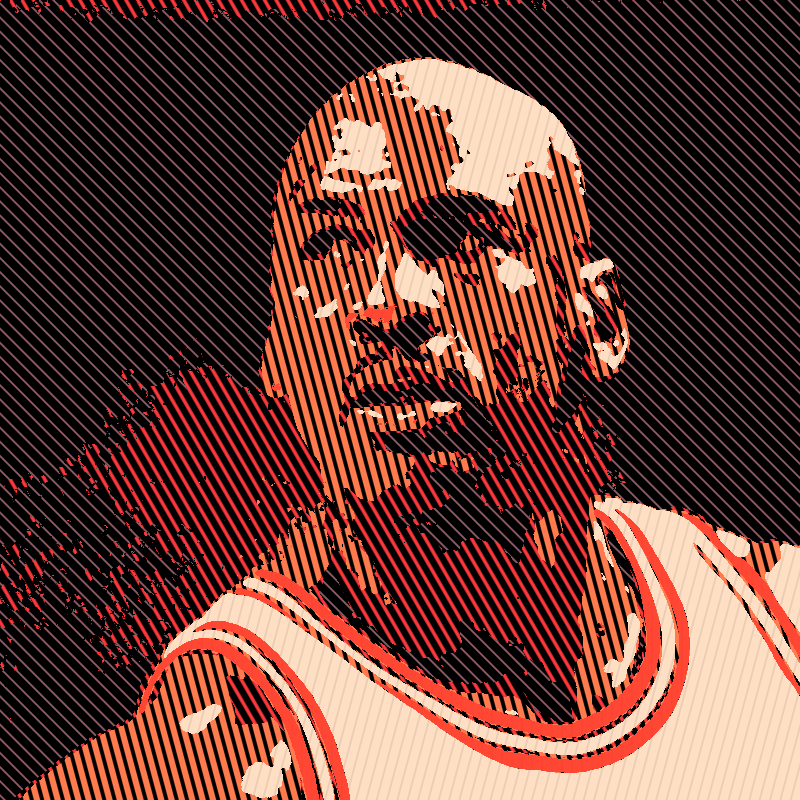
I was doing hatching of photographs and what i did was converted the photograph to have less colors using Image->Mode->Indexed and specified the number of colors (for example 3 colors) with no dithering.
Then selected a single color using "Select by color tool" and hatch it.
This script is to help me hatch just the selection.
So you Have to have a selection before you can run this script.

What the script does:
it saves your selection into a path called "Selection" and renames the path later so that if you run the script again it won't confuse it with the new path selection (I couldn't get it to delete the path for some reason).
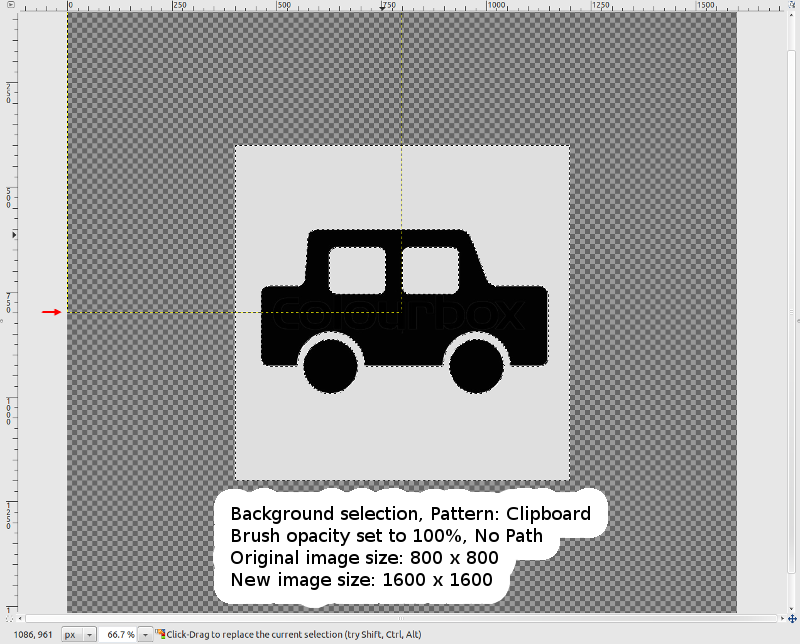
it then creates a new image based on specified parameters to copy into clipboard.
then creates the new layer of double the size of your image in order to rotate freely and fills this layer with the pattern from clipboard and rotates to specified angle and then re-selects your selection, invert and cut so you're left with your selection with the specified hatch pattern.

1 thing to remember when running this script:
You must have brush opacity set to 100


Other than that it helps with the labor of hatching an image....now you're left with the fun part figuring out what colors, rotate angle and hatch width(percentage) to hatch with....
Hope you have a lot of fun.

Attachment:
HatchSelectionLayer.scm [7.98 KiB]
Downloaded 407 times

It'll be available under Script-Fu/Create New/Hatch Selection Layer

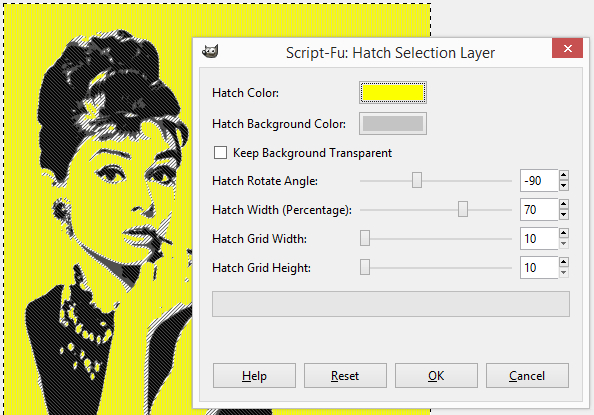
preview settings screen
Image
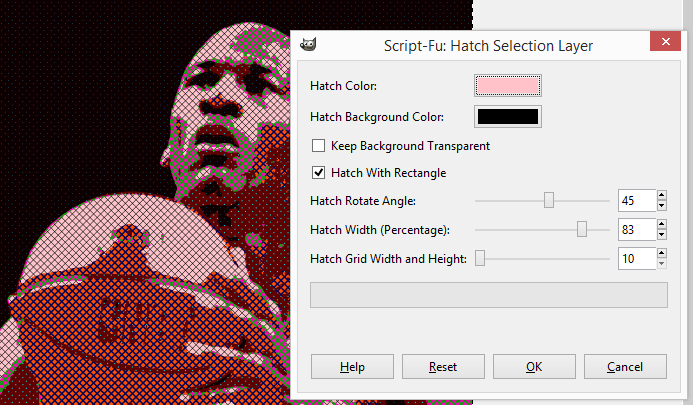
UPDATED preview with added "Hatch with rectangle" option.
Image
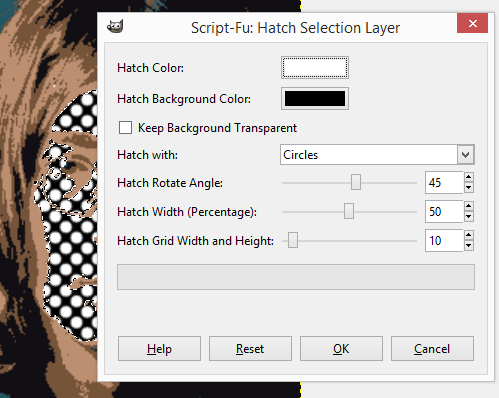
UPDATED preview with changed Option between "Lines","Squares","Circles"
Image
Oh yeah and after it creates the layer with hatched pattern...it leaves the new image created for the hatch laying around, you can close/discard it if you like... don't be thrown off, just click back to your original image and it's all good, i didn't look into closing these images yet... or know how to set it so that the active view is on your original image hence experimentation script :)

_________________
TinT


Last edited by trandoductin on Thu May 28, 2015 12:46 pm, edited 12 times in total.

Share on Facebook Share on Twitter Share on Orkut Share on Digg Share on MySpace Share on Delicious Share on Technorati
Top
 Post subject: Re: Hatch Selection Layer Script
PostPosted: Tue May 26, 2015 1:24 am  (#2) 
Offline
Global Moderator
User avatar

Joined: Nov 16, 2011
Posts: 5128
Location: Metro Vancouver, BC
I may have done something, I followed the directions and use the script defaults. This was my result, with the original image having the grey background.

Image

_________________
Image
Gimp 2.8.18, Linux, median user
Gimp Chat Tutorials Index
Spirit Bear (Kermode)


Top
 Post subject: Re: Hatch Selection Layer Script
PostPosted: Tue May 26, 2015 1:35 am  (#3) 
Offline
Script Coder
User avatar

Joined: Apr 23, 2010
Posts: 1553
Location: not from Guildford after all
Odinbc, which version of GIMP are you using? I believe there was a bug in versions 2.8.8 and 2.8.10 that may impact Tranductin's script.

_________________
Any sufficiently primitive technology is indistinguishable from a rock.


Top
 Post subject: Re: Hatch Selection Layer Script
PostPosted: Tue May 26, 2015 1:58 am  (#4) 
Offline
Script Coder
User avatar

Joined: Apr 23, 2010
Posts: 1553
Location: not from Guildford after all
trandoductin wrote:
[...] i didn't look into closing these images yet... or know how to set it so that the active view is on your original image hence experimentation script :)
It is only possible for a script to close an image if the image has no views associated with it. The easiest way to handle this is for your script to never create a view for your hatch-image in the first place. (i.e., don't use 'gimp-display-new').


P.S. You can use 'gimp-image-remove-vectors' to delete a path ("paths" are not "items" in GIMP vernacular), though you might find it easier to avoid using paths altogether and just create a channel mask to modify the selection.

_________________
Any sufficiently primitive technology is indistinguishable from a rock.


Top
 Post subject: Re: Hatch Selection Layer Script
PostPosted: Tue May 26, 2015 8:01 am  (#5) 
Offline
Global Moderator
User avatar

Joined: Nov 16, 2011
Posts: 5128
Location: Metro Vancouver, BC
saulgoode wrote:
Odinbc, which version of GIMP are you using? I believe there was a bug in versions 2.8.8 and 2.8.10 that may impact Tranductin's script.
Gimp 2.8.14

EDIT:
I figured it out, the image was Grayscale. :oops:

_________________
Image
Gimp 2.8.18, Linux, median user
Gimp Chat Tutorials Index
Spirit Bear (Kermode)


Top
 Post subject: Re: Hatch Selection Layer Script
PostPosted: Tue May 26, 2015 10:06 am  (#6) 
Offline
Script Coder
User avatar

Joined: May 07, 2014
Posts: 3975
Location: Canada
thanks i will look into using channels and not use gimp display new

Edit: I updated the script to use channels instead of path, and not show the created hatch image to use for copying into clipboard.
While I was editing the script and testing it...something strange happened to one of my images no matter what i do (rerunning the script many times) it'll create blank layer. It's really odd and it only happens to that one image, i tried creating another image and it worked fine with or without alpha channel (I thought it was related to an image with/without alpha channel but that wasn't it and i can't reproduce it anymore, I am wondering maybe that image got put into a weird state while i was running my script and it broke somehow and put it in that state). Anyways the latest script should work nicely now.

_________________
TinT


Top
 Post subject: Re: Hatch Selection Layer Script
PostPosted: Tue May 26, 2015 11:55 am  (#7) 
Offline
Script Coder
User avatar

Joined: May 07, 2014
Posts: 3975
Location: Canada
John Lennon...reduced to 5 colors and hatched each one with angle rotated by 15 degrees starting at 45.
Image

Updated script to remove the created channel of selection and remove image used to create hatched pattern so user is not left with unneeded content.

another of Michael Jordan this time with colors...
Image
How I selected the color to hatch with.
1) select the color you're trying to hatch,
2) look at its "value" remember this value to enter as width (percentage)
3) Then bump the value to 100 and use this color of value 100 as the hatch color.

_________________
TinT


Top
 Post subject: Re: Hatch Selection Layer Script
PostPosted: Tue May 26, 2015 1:10 pm  (#8) 
Offline
Script Coder
User avatar

Joined: May 07, 2014
Posts: 3975
Location: Canada
come on in and share some of your hatches people (for fun :hehe )

_________________
TinT


Top
 Post subject: Re: Hatch Selection Layer Script
PostPosted: Tue May 26, 2015 2:30 pm  (#9) 
Offline
Script Coder
User avatar

Joined: May 07, 2014
Posts: 3975
Location: Canada
another one,
this one i tried to break the hatch colors into some components depending on rgb values...
Image

_________________
TinT


Top
 Post subject: Re: Hatch Selection Layer Script
PostPosted: Tue May 26, 2015 3:03 pm  (#10) 
Offline
GimpChat Member
User avatar

Joined: Sep 24, 2010
Posts: 12516
Here's a try Tran. :)


Attachments:
don_rickles_62975-1152x864.png
don_rickles_62975-1152x864.png [ 487.65 KiB | Viewed 7791 times ]

_________________
Lyle

Psalm 109:8

Image
Top
 Post subject: Re: Hatch Selection Layer Script
PostPosted: Tue May 26, 2015 3:14 pm  (#11) 
Offline
Script Coder
User avatar

Joined: Dec 27, 2014
Posts: 508
That's looking like a useful script now, Tin.
Here's the same Lennon image, but rendered with your script rather than manually as before.

Image

Just a minor point: the hatch lines come out rather thicker than the "Hatch Width" parameter would suggest.
If I set width=50% and angle=0 what I get (seen at 550% magnification) is this:

Image

When I did the Lennon image manually I used widths of 50% for the red and 90% for the yellow but with your script I had to reduce those widths to 40% and 70% respectively to get a similar result.


Last edited by jontait2 on Tue May 26, 2015 3:16 pm, edited 1 time in total.

Top
 Post subject: Re: Hatch Selection Layer Script
PostPosted: Tue May 26, 2015 3:15 pm  (#12) 
Offline
GimpChat Member
User avatar

Joined: Sep 24, 2010
Posts: 12516
Maybe the next update will completely automate the process (am I asketh for too mucheth again? lol). :)

_________________
Lyle

Psalm 109:8

Image


Top
 Post subject: Re: Hatch Selection Layer Script
PostPosted: Tue May 26, 2015 4:31 pm  (#13) 
Offline
Script Coder
User avatar

Joined: May 07, 2014
Posts: 3975
Location: Canada
jontait2 wrote:
That's looking like a useful script now, Tin.
Here's the same Lennon image, but rendered with your script rather than manually as before.

[ Image ]

Just a minor point: the hatch lines come out rather thicker than the "Hatch Width" parameter would suggest.
If I set width=50% and angle=0 what I get (seen at 550% magnification) is this:

[ Image ]

When I did the Lennon image manually I used widths of 50% for the red and 90% for the yellow but with your script I had to reduce those widths to 40% and 70% respectively to get a similar result.


Yeah I noticed that width thickness too. I have no idea. When it comes to setting brush work I get confused..it not as straight forward as stroke path with solid line like i expected .Maybe someone else pro enough can explain why that is or if i am doing something wrong try to use the brush.

_________________
TinT


Top
 Post subject: Re: Hatch Selection Layer Script
PostPosted: Tue May 26, 2015 4:49 pm  (#14) 
Offline
Script Coder
User avatar

Joined: May 07, 2014
Posts: 3975
Location: Canada
lylejk wrote:
Maybe the next update will completely automate the process (am I asketh for too mucheth again? lol). :)


I wouldn't want to take out the fun of trying figure out what color values to use.
I guess it could be fully automated if we added more options like to choose between below options
to hatch the hatch color over black.
to hatch Red color over (Blue,Green) combination to make hatch color
to hatch Green color over (Red,Blue) combination to make hatch color
to hatch Blue color over(Red,Green) combination to make hatch color
and but then these options are available for each hatch color... don't know how to let user choose that for each color.
I don't know how to over come problems where these combinations don't work...like for example if you choose Red color over (Blue, Green) combination and if Red is already really bright, and the value of Blue and Green is a high value for example 60 percent, that means blue and green will cover 60 percent of your hatch, then the 40% left is shown to be red, to compensate i make red/40 * 100 but if this value is greater than 255 then it's not possible to break it in to red over (blue,Green)...then i must choose another combination that works...

Or if you mean just automate it to draw a hatch color over black (which is really simple just grab the original value of a color bump it up to 100 percent and use that 100 color and use original value as line width(percentage) then that should be easier...but i don't know how to grab color values and manipulate it, i might have at one point but forgot how hehehe.

_________________
TinT


Top
 Post subject: Re: Hatch Selection Layer Script
PostPosted: Tue May 26, 2015 4:50 pm  (#15) 
Offline
Script Coder
User avatar

Joined: May 07, 2014
Posts: 3975
Location: Canada
maybe i'll wait for it as a GMIC filter hehehe.

_________________
TinT


Top
 Post subject: Re: Hatch Selection Layer Script
PostPosted: Tue May 26, 2015 4:55 pm  (#16) 
Offline
Script Coder
User avatar

Joined: May 07, 2014
Posts: 3975
Location: Canada
I also ran into a bug that i have no idea why it happened...i used 6 as percentage and it drew a hatch is is obviously more than 90 percent... i had to run open my script change some numbers to have the following ".0" I was thinking maybe it's like other languages where if you divide without the ".0" it would treat it like whole number division..but i should get zero which means no linewidth ...but not over 90 percent that was freaky as hell. don't know if that fixed it or if I ran it for 50 percent and then it started to work for 6 when i tried it again...don't know if i fixed it of not but it twas really weird and hard to reproduce.
I am hoping my GIMP is just freaky.... :hehe

_________________
TinT


Top
 Post subject: Re: Hatch Selection Layer Script
PostPosted: Tue May 26, 2015 5:58 pm  (#17) 
Offline
Script Coder
User avatar

Joined: May 07, 2014
Posts: 3975
Location: Canada
Just added a "Hatch with rectangle" option (it's actually a square).
Image

_________________
TinT


Top
 Post subject: Re: Hatch Selection Layer Script
PostPosted: Tue May 26, 2015 6:14 pm  (#18) 
Offline
Script Coder
User avatar

Joined: Dec 27, 2014
Posts: 508
trandoductin wrote:
Yeah I noticed that width thickness too. I have no idea. When it comes to setting brush work I get confused..it not as straight forward as stroke path with solid line like i expected .Maybe someone else pro enough can explain why that is or if i am doing something wrong try to use the brush.

Tin, I think part of the problem is that the brush behaviour depends upon it's shape - to get the behaviour you were expecting for this script I think you need to set the shape to square and reduce the size by 1.
I've hacked your script thus:

    ;we'll try our own brush
    (set! brush-name (car(gimp-brush-new "hatch-brush")))
    (gimp-brush-set-hardness brush-name 100)
    (gimp-brush-set-radius brush-name 100)
    (gimp-brush-set-spacing brush-name 0)
    (gimp-brush-set-shape brush-name BRUSH-GENERATED-SQUARE)       ;*JT*
    (gimp-context-set-brush brush-name) 
   
    (gimp-context-set-brush-size (- linewidth 1))         ;*JT*
     (gimp-edit-stroke-vectors hatch-layer new-vectors)


This still leaves a bit of a problem at low width values: 20% and 10% appear exactly the same and anything less than 10% comes out blank!


Top
 Post subject: Re: Hatch Selection Layer Script
PostPosted: Tue May 26, 2015 6:54 pm  (#19) 
Offline
Script Coder
User avatar

Joined: May 07, 2014
Posts: 3975
Location: Canada
JT,
I updated the script to use BRUSH-GENERATED-SQUARE like you said.
But I got an error when i tried 1 percent and it tries to minus 1 from linewidth.
To overcome this I made the hatch width/height 10 times as large so it's 100 times in area...and then
draw it and scale it back down to original width/height afterwards....so that even 1 percent would work it just shows up as a really thin dark grayish line...
I tried 50%...eventhough 50% looks like it has more white because of the grayish shading around it I checked by inverted it and it lined up with the non inverted version and it matched so it must be 50%.

_________________
TinT


Top
 Post subject: Re: Hatch Selection Layer Script
PostPosted: Tue May 26, 2015 7:18 pm  (#20) 
Offline
Global Moderator
User avatar

Joined: Apr 07, 2010
Posts: 14182
That's a cool pic tran... the little green dots seem to set it out somehow.

_________________
Image


Top
Post new topic Reply to topic  [ 33 posts ]  Go to page 1, 2  Next

All times are UTC - 5 hours [ DST ]


   Similar Topics   Replies 
No new posts How do I script a new white layer to the bottom of the layer stack

7

No new posts Attachment(s) Apply Selection to Layer with LIVE PREVIEW

6

No new posts Attachment(s) GEGL selection modification filter to apply on layer mask

8

No new posts Selection pasting only transparency - single layer image [Solved]

3

No new posts Attachment(s) Hatch Patterns

2


* Login  


Powered by phpBB3 © phpBB Group