It is currently Sat Apr 27, 2024 12:28 pm


All times are UTC - 5 hours [ DST ]


Post new topic Reply to topic  [ 9 posts ] 
Author Message
 Post subject: ofn-luminosity-masks
PostPosted: Thu Nov 14, 2019 4:34 pm  (#1) 
Offline
Script Coder
User avatar

Joined: Oct 25, 2010
Posts: 4739
Since luminosity masks are all the rage, my own take on the subject.

Unlike the tutorial, and unlike most Gimp scripts based on this tutorial,

- The script creates only one mask at a time. This mask is immediately used to set the selection, thus saving several mouse clicks.
With the adequate shortcut(s) you can set a mask with a single keystroke.
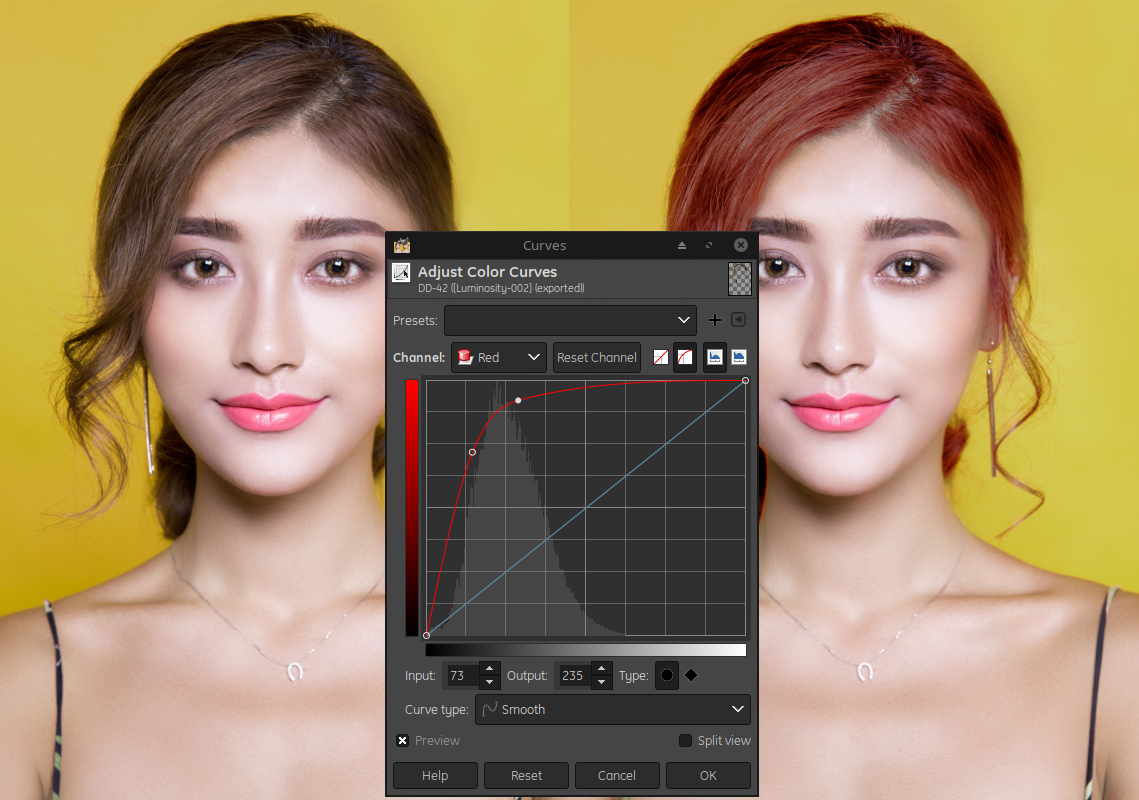
- The mask is not created by addition/composition of other masks, but by applying directly the equivalent curve with the Curves tool.
- The script creates a mask using the current state of the layer. By contrast the tutorial and the scripts create all the masks once, usually on the initial state of the image, so when the masks are used successively, the pixels remain selected based on their initial luminosity and not on the luminosity they reached following the previous edits (unless you redo all the masks of course).

Script is here. Gimp 2.10 only for the time being (there is a compatibility problem with 2.8 that isn't solved yet).

_________________
Image


Share on Facebook Share on Twitter Share on Orkut Share on Digg Share on MySpace Share on Delicious Share on Technorati
Top
 Post subject: Re: ofn-luminosity-masks
PostPosted: Thu Nov 14, 2019 5:50 pm  (#2) 
Offline
GimpChat Member
User avatar

Joined: May 10, 2013
Posts: 1389
Location: FInland
Thanks ofnuts, your takes are always good. Tried it quickly, to change the hair color with DD and D.
Haven't played that much with luminosity masks, sometimes I use them to create better contrast for layer masks/background extraction.

Image


Top
 Post subject: Re: ofn-luminosity-masks
PostPosted: Fri Nov 15, 2019 5:38 am  (#3) 
Offline
GimpChat Member
User avatar

Joined: Nov 15, 2014
Posts: 866
After a quick try, I think this is a useful addition.
Because the selection/mask is available it can also be used as a basis for creating other masks.

david.


Top
 Post subject: Re: ofn-luminosity-masks
PostPosted: Sat Nov 16, 2019 1:03 pm  (#4) 
Offline
Script Coder
User avatar

Joined: Oct 25, 2010
Posts: 4739
Uploaded a new version. Added feature: define your own mask(s) in a side file. Enjoy.

_________________
Image


Top
 Post subject: Re: ofn-luminosity-masks
PostPosted: Sat Nov 16, 2019 5:20 pm  (#5) 
Offline
Administrator
User avatar

Joined: Aug 10, 2012
Posts: 13017
Location: Native to NYC living in Arizona, Gimp 2.8 & 2.10, Win 11 PC.
Thank you ofnuts.
:bigthup

_________________
Image
"A wise man learns more from a foolish question than a fool can learn from a wise answer"
Image


Top
 Post subject: Re: ofn-luminosity-masks
PostPosted: Mon Feb 24, 2020 7:09 am  (#6) 
Offline
New Member

Joined: Feb 24, 2020
Posts: 2
Nidhogg wrote:
Thanks ofnuts, your takes are always good. Tried it quickly, to change the hair color with DD and D.
Haven't played that much with luminosity masks, sometimes I use them to create better contrast for layer masks/background extraction.

[ Image ]


Impressive, I always wanted to learn how to do this with luminosity masking, but have no idea how to. I normally just use it to adjust brightness, shadow only. Can you teach me how or share the steps for this?

Thank you in advance.


Top
 Post subject: Re: ofn-luminosity-masks
PostPosted: Mon Feb 24, 2020 10:29 am  (#7) 
Offline
GimpChat Member
User avatar

Joined: May 10, 2013
Posts: 1389
Location: FInland
It's nothing complex.
I used the plug-in from Menu. Select/luminosity/patdavid/Darks...DD
Then, a python plug-in called Layer via copy/cut by slybug.
You can do same with copy + paste as new layer in place in Gimp 2.10.
Repeated same with Darks...DDD for this pexels image, and merged them.

Image

Used eraser to make sure eyes, nose, lips, chin and bikini straps are not affected.

Image

Lot of ways to alter the hair color now. I think curves is the easiest and works well.
Changed the merged luminosity layer blending mode from normal to overlay and used red curve.

Image


Top
 Post subject: Re: ofn-luminosity-masks
PostPosted: Mon Feb 24, 2020 11:13 am  (#8) 
Offline
GimpChat Member

Joined: Dec 19, 2018
Posts: 158
If anyone is interested, in the attachment I share the file with my curves that I edited to use with this script.


Attachments:
KrikorMasks-ofn-luminosity-masks.zip [972 Bytes]
Downloaded 206 times
Top
 Post subject: Re: ofn-luminosity-masks
PostPosted: Sat Mar 28, 2020 8:46 am  (#9) 
Offline
New Member

Joined: Feb 24, 2020
Posts: 2
Thanks for the guide.

Nidhogg wrote:
It's nothing complex.
I used the plug-in from Menu. Select/luminosity/patdavid/Darks...DD
Then, a python plug-in called Layer via copy/cut by slybug.
You can do same with copy + paste as new layer in place in Gimp 2.10.
Repeated same with Darks...DDD for this pexels image, and merged them.

[ Image ]

Used eraser to make sure eyes, nose, lips, chin and bikini straps are not affected.

[ Image ]

Lot of ways to alter the hair color now. I think curves is the easiest and works well.
Changed the merged luminosity layer blending mode from normal to overlay and used red curve.

[ Image ]


Top
Post new topic Reply to topic  [ 9 posts ] 

All times are UTC - 5 hours [ DST ]


   Similar Topics   Replies 
No new posts Attachment(s) New Luminosity Masks Scripts

6

No new posts Attachment(s) My latest Luminosity Masks script

1

No new posts Attachment(s) Yet another luminosity mask plug-in!

3

No new posts Attachment(s) Alternative Luminosity Mask Script

6

No new posts Help with masks and layers please!

3


* Login  


Powered by phpBB3 © phpBB Group