It is currently Tue Jul 02, 2024 2:21 am


All times are UTC - 5 hours [ DST ]


Post new topic Reply to topic  [ 24 posts ]  Go to page 1, 2  Next
Author Message
 Post subject: PyScript to draw arrow
PostPosted: Tue Jan 31, 2017 9:05 pm  (#1) 
Offline
GimpChat Member
User avatar

Joined: Jan 30, 2017
Posts: 19
Hi there,
I made this python script (see attached file) that creates an arrow from a vectors.
It is in <image>Filtre->Flecha
I made it because I need to add arrows on building maps to indicate products movements.
Here are other scripts that make arrows
viewtopic.php?f=9&t=14617
http://chiselapp.com/user/saulgoode/rep ... troke-path
It is fonctionnal but I am unhappy with few points.

First few precision about how it works :
- it uses the current image and current layer
- it uses the current foreground color
- it uses the current brush size (or so it should)
- it uses the active vectors
- it draws along the active vectors on a new layer
- it makes a new layer on which it draws the spike
- it moves and rotate the spike layer and merge it on the shaft layer
- it drops the shadow if the foreground is not black
- it merges the layer to the original one.

What I do not like is that I was not able to use the tool to draw along the line that exists in the UI. I meen it had to use a brush instead of the feature that let me choose the style of extrmities and angeled turns.

Secondly I could not select the tool with python, which results in a different behaviour of the script depending on the last tool I selected before drawing my vectors.

Finally the size of the brush only works for the stencil tool.

If you have any information, suggestions please let me know :)

Salamandre
Here after the code
#!/usr/bin/python

# Python flecha: create an arrow from a vector
#
# Copyright 2017, Jacques Duflos
# Please share and enjoy under the terms of the GPL v2 or later.

from gimpfu import *
from math import pi
from cmath import phase

def python_flecha(img, layer):
    # get the vectors and check if there is one
    vec = pdb.gimp_image_get_active_vectors(img)
    if vec == None:
        # afficher un message
        pdb.gimp_message_set_handler(0)
        pdb.gimp_message("No hay ninguna ruta seleccionada")
    else:
        pdb.gimp_undo_push_group_start(img)
        width = pdb.gimp_context_get_brush_size()

        # get the actual brush, and layer position
        old_brush = pdb.gimp_context_get_brush()
        position = pdb.gimp_image_get_item_position(img, layer)
        # create new layer to work on
        lay_arrow = pdb.gimp_layer_new(img, img.width, img.height, 1, "arrow", 100, 0)
        pdb.gimp_image_insert_layer(img, lay_arrow, None, position)
        pdb.gimp_image_set_active_layer(img, lay_arrow)

        # set the brush and draw the shaft
        pdb.gimp_context_set_brush("2. Hardness 100")
        pdb.gimp_edit_stroke_vectors(lay_arrow, vec)
        pdb.gimp_context_set_brush(old_brush)

        #draw the spike
        #get the final point
        type, num_points, controlpoints, closed = pdb.gimp_vectors_stroke_get_points(vec, 1)
        xf,yf = [controlpoints[index] for index in [num_points-4, num_points-3]]

        #get a point before the end and see the angle
        length = pdb.gimp_vectors_stroke_get_length(vec, 1, 1)
        ppf = pdb.gimp_vectors_stroke_get_point_at_dist(vec, 1, length-3, 1)
        xpf, ypf = ppf[0], ppf[1]
        angle = pi/2 + phase(complex(xf-xpf,yf-ypf))
        #create spike layer
        lay_spike = pdb.gimp_layer_new(img, width*2, width, 1, "spike", 100, 0)
        pdb.gimp_image_insert_layer(img, lay_spike, None, position)
        pdb.gimp_image_set_active_layer(img, lay_spike)
        #selecte the spike shape and fill it
        pdb.gimp_free_select(img, 6, [0,width,2*width,width,width,0], 2, True, False, 0)
        pdb.gimp_edit_bucket_fill(lay_spike, 0, 0, 100, 0, False, 0, 0)
        pdb.gimp_selection_none(img)
        # rotate, translate, merge layer and drop shadow
        pdb.gimp_item_transform_rotate(lay_spike, angle, False, width, width)
        pdb.gimp_layer_translate(lay_spike, xpf-width, ypf-width)
        new_layer = pdb.gimp_image_merge_down(img, lay_spike, 2)

        # create the shadow if not black
        color = gimp.get_foreground()
        colorcomp = [color[index] for index in [0,1,2]]
        if colorcomp != [0,0,0]:
            pdb.gimp_selection_layer_alpha(new_layer)
            pdb.gimp_selection_grow(img, 2)
            gimp.set_foreground((0,0,0))
            pdb.gimp_bucket_fill(new_layer, 0, 2, 100, 0, False, 0, 0)
            gimp.set_foreground(color)
        new_layer = pdb.gimp_image_merge_down(img, new_layer, 2)

        # reset the old brush and layer, display and close undo group
        pdb.gimp_image_set_active_layer(img, new_layer)
        pdb.gimp_selection_none(img)
        pdb.gimp_displays_flush()
        pdb.gimp_undo_push_group_end(img)

register(
   "python_fu_flecha",
   "Create an arrow from a vector",
   "Create an arrow from a single strok vector of specified width, color and border",
   "Jacques Duflos",
   "Jacques Duflos",
   "2017",
   "<Image>/Filters/Flecha",
   "*",
   [
   ],
   [],
   python_flecha)


main()


Attachments:
File comment: v1.0 flecha.py
v1.1 flecha_v1.1.py

flecha.zip [3.13 KiB]
Downloaded 311 times


Last edited by Salamandre on Sun Feb 12, 2017 8:48 pm, edited 3 times in total.
Share on Facebook Share on Twitter Share on Orkut Share on Digg Share on MySpace Share on Delicious Share on Technorati
Top
 Post subject: Re: PyScript to draw arrow
PostPosted: Tue Jan 31, 2017 10:58 pm  (#2) 
Offline
Script Coder
User avatar

Joined: Feb 18, 2011
Posts: 4827
Location: Bendigo Vic. Australia
It didn't draw an arrow head, all that resulted was the path being stroked with the current brush in the current brush-size and F/G color

_________________
Image
No matter how much you push the envelope, it'll still be stationery.


Top
 Post subject: Re: PyScript to draw arrow
PostPosted: Tue Jan 31, 2017 11:20 pm  (#3) 
Offline
GimpChat Member
User avatar

Joined: Jan 30, 2017
Posts: 19
Maybe it drew the arrow so small that it is inside the line.
You need to have selected this tool before using the script (it is one of the issues)

Image

so the width of the shaft is the brush size and the arrow is twice as big. The arrow you see on the image is made with the script for a width of 10.

I use the brush size to make a quike script, with no option window.

Tell me if it works


Top
 Post subject: Re: PyScript to draw arrow
PostPosted: Wed Feb 01, 2017 2:01 am  (#4) 
Offline
Script Coder
User avatar

Joined: Feb 18, 2011
Posts: 4827
Location: Bendigo Vic. Australia
It was OK with the brush size set to 10 or greater
Image

_________________
Image
No matter how much you push the envelope, it'll still be stationery.


Top
 Post subject: Re: PyScript to draw arrow
PostPosted: Wed Feb 01, 2017 2:46 am  (#5) 
Offline
Script Coder
User avatar

Joined: Oct 25, 2010
Posts: 4752
Yes, there is no API to stroke a path in "Line" mode. I do have a script that does something similar, but it creates path strokes for the arrow heads and stops there. And this isn't so much of a problem, because the choices are rather open at that point (width, color, endings shape...) and to stroke the path in line mode would require a dialog about as complex as the "stroke path" dialog itself, with little added value.

Btw, instead of using cmath.phase(), you should be using math.atan2(), and you can get a better estimate of the tangent by using the coordinates of the tangent handle...

_________________
Image


Top
 Post subject: Re: PyScript to draw arrow
PostPosted: Wed Feb 01, 2017 9:42 am  (#6) 
Offline
GimpChat Member
User avatar

Joined: Jan 30, 2017
Posts: 19
Hi, thanks for the answer. Could you show the script you'er talking about ? It was my first intention but I chose to keep it for a further version.

Quote:
Btw, instead of using cmath.phase(), you should be using math.atan2(), and you can get a better estimate of the tangent by using the coordinates of the tangent handle...

Well, most of the time the tangent handle is on the last point (straight lines) so I didn't use that. But in this case I could make a conditional statement :
- if both two last tangant handles are unused, use the angle of last straight line
- if last tangant handle used, use it
- if last tangant unused but previous tangant used, I see no other choice but to use my actual script.

But you are right, it is a part of the script I should improve.


Top
 Post subject: Re: PyScript to draw arrow
PostPosted: Wed Feb 01, 2017 2:25 pm  (#7) 
Offline
GimpChat Member
User avatar

Joined: May 16, 2010
Posts: 14709
Location: USA
It is important to upload your python scripts in a zip folder as some users may not have the ability to properly indent python code with their text viewers. This way users can just place the python module in their plug-in folders and restart GIMP. Also if you could give the menu location in the first post for the filter? <Image>/Filters/Flecha

This greatly helps users to find the plug-in in their GIMP menus.

Thanks! :)

_________________
Image
Edmund Burke nailed it when he said, "The only thing necessary for the triumph of evil is for good men to do nothing."


Top
 Post subject: Re: PyScript to draw arrow
PostPosted: Wed Feb 01, 2017 2:37 pm  (#8) 
Offline
GimpChat Member
User avatar

Joined: May 16, 2010
Posts: 14709
Location: USA
Worked fine for me first try. :bigthup

Image

_________________
Image
Edmund Burke nailed it when he said, "The only thing necessary for the triumph of evil is for good men to do nothing."


Top
 Post subject: Re: PyScript to draw arrow
PostPosted: Wed Feb 01, 2017 4:30 pm  (#9) 
Offline
Script Coder
User avatar

Joined: Oct 25, 2010
Posts: 4752
Salamandre wrote:
Hi, thanks for the answer. Could you show the script you'er talking about ? It was my first intention but I chose to keep it for a further version.


See path-arrow-heads

_________________
Image


Top
 Post subject: Re: PyScript to draw arrow
PostPosted: Wed Feb 01, 2017 6:00 pm  (#10) 
Offline
Script Coder
User avatar

Joined: Feb 18, 2011
Posts: 4827
Location: Bendigo Vic. Australia
I think that the ability to add text to the arrow would be useful also
Image

_________________
Image
No matter how much you push the envelope, it'll still be stationery.


Top
 Post subject: Re: PyScript to draw arrow
PostPosted: Wed Feb 01, 2017 10:03 pm  (#11) 
Offline
GimpChat Member
User avatar

Joined: Jan 30, 2017
Posts: 19
@ofnuts

Thanks

@ graechan

Yes, it's en idea for a v2 or a brother script with options


Top
 Post subject: Re: PyScript to draw arrow
PostPosted: Thu Feb 02, 2017 2:13 pm  (#12) 
Offline
GimpChat Member
User avatar

Joined: May 16, 2010
Posts: 14709
Location: USA
Graechan wrote:
I think that the ability to add text to the arrow would be useful also
[ Image ]

I think that is a good idea also.

_________________
Image
Edmund Burke nailed it when he said, "The only thing necessary for the triumph of evil is for good men to do nothing."


Top
 Post subject: Re: PyScript to draw arrow
PostPosted: Sun Feb 12, 2017 7:51 pm  (#13) 
Offline
GimpChat Member
User avatar

Joined: Jan 30, 2017
Posts: 19
Hello there,
Here is the new version of my script (V1.1) :yes
Now you can either use it as perviously or choose the options in a window.
Feel free to use it and to give me feedback :hehe

Here are few issues for which I would like some help programming
I had a problem puting special characters in the text of the options
register(
    "python_fu_flecha_completa",
    "Create an arrow from a vector",
    "Create an arrow from a single strok vector with options",
    "Jacques Duflos",
    "Jacques Duflos",
    "2017 CC0",
    "<Image>/Filters/Flecha...",
    "*",
    [
    (PF_SPINNER, 'width', 'Ancho del eje:', 10,(1, 1000, 1)),
    (PF_SPINNER, 'spike_ratio', 'Tamaño de la flecha x el ejen):', 2,(1, 100, 1)),
    (PF_COLOR, 'color', 'Color de la flecha:', (255,0,0)),
    (PF_BOOL , 'is_border', 'Con borde ?', True),
    (PF_COLOR, 'border_color', 'Color del borde:', (0,0,0))
    ],
    [],
    python_flecha_completa)

the "ñ" was preventing the script to be registered, so I took it off, but I would like to be able to put it.

Is there a way to put the foreground color as the default color ?

I keep in mind the idea to put a text on the arrow
Thanks ! :pengy :tyspin


Attachments:
File comment: V1.0 flecha.py
V1.1 flecha_v1.1.py

flecha.zip [3.13 KiB]
Downloaded 120 times
Top
 Post subject: Re: PyScript to draw arrow
PostPosted: Mon Feb 13, 2017 2:57 am  (#14) 
Offline
Script Coder
User avatar

Joined: Oct 25, 2010
Posts: 4752
1) It is a matter of declaring the proper encoding of the source code by adding something like:

# -*- coding: utf-8 -*-
# -*- coding: iso-8859-15 -*-

as the second line of your script (use one or the other) (the first one should be "#!/usr/bin/env python") and of course encoding the file appropriately (if you are using a programmer's editor, it will recognize the line and encode the file properly).

2) No. Of course at registration time, you can obtain the current foreground value and use it in the registration call, but this can have changed when the user will invoke your script. So you either have a selector that says "Current Foreground"/"Specific color" or just use the foreground (which is how most tools work...).

Side note: if you publish on the web, better have code in English (names of functions/variables, comments) as well as a version with an English UI.

_________________
Image


Top
 Post subject: Re: PyScript to draw arrow
PostPosted: Mon Feb 13, 2017 10:02 pm  (#15) 
Offline
GimpChat Member
User avatar

Joined: Jan 30, 2017
Posts: 19
Thanks Ofnuts !
For the language I have to makr the ui in Spanish, but I like to share. I have not investigated yet if there is a way to register translations of the texts, so if you installed gimp in english, my script would show in english.


Top
 Post subject: Re: PyScript to draw arrow
PostPosted: Tue Feb 28, 2017 9:26 pm  (#16) 
Offline
GimpChat Member
User avatar

Joined: Jan 30, 2017
Posts: 19
Hello there !
Here is the V2.0 of my script ! :clap :jumpclap
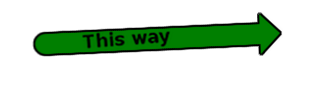
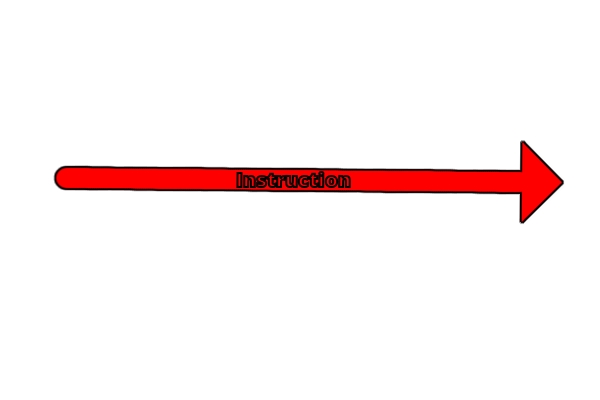
Caution : it works with the text_along_path script modified by me (I join it too)

What's new?
It has been translated to english
You can put a text on the arrow

Any feedback welcome :bigthup

Hey Ofnuts, I have modified your script so the declared function returns the vectors created. What do you think of it ? You can see my modifications by looking for the "#modif perso" coments.

I join the script and copy past it here after.
#!/usr/bin/python

# Python arrow: create an arrow from a vector
#
# Copyright 2017 CC0, Jacques Duflos <j.duflos@ymail.com>
# Please share and enjoy under the terms of the GPL v2 or later.

# History
# v1.0 30-01-2017 First published version
# v1.1 12-02-2017 make two scripts with and without options
# v2.0 28-02-2017 possibility to add text on the arrow.
#                 translate to english, file name changed to
#                 arrow_labeled. arrow_labeled. Implies to add
#                 the text along path v0.5(modified by me)

# To do:
# if a tangant is specified at the last point, use it instead of calculating it ; or use the path-arrow-heads-0.0 to draw the head
# find out how to put special caracters in the option window
# use the text_along_path script to add text along the arrow
# move the scritp acces to the path toolbox

from gimpfu import *
from math import pi
from cmath import phase

txts = {
  'message no path' : {
    'en':'No path selected',
    'fr':'Aucun chemin selectionne',
    'es':'No hay ninguna ruta seleccionada'},
  'short description quike arrow' : {
    'en':'Create an arrow from a vector',
    'fr':'Cree une fleche a partir d un chemin',
    'es':'Crea una flecha con un camino'},
  'long description quike arrow' : {
    'en':'Create an arrow from a vector without options',
    'fr':'Cree une fleche a partir d un chemin sans demander d option',
    'es':'Crea una flecha con un camino sin optiones'},
  'short description arrow' : {
    'en':'Create an arrow from a vector',
    'fr':'Cree une fleche a partir d un chemin',
    'es':'Crea una flecha con un camino'},
  'long description arrow' : {
    'en':'Create an arrow from a vector with options',
    'fr':'Cree une fleche a partir d un chemin avec des options',
    'es':'Crea una flecha con un camino con optiones'},
  'option shaft width' : {
    'en':'Width of the shaft',
    'fr':'Largeur de la tige',
    'es':'Ancho del eje'},
  'option spike ration' : {
    'en':'Size of the head (times the shaft)',
    'fr':'Taille de la pointe p/r a la tigh',
    'es':'Tamano de la flecha x el eje'},
  'option color' : {
    'en':'Color of the arrow',
    'fr':'Couleur de la fleche',
    'es':'Color de la flecha'},
  'option is border' : {
    'en':'With border?',
    'fr':'Avec bord ?',
    'es':'Con borde?'}
  }

language = 'en'
txt = {}
for (key, val) in txts.items():
    txt[key] = val[language]

def python_quike_arrow(img, layer):
    width = pdb.gimp_context_get_brush_size()
    spike_ratio = 2
    color = gimp.get_foreground()
    is_border = [color[index] for index in [0,1,2]] != [0,0,0]
    pdb.gimp_undo_push_group_start(img)
    arrow_from_path(img, layer, None, width, spike_ratio, color, is_border, (0,0,0))
    pdb.gimp_undo_push_group_end(img)

def python_arrow_labeled(img, layer, text, width, spike_ratio, color, is_border, border_color):
    pdb.gimp_undo_push_group_start(img)
    arrow_from_path(img, layer, None, text, width, spike_ratio, color, is_border, border_color)
    pdb.gimp_undo_push_group_end(img)

def arrow_from_path(img, layer, vec, text, width, spike_ratio, color, is_border, border_color):
    # if no vector specified, get active one and check
    if vec == None:
        vec = pdb.gimp_image_get_active_vectors(img)
   
    if vec == None:
        # afficher un message
        pdb.gimp_message_set_handler(0)
        pdb.gimp_message(txt['message no path'])
    else:
        # get the actual brush, and layer position
        old_color = pdb.gimp_context_get_foreground()
        old_brush = pdb.gimp_context_get_brush()
        old_size = pdb.gimp_context_get_brush_size()
        position = pdb.gimp_image_get_item_position(img, layer)
        # create new layer to work on
        lay_arrow = pdb.gimp_layer_new(img, img.width, img.height, 1, "arrow", 100, 0)
        pdb.gimp_image_insert_layer(img, lay_arrow, None, position)
        pdb.gimp_image_set_active_layer(img, lay_arrow)
       
        # set the brush and draw the shaft
        pdb.gimp_context_set_foreground(color)
        pdb.gimp_context_set_brush("2. Hardness 100")
        pdb.gimp_context_set_brush_size(width)
        pdb.gimp_edit_stroke_vectors(lay_arrow, vec)
       
        #draw the spike
        spike_width = width * spike_ratio
        #get the final point
        type, num_points, controlpoints, closed = pdb.gimp_vectors_stroke_get_points(vec, 1)
        xf,yf = [controlpoints[index] for index in [num_points-4, num_points-3]]
       
        #get a point before the end and see the angle
        length = pdb.gimp_vectors_stroke_get_length(vec, 1, 1)
        ppf = pdb.gimp_vectors_stroke_get_point_at_dist(vec, 1, length-3, 1)
        xpf, ypf = ppf[0], ppf[1]
        angle = pi/2 + phase(complex(xf-xpf,yf-ypf))
        #create spike layer
        lay_spike = pdb.gimp_layer_new(img, spike_width, spike_width * 0.5, 1, "spike", 100, 0)
        pdb.gimp_image_insert_layer(img, lay_spike, None, position)
        pdb.gimp_image_set_active_layer(img, lay_spike)
        #selecte the spike shape and fill it
        shape = [x * spike_width for x in [
            0.0 , 0.5,
            1.0 , 0.5,
            0.5 , 0.0]]
        pdb.gimp_free_select(img, 6, shape, 2, True, False, 0)
        pdb.gimp_edit_bucket_fill(lay_spike, 0, 0, 100, 0, False, 0, 0)
        pdb.gimp_selection_none(img)
        # rotate, translate, merge layer and drop shadow
        pdb.gimp_item_transform_rotate(lay_spike, angle, False, spike_width * 0.5, spike_width * 0.5)
        pdb.gimp_layer_translate(lay_spike, xf - spike_width *0.5, yf - spike_width * 0.5)
        new_layer = pdb.gimp_image_merge_down(img, lay_spike, 2)
       
        # create the shadow if asked
        if is_border:
            pdb.gimp_selection_layer_alpha(new_layer)
            pdb.gimp_selection_grow(img, 2)
            gimp.set_foreground(border_color)
            pdb.gimp_bucket_fill(new_layer, 0, 2, 100, 0, False, 0, 0)
       
        new_layer = pdb.gimp_image_merge_down(img, new_layer, 2)
       
        # text
        Fpath = pdb.python_fu_text_along_path_full(img, vec,
            text, pdb.gimp_context_get_font(), width,
            2,3 , True, 0.0, 0.0, False, False, 0, 0, 0)
        pdb.gimp_vectors_to_selection(Fpath, 2, True, False, 0, 0)
        pdb.gimp_bucket_fill(new_layer, 0, 0, 100, 0, False, 0, 0)

        # reset the old brush and layer, display and close undo group
        pdb.gimp_context_set_foreground(old_color)
        pdb.gimp_context_set_brush(old_brush)
        pdb.gimp_context_set_brush_size(old_size)
        pdb.gimp_image_set_active_layer(img, new_layer)
        pdb.gimp_selection_none(img)
        pdb.gimp_displays_flush()


register(
    "python_fu_quike_arrow",
    txt['short description quike arrow'],
    txt['long description quike arrow'],
    "Jacques Duflos",
    "Jacques Duflos CC0",
    "2017",
    "<Image>/Filters/Quike arrow",
    "*",
    [
    ],
    [],
    python_quike_arrow)

register(
    "python_fu_arrow_labeled",
    txt['short description arrow'],
    txt['long description arrow'],
    "Jacques Duflos",
    "Jacques Duflos CC0",
    "2017",
    "<Image>/Filters/Arrow...",
    "*",
    [
    (PF_STRING, 'text', 'Text:', ''),
    (PF_SPINNER, 'width', txt['option shaft width'], 10,(1, 1000, 1)),
    (PF_SPINNER, 'spike_ratio', 'Tamano de la flecha x el ejen):', 2,(1, 100, 1)),
    (PF_COLOR, 'color', 'Color de la flecha:', (255,0,0)),
    (PF_BOOL , 'is_border', 'Con borde ?', True),
    (PF_COLOR, 'border_color', 'Color del borde:', (0,0,0))
    ],
    [],
    python_arrow_labeled)

main()


Attachments:
arrow_labeled_v2.0_text_along_path_v0.5.rar [8.47 KiB]
Downloaded 123 times
Top
 Post subject: Re: PyScript to draw arrow
PostPosted: Wed Mar 01, 2017 1:00 am  (#17) 
Offline
Script Coder
User avatar

Joined: Feb 18, 2011
Posts: 4827
Location: Bendigo Vic. Australia
It workedwith a bit of effort but when used from both menu locations had errors
Image
Quote:
GIMP Warning
Plug-In 'Quike arrow' left image undo in inconsistent state, closing open undo groups.

GIMP Error
Calling error for procedure 'gimp-vectors-to-selection':
Procedure 'gimp-vectors-to-selection' has been called with value '-1' for argument 'vectors' (#1, type GimpVectorsID). This value is out of range.

GIMP Warning
Plug-In 'Arrow' left image undo in inconsistent state, closing open undo groups.


Quote:
GIMP Error
Calling error for procedure 'gimp-vectors-to-selection':
Procedure 'gimp-vectors-to-selection' has been called with value '-1' for argument 'vectors' (#1, type GimpVectorsID). This value is out of range.

GIMP Warning
Plug-In 'Arrow' left image undo in inconsistent state, closing open undo groups.

_________________
Image
No matter how much you push the envelope, it'll still be stationery.


Top
 Post subject: Re: PyScript to draw arrow
PostPosted: Wed Mar 01, 2017 2:54 am  (#18) 
Offline
Script Coder
User avatar

Joined: Oct 25, 2010
Posts: 4752
Salamandre wrote:
Hello there !
Hey Ofnuts, I have modified your script so the declared function returns the vectors created. What do you think of it ? You can see my modifications by looking for the "#modif perso" coments.

You do whatever you want with my code but you shouldn't be distributing text-to-path-0.5, but duclos-text-to-path-0.0 (or steal code from it...). If you distribute it it's yours.

I'm not returning a path because I can create several paths depending on options. This said the path created is the one at the top of the path list (image.vectors[0]) so if this is your only mod, you can use the original version.

_________________
Image


Top
 Post subject: Re: PyScript to draw arrow
PostPosted: Sat Mar 04, 2017 4:31 pm  (#19) 
Offline
GimpChat Member
User avatar

Joined: Jan 30, 2017
Posts: 19
@Graechan
maybe it is because of using the text along path v0.4.
But here is the v2.1 of my script that works OK.

@Ofnuts
No I prefer to modify my script to make it work with yours as such. I think duplicating scripts or "stealing" codes is counter productive.
However, a procedure that creates objects (in your case vectors) should either destroy them before ending or return them as values.

In the first part of my script, I tried to put a verification to see if the script text_along_path_full was there, and to inform the user if not.

#if "python_fu_text_along_path_full" in dir(pdb):
#    def_txt = ""
#else:
#    def_txt = "you need the add-on text-along-path-0.4.py"
def_txt=""


But it doesn't work. Someone knows an other way to reach this goal ?


Attachments:
arrow_labeled_v2.1.py.zip [2.78 KiB]
Downloaded 122 times
Top
 Post subject: Re: PyScript to draw arrow
PostPosted: Sat Mar 04, 2017 6:43 pm  (#20) 
Offline
Script Coder
User avatar

Joined: Feb 18, 2011
Posts: 4827
Location: Bendigo Vic. Australia
Salamandre both Menu entries work nicely now but do we still need 'text-along-path-0.5.py' installed
Edit no it doesn't as it works fine without it

_________________
Image
No matter how much you push the envelope, it'll still be stationery.


Top
Post new topic Reply to topic  [ 24 posts ]  Go to page 1, 2  Next

All times are UTC - 5 hours [ DST ]


   Similar Topics   Replies 
No new posts Draw Arrows/Draw Shapes: Sorry! My download link hadn't worked.

0

No new posts Attachment(s) HN: Draw shape - Create paths draw shapes simultaneously and easily

31

No new posts I cannot make the draw tool actually draw

3

No new posts First draw

1

No new posts Attachment(s) Draw on Paper

10


* Login  


Powered by phpBB3 © phpBB Group