This is a simple plug-in to create new highlights or to enhance existing highlights for custom fonts. It works by selecting the outline of each character and shrinking this selection by the required amount and filling this with colour.
A PDF copy of this guide:
Attachment:
Download, unzip and install in your user Plug-ins folder.
Attachment:
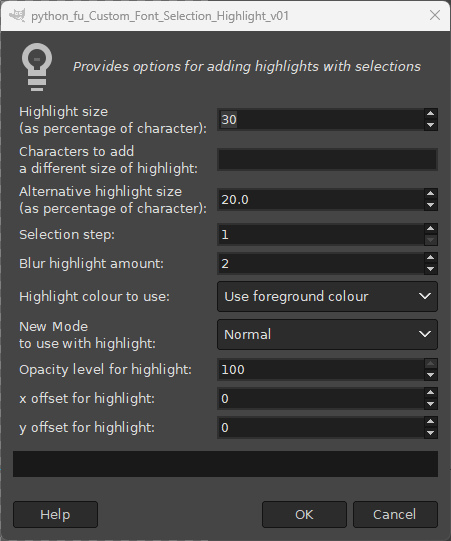
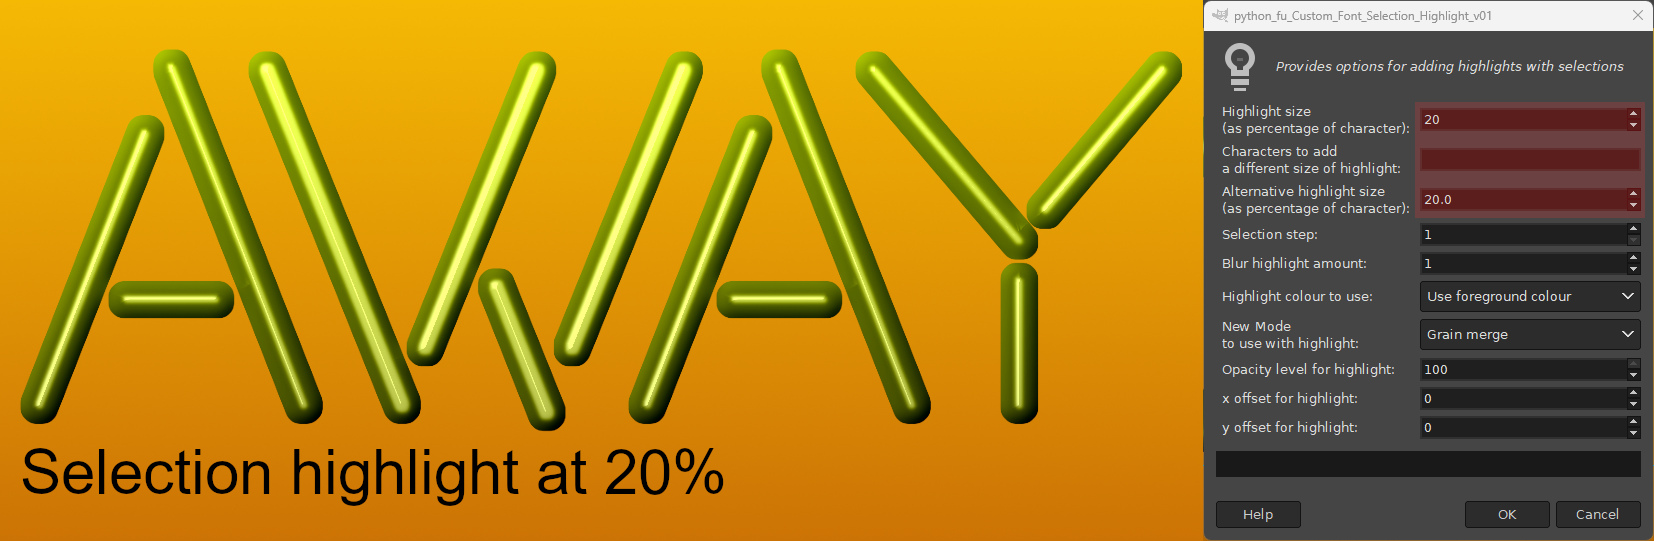
The dialog showing the default settings:
Open up the custom font that you want to add a highlight to and call up the plug-in dialog from the menu location:
Filters>>Custom Fonts>>Decorating Tools>>Custom Font Selection Highlight v 0.1…Since there is no preview option it is probably more useful to work with a single character image: Copy a character (
(Ctrl + C)) and paste it as a new image (
Ctrl + Shift + V).
The options are mostly self-explanatory.
Highlight Size:Enter the value for the highlight you want to create and click on ‘OK’.
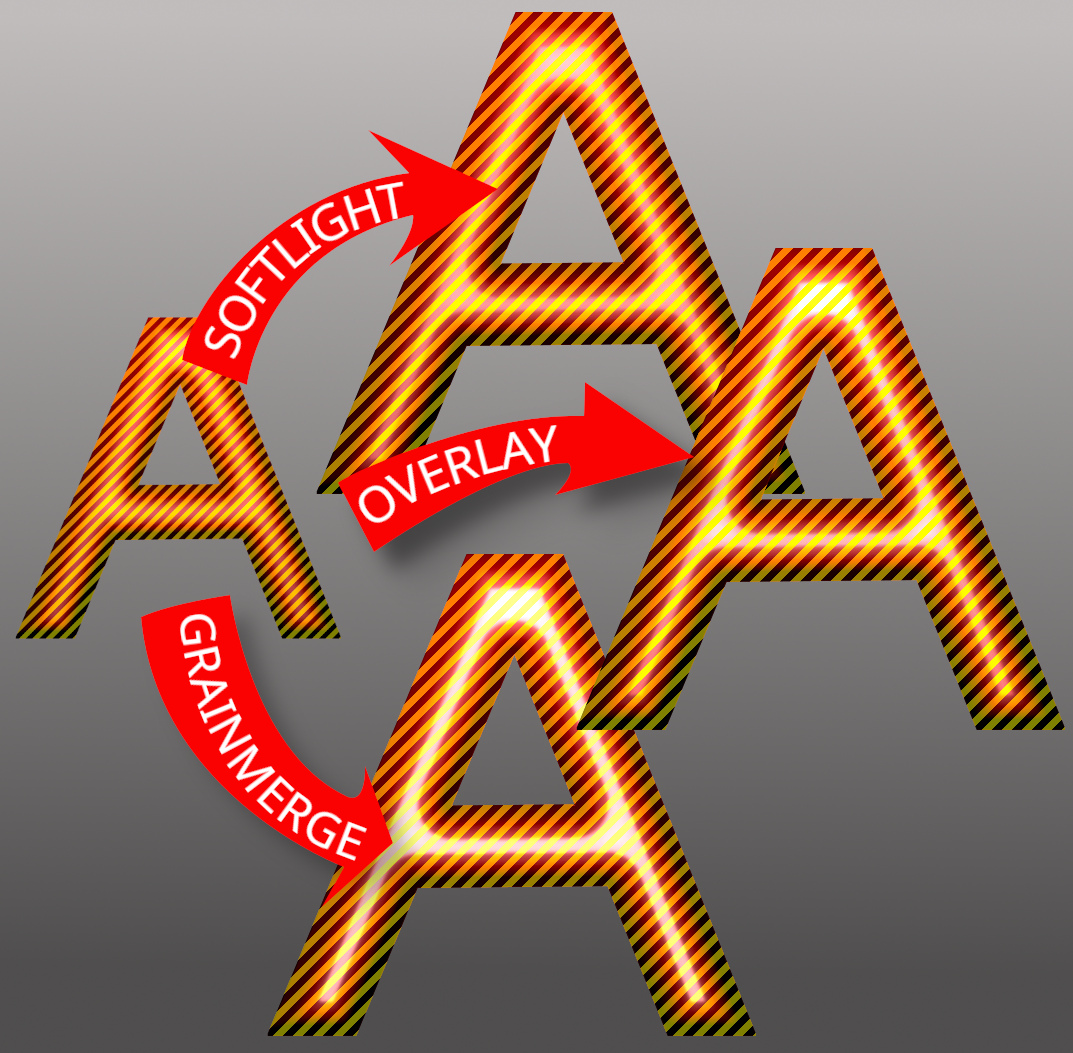
 New Mode to use with highlight:
Select the mode you want to apply the highlight with.
The blur and opacity options can also be used to good effect here.
X and Y offset options:These options allow you to adjust the position of the highlight over the character and to add overlapping highlights.
 Potential speed problems
When working with a full set of wide custom font characters it can take a while to add highlights so I have added a step option that can be used to speed things up.
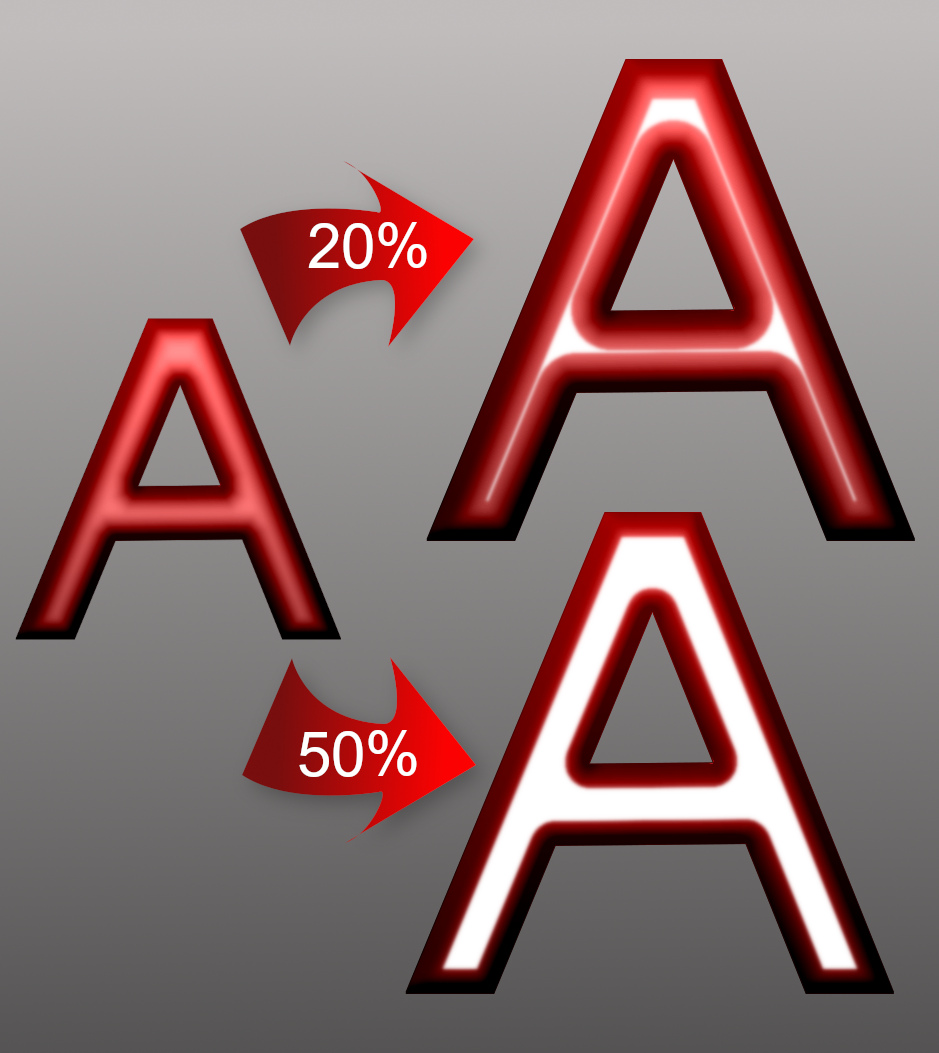
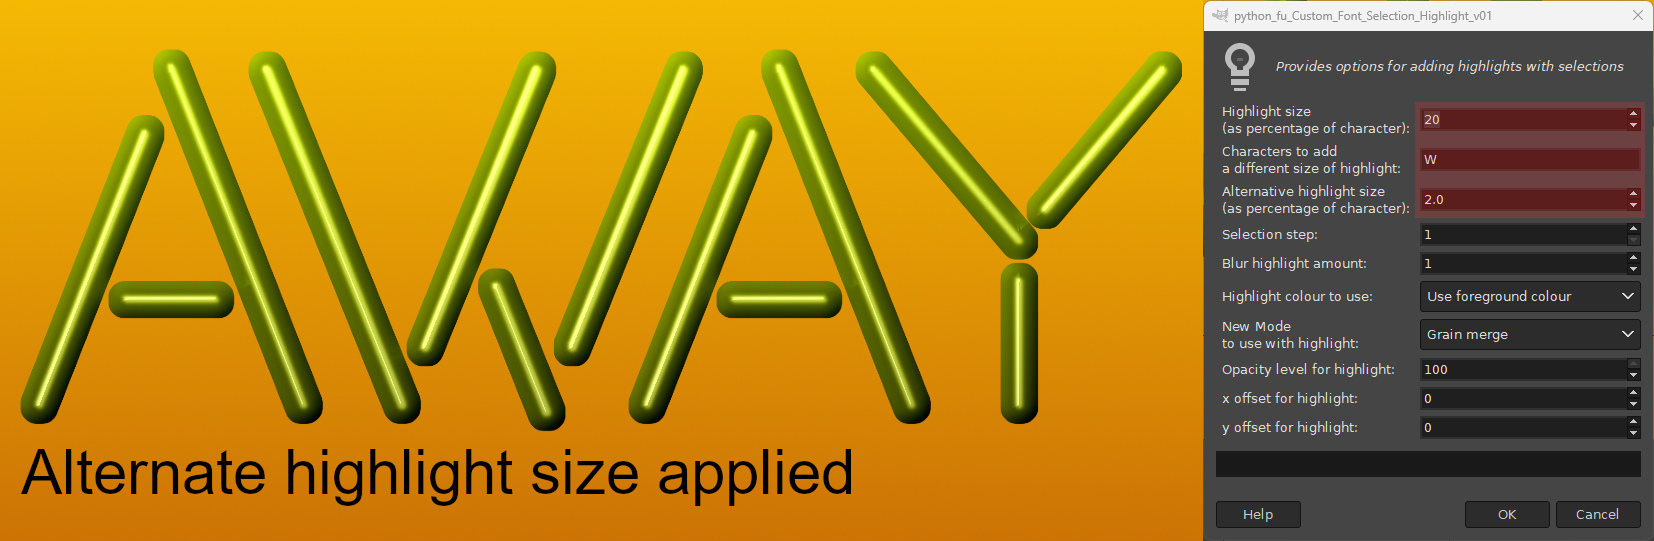
Unexpected size of highlightsThis can occur with some of the diagonal characters in thinner custom fonts as shown in the characters in the example image below:
The highlight on the letter ‘W’ appears much larger than on other characters.
The solution is to add any characters affected to the text box provided and to provide a new value for the ‘Alternative highlight size’. The plug-in can then be used on another version of the original custom font if you feel the results are too obvious to live with.
The alternative size value of 2.0 was used to create the next set of characters. Note the insertion of the ‘W’ in the ‘Characters to add a different size of highlight’ text box option.
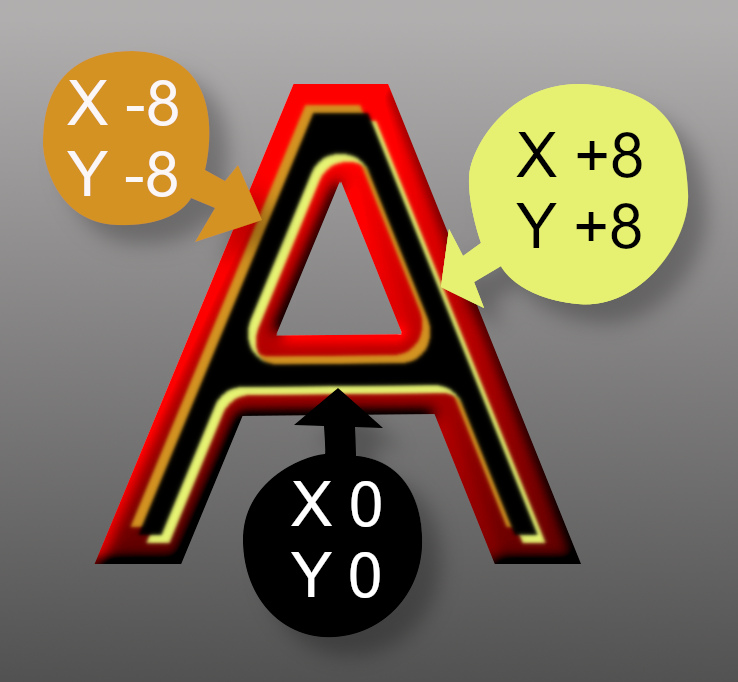
 An example
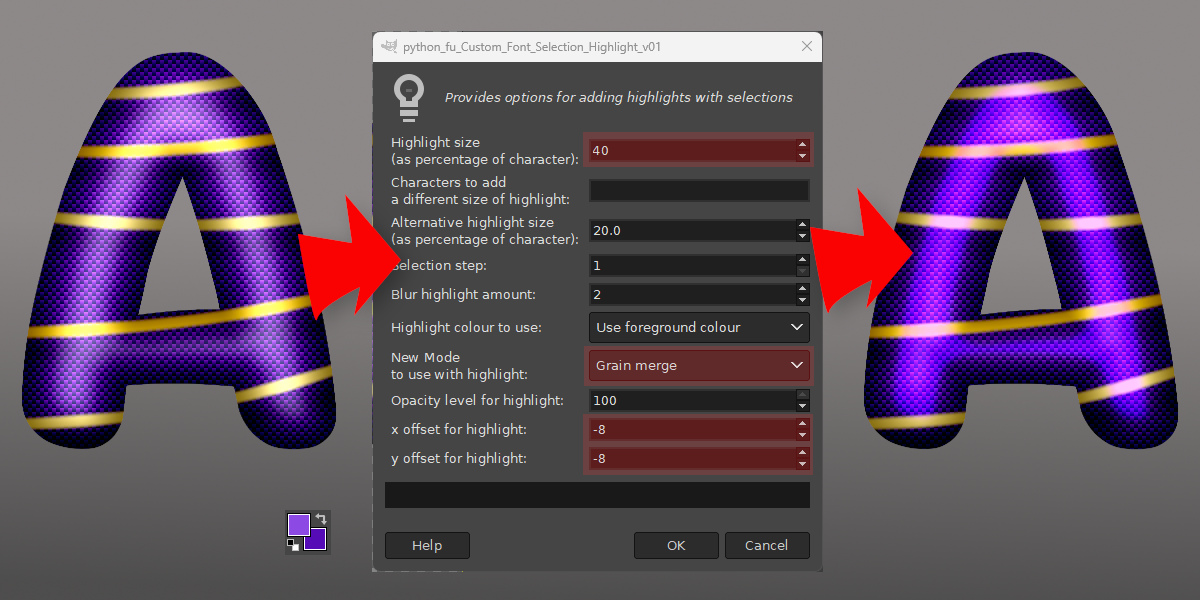
I had used Custom Font Highlights to add an emboss and highlight to this custom font but I wanted something with a little more impact using over-lapping highlights.
 Step 1:
Add the first highlight using Grain merge mode and X and Y offsets of -8:
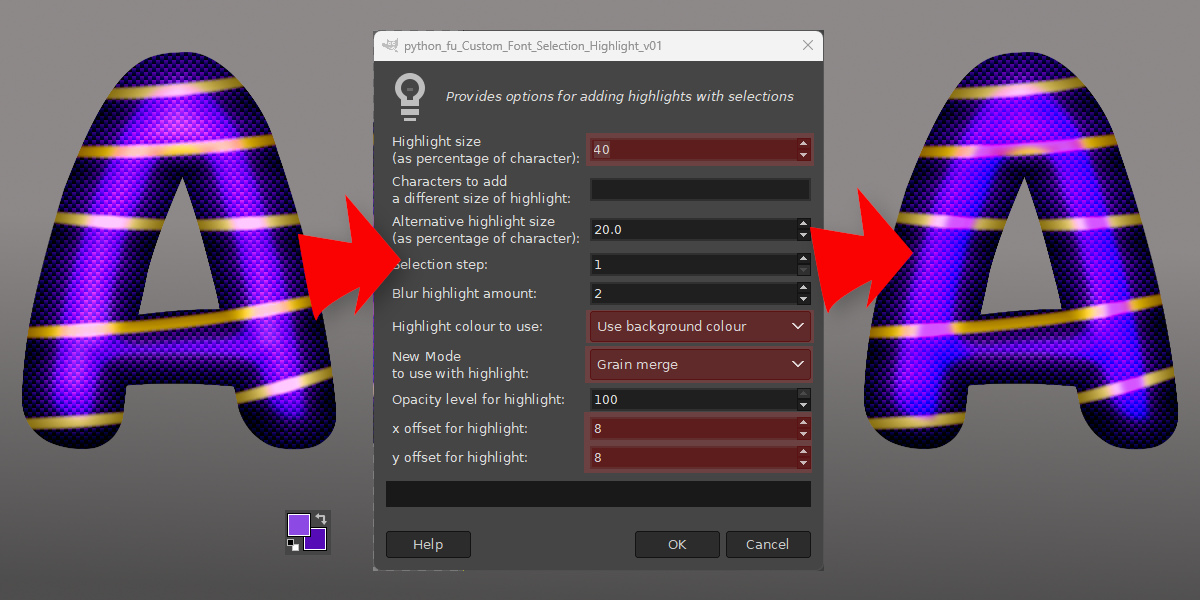
 Step 2:
Add a second highlight (I used my background colour with grain merge mode) with X and Y offsets of 8.
 Step 3:
I reduced the highlight size to 20% and used white foreground in linear light mode and set the X and Y offsets to zero.

Now I had the pop that I wanted with my highlight effect; job done!

Have fun...
_________________
"Let no one steal your dreams."
Paul Cookson
Latest plug-in update: Selection Highlights v.0.1
Custom Font Links
Tools
Character Paths
White Bases


 super cool plugin and tuto,
 so much!!
 Patrice