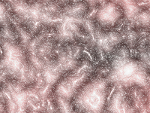
i see that recently was posted the satin tutorial, from the tutorial fencepost created also a script , below
The script was for gimp 2.6 , i didn't test it on 2.8 (i just found it )looking better to the script IS updated for gimp 2.8 , update by Samj
; GIMP - The GNU Image Manipulation Program
; Copyright (C) 1995 Spencer Kimball and Peter Mattis
;
; This program is free software; you can redistribute it and/or modify
; it under the terms of the GNU General Public License as published by
; the Free Software Foundation; either version 2 of the License, or
; (at your option) any later version.
;
; This program is distributed in the hope that it will be useful,
; but WITHOUT ANY WARRANTY; without even the implied warranty of
; MERCHANTABILITY or FITNESS FOR A PARTICULAR PURPOSE.  See the
; GNU General Public License for more details.
;
; You should have received a copy of the GNU General Public License
; along with this program; if not, write to the Free Software
; Foundation, Inc., 675 Mass Ave, Cambridge, MA 02139, USA.
;
;
; Creates a Satin texture layer based on this tutorial:
; http://www.gimpdome.com/forum/index.php?topic=3246.0
; Script can be found under Filters > Render > Satin...
; The user sets the Hue, Saturation, and Lightness Settings as desired.
; The default settings are those used in the tutorial, which is a "dark pink"

; Script updated on October 3, 2008 to work in GIMP 2.6

;Define Script

(define (fp-satin-script image drawable hue saturation lightness)

;Declare Variables

    (let*
    (
   (theHeight 0)
   (theWidth 0)
   (satinLayer 0)
   (noiseLayer 0)
   (counter 15)
   (varX1 0)
   (varX2 0)
   (varY1 0)
   (varY2 0)
    )

(gimp-context-push)

; Begin Undo Group

(gimp-undo-push-group-start image)


; Set height, width and type based on current image values

(set! theHeight (car (gimp-image-height image)))
(set! theWidth (car (gimp-image-width image)))

; Set the foreground / background colors to black and white

(gimp-context-set-background '(255 255 255))
(gimp-context-set-foreground '(0 0 0))

; Create the Satin Layer, fill it with white and add it to the top of the image

(set! satinLayer (car (gimp-layer-new image theWidth theHeight RGBA-IMAGE "Satin Layer" 100 0)))
(gimp-image-add-layer image satinLayer -1)
(gimp-drawable-fill satinLayer BACKGROUND-FILL)
(gimp-image-raise-layer-to-top image satinLayer)

; Set up a "counter" so that as long as the the counter's value is greater than zero, the
; gradient will be applied.  In this case, the gradient will be applied 15 times, since the
; counter was set to 15 in the let* block.

(while (> counter 0)

; Randomize the X and Y values so that the gradient can be applied in a random fashion

(set! varX1 (random theWidth))
(set! varX2 (random theWidth))
(set! varY1 (random theHeight))
(set! varY2 (random theHeight))


; Apply gradient

(gimp-edit-blend satinLayer FG-BG-RGB-MODE DIFFERENCE-MODE GRADIENT-LINEAR 100 0 REPEAT-NONE FALSE FALSE 3 0.2 TRUE varX1 varY1 varX2 varY2)

; Minus one from repeat count

(set! counter (- counter 1))

)

; Run the Gaussian Blur plugin using the settings from the tutorial

(plug-in-gauss RUN-NONINTERACTIVE image satinLayer 20.0 20.0 1)

; Run the Edge Detect plugin using the settings from the tutorial

(plug-in-edge RUN-NONINTERACTIVE image satinLayer 2.0 2 0)

; Invert the colors of the satinLayer

(gimp-invert satinLayer)

; Run the Levels Tool using the settings from the tutorial

(gimp-levels satinLayer HISTOGRAM-VALUE 135 255 1.0 0 255)

; Run the Gaussian blur plugin using the settings from the tutorial

(plug-in-gauss RUN-NONINTERACTIVE image satinLayer 2.5 2.5 1)

; Set the foreground color to a middle gray

(gimp-context-set-foreground '(128 128 128))

; Create the noiseLayer, fill it with the new foreground color
; add it to the image above the satinLayer, give it a name
; and set its blend mode to overlay

(set! noiseLayer (car (gimp-layer-copy satinLayer TRUE)))
(gimp-drawable-fill noiseLayer FOREGROUND-FILL)
(gimp-image-add-layer image noiseLayer -1)
(gimp-drawable-set-name noiseLayer "Noise Layer")
(gimp-layer-set-mode noiseLayer OVERLAY-MODE)

; Run the RGB Noise Scatter, Motion Blur, and Displace plugins
; on the noiseLayer using the settings from the tutorial

(plug-in-rgb-noise RUN-NONINTERACTIVE image noiseLayer 0 0 0.2 0.2 0.2 0)
(plug-in-mblur RUN-NONINTERACTIVE image noiseLayer 0 15 135 0 0)
(plug-in-displace RUN-NONINTERACTIVE image noiseLayer 15 15 1 1 satinLayer satinLayer 1)

; Merge the noiseLayer and satinLayer together

(gimp-image-merge-down image noiseLayer CLIP-TO-IMAGE)

; Tell GIMP that the result from the merged layers (the active layer)
; is now called the satinLayer

(set! satinLayer (car (gimp-image-get-active-layer image)))

; Run the Colorize Tool using the values set by the User

(gimp-colorize satinLayer hue saturation lightness)


; End Undo Group

(gimp-undo-push-group-end image)

; Update display

(gimp-displays-flush)

; Resets previous user settings

(gimp-context-pop)

)
)

; Register Script

(script-fu-register    "fp-satin-script"
         "<Image>/Filters/Render/Satin..."
         "Create a Satin Fabric"
         "Art Wade"
         "Art Wade"
         "October 3, 2008"
         "RGB*"
         SF-IMAGE      "SF-IMAGE" 0
         SF-DRAWABLE   "SF-DRAWABLE" 0
         SF-ADJUSTMENT     "Satin Color (order of color is R O Y G B V - Red is zero)" '(20 0 360 1 10 0 0)
         SF-ADJUSTMENT     "Color Saturation - Its Depth" '(50 10 100 1 10 0 1)
            SF-ADJUSTMENT     "Color Lightness - Its Brightness" '(0 -50 70 1 10 0 1)
)
; Début du script-fu Denim_gimp_2_8.scm
;
; Accès par : Fichier > Créer > Motifs > Denim...
; File > Create > Patterns > Denim...
;
; __________________________________________________________
;
;
; script-fu adapté du didacticiel http://fence-post.deviantart.com/art/Creating-Denim-in-GIMP-53850678
; téléchargement http://www.deviantart.com/download/53850678/Creating_Denim_in_GIMP_by_fence_post.zip
; Merci à Fence-Post, l'auteur.
;
;
;
; Licence GNU/GPL
;
; --------------------------------------------------------------------
; édité avec Notepad++ http://notepad-plus-plus.org/
;
; version 1.0 par samj ( http://www.aljacom.com/~gimp http://samjcreations.blogspot.com ) 5 juin 2012
; version 1.01 par samj 10 juin 2012 remplacer gimp-layer-set-visible par gimp-item-set-visible pour 100% Gimp 2.8
;
; --------------------------------------------------------------------
;
;
; Denim : http://fr.wikipedia.org/wiki/Denim http://en.wikipedia.org/wiki/Denim
;
; Remarques : Ce script-fu est lent, il faut moins de 10 secondes pour créer un motif de 100*100 pixels et environ 2 minutes pour un motif de 512*512
; Pour le motif 500*100 attendre environ 20 secondes.
; Pour le motif 512*1024 attendre environ 4 minutes...
; Les temps sont réalisés avec un ordinateur assez ancien pas très rapide.
; La couture est créée si la largeur > 63 et la hauteur > 99
; Avec des pixels transparents dans le tissu modifier la couleur du calque "calque_couleur" pour obtenir d'autres effets (par exemple un jaune e6ed23 ou du blanc pour éclaircir) en enlevant la visibilité aux calques intermédiaires.
; Pour donner un autre effet d'usure sur les plis de la couture :
; - Enlever la visibilité du calque "calque_usure".
; - Donner la visibilité au calque "calque_deformation_couture" et, en sélectionnant ce calque, utiliser les filtres Amélioration > Renforcer la netteté, Mappage > Déplacer selon une carte.
(define (
Denim
width
height
couleur
trame
profondeur
couleur_fil
type_fil
intensite_limite_couture
intensite_pli_couture
tileable
)
(let*
(
; affectation des variables
; mémoriser les couleurs PP et AP
(old-fg (car (gimp-context-get-foreground)))
(old-bg (car (gimp-context-get-background)))
; créer une nouvelle image rgb
(img (car (gimp-image-new width height 0)))
;calque_fond
(calque_fond)
;calque_serge
(calque_serge)
;calque_couleur
(calque_couleur)
;calque_limite_couture
(calque_limite_couture)
;calque_fond_couture
(calque_fond_couture)
;calque_deformation_couture
(calque_deformation_couture)
;calque_fil
(calque_fil)
;calque_usure
(calque_usure)
(array_pixel (cons-array 4 'byte))
(X_pixel 0)
(Y_pixel 0)
(flou_rgb 0.15)
(flou_alpha 0.15)
; où appliquer la brosse
(*array_points_brosse* (cons-array 4 'double))
(gradient-length 6)
(x_point1 18)
(y_point1 12)
(x_point2 38)
(y_point2 6)
)
;; Start undo group.
(gimp-image-undo-group-start img)
; calque_couleur*******************************************************************************
; utile si flou_alpha <> 0 et pour faire d'autres effets
; créer calque_couleur
(set! calque_couleur (car (gimp-layer-new img width height 1 "calque_couleur" 100 0)))
; ajouter le calque calque_couleur
(gimp-image-insert-layer img calque_couleur 0 -1)
; modifier couleur de premier plan
(gimp-context-set-foreground couleur)
; modifier couleur d'arrière plan
(gimp-context-set-background '(255 255 255))
; remplir de PP
(gimp-drawable-fill calque_couleur 0)
; enlever la visibilité de ce calque
; (gimp-layer-set-visible calque_couleur FALSE)
(gimp-item-set-visible calque_couleur FALSE)
; mettre ce calque au bas de la pile
;(gimp-image-lower-item-to-bottom img calque_couleur)
; calque_fond*********************************************************************************
; créer calque_fond
(set! calque_fond (car (gimp-layer-new img width height 1 "calque_fond" 100 0)))
; ajouter le calque calque_fond
(gimp-image-insert-layer img calque_fond 0 -1)
; modifier couleur de premier plan
(gimp-context-set-foreground couleur)
; modifier couleur d'arrière plan
(gimp-context-set-background '(255 255 255))
; remplir de PP
(gimp-drawable-fill calque_fond 0)
; déterminer le niveau de flou
(if
(= trame 0)
(begin
(set! flou_rgb 0.15)
(set! flou_alpha 0.15)
)
)
;;
(if
(= trame 1)
(begin
(set! flou_rgb 0.15)
(set! flou_alpha 0)
)
)
;;
(if
(= trame 2)
(begin
(set! flou_rgb 0.1)
(set! flou_alpha 0.1)
)
)
;;
(if
(= trame 3)
(begin
(set! flou_rgb 0.1)
(set! flou_alpha 0)
)
)
;;
(if
(= trame 4)
(begin
(set! flou_rgb 0.2)
(set! flou_alpha 0.2)
)
)
;;
(if
(= trame 5)
(begin
(set! flou_rgb 0.2)
(set! flou_alpha 0)
)
)
;;
(if
(= trame 6)
(begin
(set! flou_rgb 0.25)
(set! flou_alpha 0.25)
)
)
;;
(if
(= trame 7)
(begin
(set! flou_rgb 0.25)
(set! flou_alpha 0)
)
)
;;
(if
(= trame 8)
(begin
(set! flou_rgb 0.3)
(set! flou_alpha 0.3)
)
)
;;
(if
(= trame 9)
(begin
(set! flou_rgb 0.3)
(set! flou_alpha 0)
)
)
; ajouter du bruit
(plug-in-rgb-noise
1 ; run-mode
img ; image
calque_fond ; drawable
0 ; independent
1 ; correlated
flou_rgb ; noise-1 effet différent entre 0.1 et 0.3 défaut = 0.15
flou_rgb ; noise-2 effet différent entre 0.1 et 0.3 défaut = 0.15
flou_rgb ; noise-3 effet différent entre 0.1 et 0.3 défaut = 0.15
flou_alpha ; noise-4 effet différent entre 0.1 et 0.3 défaut = 0.15
)
; calque_serge , créer le motif****************************************************************
; http://fr.wikipedia.org/wiki/Serge_(tissu)
; créer calque_serge
(set! calque_serge (car (gimp-layer-new img width height 1 "calque_serge" 100 0)))
; ajouter le calque calque_fond
(gimp-image-insert-layer img calque_serge 0 -1)
(aset array_pixel 0 0)
(aset array_pixel 1 0)
(aset array_pixel 2 0)
(aset array_pixel 3 255)
; tracer les pixels en 5 étapes, temps de calcul très important!
; étape 1
(set! Y_pixel 0)
(while (< Y_pixel height)
(set! X_pixel 4)
(while (< X_pixel width)
(gimp-drawable-set-pixel calque_serge X_pixel Y_pixel 4 array_pixel)
(set! X_pixel (+ X_pixel 5))
)
(set! Y_pixel (+ Y_pixel 5))
)
; étape 2
(set! Y_pixel 1)
(while (< Y_pixel height)
(set! X_pixel 3)
(while (< X_pixel width)
(gimp-drawable-set-pixel calque_serge X_pixel Y_pixel 4 array_pixel)
(set! X_pixel (+ X_pixel 5))
)
(set! Y_pixel (+ Y_pixel 5))
)
; étape 3
(set! Y_pixel 2)
(while (< Y_pixel height)
(set! X_pixel 2)
(while (< X_pixel width)
(gimp-drawable-set-pixel calque_serge X_pixel Y_pixel 4 array_pixel)
(set! X_pixel (+ X_pixel 5))
)
(set! Y_pixel (+ Y_pixel 5))
)
; étape 4
(set! Y_pixel 3)
(while (< Y_pixel height)
(set! X_pixel 1)
(while (< X_pixel width)
(gimp-drawable-set-pixel calque_serge X_pixel Y_pixel 4 array_pixel)
(set! X_pixel (+ X_pixel 5))
)
(set! Y_pixel (+ Y_pixel 5))
)
; étape 5
(set! Y_pixel 4)
(while (< Y_pixel height)
(set! X_pixel 0)
(while (< X_pixel width)
(gimp-drawable-set-pixel calque_serge X_pixel Y_pixel 4 array_pixel)
(set! X_pixel (+ X_pixel 5))
)
(set! Y_pixel (+ Y_pixel 5))
)
; calque_fond*********************************************************************************
; repoussage d'après une carte
(plug-in-bump-map
1 ; run-mode
img ; image
calque_fond ; drawable
calque_serge ; bumpmap
135 ; azimuth
45 ; elevation
profondeur ; depth effet intéressant de 1 à 64 défaut=47
0 ; xofs
0 ; yofs
255 ; waterlevel
0 ; ambient
TRUE ; compensate
TRUE ; invert
2 ; type
)
; rendre le motif raccordable
(if
(= tileable TRUE)
; appel du greffon
(plug-in-make-seamless 1 img calque_fond)
)
; calque_serge*********************************************************************************
; enlever la visibilité de ce calque
;(gimp-layer-set-visible calque_serge FALSE)
(gimp-item-set-visible calque_serge FALSE)
; COUTURE **************************************************************************************
; créer la couture si largeur > 63 et hauteur > 99
(if
(and (> width 63) (> height 99))
(begin
; calque_limite_couture**********************************************************
; créer calque_limite_couture
(set! calque_limite_couture (car (gimp-layer-new img width height 1 "calque_limite_couture" 100 0)))
; ajouter le calque calque_limite_couture
(gimp-image-insert-layer img calque_limite_couture 0 -1)
; modifier couleur de premier plan en blanc
(gimp-context-set-foreground '(255 255 255))
; modifier couleur d'arrière plan
(gimp-context-set-background '(255 255 255))
; remplir de PP
(gimp-drawable-fill calque_limite_couture 0)
; sélection à remplir de noir
(gimp-image-select-rectangle img 0 55 0 (- width 55) height)
; modifier couleur de premier plan en noir
(gimp-context-set-foreground '(0 0 0))
; modifier couleur d'arrière plan
(gimp-context-set-background '(255 255 255))
; remplir de PP
(gimp-edit-bucket-fill calque_limite_couture 0 0 100 0 FALSE 0 0)
; ne rien sélectionner
(gimp-selection-none img)
; appliquer un flou
(plug-in-gauss 1 img calque_limite_couture 15 15 0)
; enlever la visibilité de ce calque
; (gimp-layer-set-visible calque_limite_couture FALSE)
(gimp-item-set-visible calque_limite_couture FALSE)
; calque_fond_couture**********************************************************
; copier le calque calque_fond
(set! calque_fond_couture (car (gimp-layer-new-from-visible img img "calque_fond_couture")))
; ajouter le calque calque_limite_couture
(gimp-image-insert-layer img calque_fond_couture 0 -1)
; repoussage d'après une carte
(plug-in-bump-map
1 ; run-mode
img ; image
calque_fond_couture ; drawable
calque_limite_couture ; bumpmap
135 ; azimuth
45 ; elevation
intensite_limite_couture ; depth de 1 à 9 valeur défaut = 5
0 ; xofs
0 ; yofs
0 ; waterlevel
0 ; ambient
TRUE ; compensate
FALSE ; invert
0 ; type
)
; calque_deformation_couture*****************************************************
; créer calque_deformation_couture
(set! calque_deformation_couture (car (gimp-layer-new img width height 1 "calque_deformation_couture" 100 0)))
; ajouter le calque calque_deformation_couture
(gimp-image-insert-layer img calque_deformation_couture 0 -1)
; modifier couleur de premier plan en blanc
(gimp-context-set-foreground '(255 255 255))
; modifier couleur d'arrière plan
(gimp-context-set-background '(255 255 255))
; créer une brosse
(gimp-brush-new "brosse_Denim")
; créer et sélectionner brosse
(gimp-context-set-brush "brosse_Denim")
(gimp-brush-set-shape "brosse_Denim" 0) ; forme ronde
(gimp-brush-set-radius "brosse_Denim" 30) ; rayon
(gimp-brush-set-spikes "brosse_Denim" 80) ; pointes
(gimp-brush-set-hardness "brosse_Denim" intensite_pli_couture) ; dureté défaut = 0.3
(gimp-brush-set-aspect-ratio "brosse_Denim" 17.2) ; proportions
(gimp-brush-set-angle "brosse_Denim" 61) ; angle
(gimp-brush-set-spacing "brosse_Denim" 10) ; espacement
; sélectionner brosse
(gimp-context-set-brush "brosse_Denim")
(set! gradient-length 6)
(set! x_point1 -14)
(set! y_point1 0)
(set! x_point2 0)
(set! y_point2 0)
; boucle pour appliquer la brosse avec le pinceau
(while
(< y_point1 height)
; valeur de gradient-length
(set! gradient-length (+ gradient-length 1))
(if
(> gradient-length 11)
(set! gradient-length 5)
)
(set! x_point1 18)
(set! y_point1 (+ y_point1 26))
(set! x_point2 38)
(set! y_point2 (- y_point1 6))
; contenu des 4 valeurs de array
(aset *array_points_brosse* 0 x_point1)
(aset *array_points_brosse* 1 y_point1)
(aset *array_points_brosse* 2 x_point2)
(aset *array_points_brosse* 3 y_point2)
; appliquer pinceau
(gimp-paintbrush
calque_deformation_couture ; drawable
2 ; fade-out
4 ; num-strokes
*array_points_brosse* ; strokes
1 ; method
gradient-length ; gradient-length
)
; valeur de gradient-length
(set! gradient-length (- gradient-length 2))
(set! x_point1 17)
(set! y_point1 (+ y_point1 28))
(set! x_point2 40)
(set! y_point2 (- y_point1 7))
; contenu des 4 valeurs de array
(aset *array_points_brosse* 0 x_point1)
(aset *array_points_brosse* 1 y_point1)
(aset *array_points_brosse* 2 x_point2)
(aset *array_points_brosse* 3 y_point2)
; appliquer pinceau
(gimp-paintbrush
calque_deformation_couture ; drawable
1 ; fade-out
4 ; num-strokes
*array_points_brosse* ; strokes
1 ; method
(* gradient-length 1.05) ; gradient-length
)
; valeur de gradient-length
(set! gradient-length (+ gradient-length 2))
(if
(> gradient-length 12)
(set! gradient-length 6)
)
(set! x_point1 18)
(set! y_point1 (+ y_point1 27))
(set! x_point2 37)
(set! y_point2 (- y_point1 1))
; contenu des 4 valeurs de array
(aset *array_points_brosse* 0 x_point1)
(aset *array_points_brosse* 1 y_point1)
(aset *array_points_brosse* 2 x_point2)
(aset *array_points_brosse* 3 y_point2)
; appliquer pinceau
(gimp-paintbrush
calque_deformation_couture ; drawable
0 ; fade-out
4 ; num-strokes
*array_points_brosse* ; strokes
1 ; method
(* gradient-length 0.9) ; gradient-length
)
)
; appliquer un flou
(plug-in-gauss 1 img calque_deformation_couture 2 3 0)
; calque_fond_couture**********************************************************
; repoussage d'après une carte
(plug-in-bump-map
1 ; run-mode
img ; image
calque_fond_couture ; drawable
calque_deformation_couture ; bumpmap
135 ; azimuth
45 ; elevation
(round (* intensite_pli_couture 10 )) ; depth valeurs défaut = de 3 à 5
0 ; xofs
0 ; yofs
0 ; waterlevel
0 ; ambient
TRUE ; compensate
FALSE ; invert
0 ; type
)
; supprimer la brosse
(gimp-brush-delete "brosse_Denim")
; ajouter usure des plis , lumière douce
(gimp-layer-set-mode calque_deformation_couture 19)
; annuler la visibilité de ce calque
; (gimp-layer-set-visible calque_deformation_couture FALSE)
(gimp-item-set-visible calque_deformation_couture FALSE)
; calque_fil*********************************************************************************
; créer calque_fil
(set! calque_fil (car (gimp-layer-new img width height 1 "calque_fil" 100 0)))
; ajouter le calque calque_fil
(gimp-image-insert-layer img calque_fil 0 -1)
; modifier couleur de premier plan
(gimp-context-set-foreground couleur_fil)
; modifier couleur d'arrière plan
(gimp-context-set-background couleur_fil)
; créer une brosse
(gimp-brush-new "brosse_fil")
; créer et sélectionner brosse
(gimp-context-set-brush "brosse_fil")
(gimp-brush-set-shape "brosse_fil" 1) ; forme en carré
(gimp-brush-set-radius "brosse_fil" type_fil) ; rayon
(gimp-brush-set-spikes "brosse_fil" 2) ; pointes
(gimp-brush-set-hardness "brosse_fil" 1) ; dureté défaut =
(gimp-brush-set-aspect-ratio "brosse_fil" 4) ; proportions
(gimp-brush-set-angle "brosse_fil" 90) ; angle
(gimp-brush-set-spacing "brosse_fil" 0) ; espacement
; sélectionner brosse
(gimp-context-set-brush "brosse_fil")
(set! x_point1 0)
(set! y_point1 -8)
(set! x_point2 0)
(set! y_point2 0)
; boucle pour appliquer la brosse avec le pinceau
(while
(< y_point1 height)
(set! x_point1 7)
(set! y_point1 (+ y_point1 16))
(set! x_point2 7)
(set! y_point2 (+ y_point1 4))
; contenu des 4 valeurs de array
(aset *array_points_brosse* 0 x_point1)
(aset *array_points_brosse* 1 y_point1)
(aset *array_points_brosse* 2 x_point2)
(aset *array_points_brosse* 3 y_point2)
; appliquer pinceau
(gimp-paintbrush
calque_fil ; drawable
0 ; fade-out
4 ; num-strokes
*array_points_brosse* ; strokes
0 ; method
0 ; gradient-length
)
(set! x_point1 45)
(set! y_point1 (- y_point1 4))
(set! x_point2 45)
(set! y_point2 (+ y_point1 4))
; contenu des 4 valeurs de array
(aset *array_points_brosse* 0 x_point1)
(aset *array_points_brosse* 1 y_point1)
(aset *array_points_brosse* 2 x_point2)
(aset *array_points_brosse* 3 y_point2)
; appliquer pinceau
(gimp-paintbrush
calque_fil ; drawable
0 ; fade-out
4 ; num-strokes
*array_points_brosse* ; strokes
0 ; method
0 ; gradient-length
)
)
; supprimer la brosse
(gimp-brush-delete "brosse_fil")
; user le fil
(plug-in-waves
1 ; run-mode
img ; image
calque_fil ; drawable
(/ type_fil 4) ; amplitude défaut = 0.25
0 ; phase
0.1 ; wavelength
1 ; type
0 ; reflective
)
; calque_usure************************************************************
; visibilité des autres calques
; (gimp-layer-set-visible calque_couleur FALSE)
; (gimp-layer-set-visible calque_fond FALSE)
; (gimp-layer-set-visible calque_fond_couture FALSE)
; (gimp-layer-set-visible calque_fil FALSE)
; (gimp-layer-set-visible calque_deformation_couture TRUE)
(gimp-item-set-visible calque_couleur FALSE)
(gimp-item-set-visible calque_fond FALSE)
(gimp-item-set-visible calque_fond_couture FALSE)
(gimp-item-set-visible calque_fil FALSE)
(gimp-item-set-visible calque_deformation_couture TRUE)
; copier le calque calque_deformation_couture
(set! calque_usure (car (gimp-layer-new-from-visible img img "calque_usure")))
; ajouter le calque calque_usure
(gimp-image-insert-layer img calque_usure 0 -1)
; modifier couleur de premier plan en blanc
(gimp-context-set-foreground '(255 255 255))
; modifier couleur d'arrière plan
(gimp-context-set-background '(255 255 255))
; déplacer selon une carte
(plug-in-displace
1 ; run-mode
img ; image
calque_usure ; drawable
1 ; amount-x
4 ; amount-y
0 ; do-x
1 ; do-y
calque_usure ; displace-map-x
calque_usure ; displace-map-y
2 ; displace-type
)
; ajouter usure des plis , lumière douce
(gimp-layer-set-mode calque_usure 19)
; visibilité des autres calques
; (gimp-layer-set-visible calque_couleur TRUE)
; (gimp-layer-set-visible calque_fond TRUE)
; (gimp-layer-set-visible calque_fond_couture TRUE)
; (gimp-layer-set-visible calque_fil TRUE)
; (gimp-layer-set-visible calque_deformation_couture FALSE)
(gimp-item-set-visible calque_couleur TRUE)
(gimp-item-set-visible calque_fond TRUE)
(gimp-item-set-visible calque_fond_couture TRUE)
(gimp-item-set-visible calque_fil TRUE)
(gimp-item-set-visible calque_deformation_couture FALSE)
)
)
; calque_couleur***************************************************************************
; mettre la visibilité de ce calque
; (gimp-layer-set-visible calque_couleur TRUE)
(gimp-item-set-visible calque_couleur TRUE)
;*******************************************************************************************
; restaurer PP et AP
(gimp-context-set-foreground old-fg)
(gimp-context-set-background old-bg)
; ne rien sélectionner
;(gimp-selection-none img)
; afficher l'image
(gimp-display-new img)
; End undo group.
(gimp-image-undo-group-end img)
)
)
(script-fu-register
"Denim"
"<Image>/File/Create/Patterns/Denim..."
"Motif tissu jeans"
"samj"
"samj"
"2010-06-06"
""
SF-ADJUSTMENT "Largeur motif / Width (pixels)" '(500 5 512 1 8 0 1) ; pixels
SF-ADJUSTMENT "Hauteur motif / Height (pixels)" '(100 5 1024 1 8 0 1) ; pixels
SF-COLOR "Couleur du tissu" '(43 108 126) ; 2b6c7e
SF-OPTION "Trame avec ou sans pixels transparents dans le tissu" '("Effet 1 avec transparence" "Effet 2 sans transparence" "Effet 3 avec transparence" "Effet 4 sans transparence" "Effet 5 avec transparence" "Effet 6 sans transparence" "Effet 7 avec transparence" "Effet 8 sans transparence" "Effet 9 avec transparence" "Effet 10 sans transparence") ; trame
SF-ADJUSTMENT "Profondeur trame" '(47 1 64 1 4 0 1) ; profondeur
SF-COLOR "Couleur du fil de la couture" '(229 217 27) ; e5d91b
SF-ADJUSTMENT "Type de fil" '(1 1 3 1 1 0 1) ; type_fil
SF-ADJUSTMENT "Intensite limite couture" '(5 1 9 1 2 0 1) ; intensite_limite_couture
SF-ADJUSTMENT "Intensite plis couture" '(0.30 0.10 0.50 0.05 0.1 2 1) ; intensite_pli_couture
SF-TOGGLE "Rendre raccordable / Tileable (calque__fond)" FALSE
)
; FIN du script