People with graphic tablets should already know about brush dynamics – it's one of the big advantages of using a graphics tablet.
But for those of us with only a mouse, brush dynamics are... well not very useful. The big exception is stroking paths.
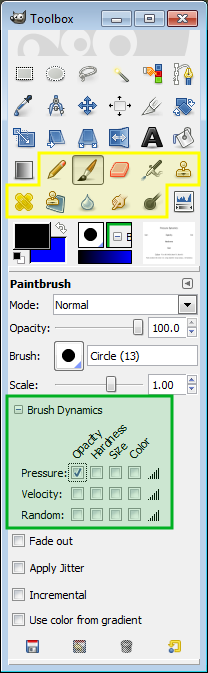
How to Stroke a path with Brush DynamicsFirst, Brush Dynamics is one of the options in the tool options dialog box for all of the
Paint Tools – the tools highlighted with yellow in the screen shot below. I've selected the Paintbrush tool. In the tool options dialog box, click the plus box in front of Brush Dynamics to expand it and see the options as shown in the green area. I'll explain these in the next section.
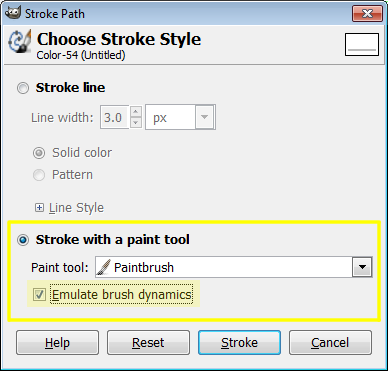
To stroke a path with brush dynamics, select the
Stroke with a paint tool option. Select a paint tool – Paintbrush is the one I usually use, but feel free to play with other tools. Be sure to check the
Emulate brush dynamics box – otherwise you won't get any of the dynamics effects.
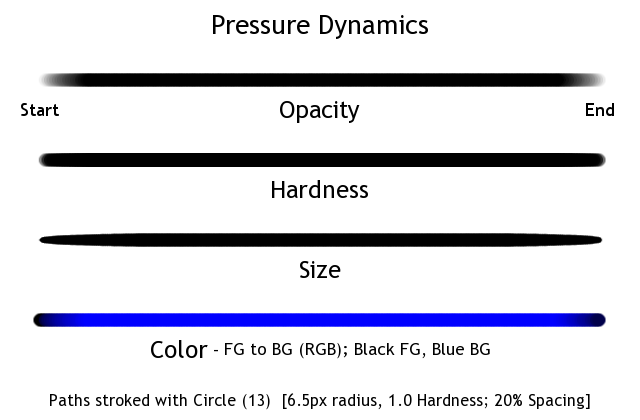
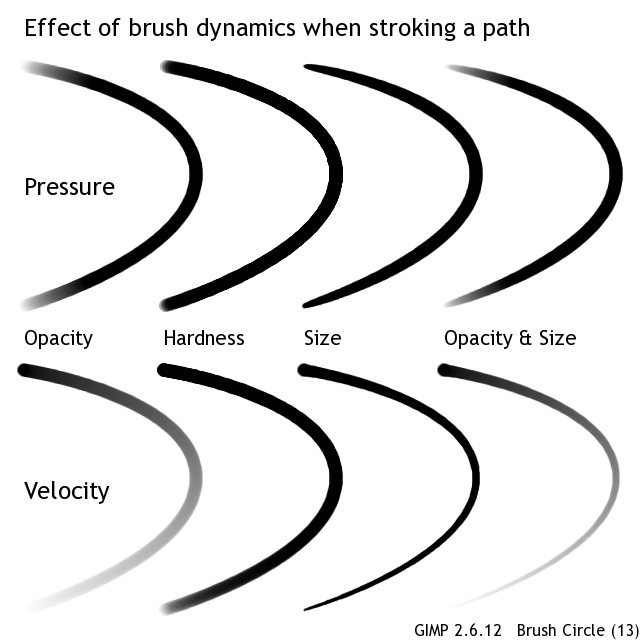
Brush Dynamics OptionsPressure: The pressure starts at zero at the beginning of the path, quickly builds to full pressure, and then at the end of the path it drops back to zero. The following picture shows the effect when each of the individual boxes is checked.
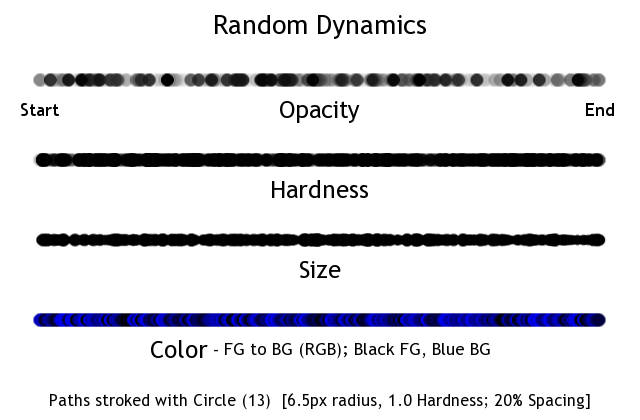
Note: Color option takes the color from the currently active gradient. In these examples I used the standard “FG to BG (RGB)” gradient with Black as the foreground color and Dark Blue as the background color.
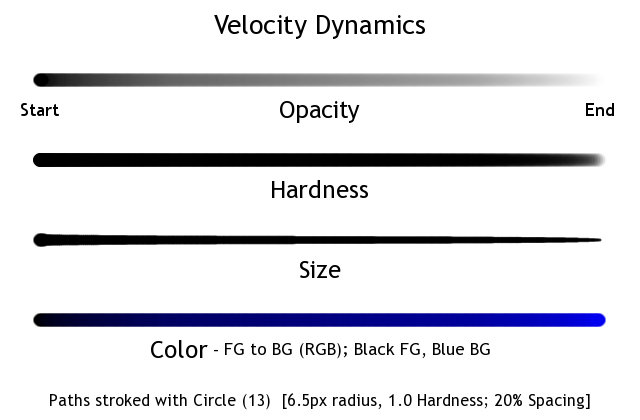
 Velocity:
 I found velocity confusing until I realized that it was emulating the effects of an airbrush or can of spray paint. The velocity starts at zero, so the paint is being sprayed very heavily at the start of the path, making a big blob. As the brush starts moving down the path, the velocity increases and the paint line becomes thinner and lighter. Eventually the velocity is fast enough that the paint becomes virtually transparent. Here is the effect from checking the individual boxes.
 Random:
 This one is what you might expect. The value jumps randomly within the range of full on to completely off.
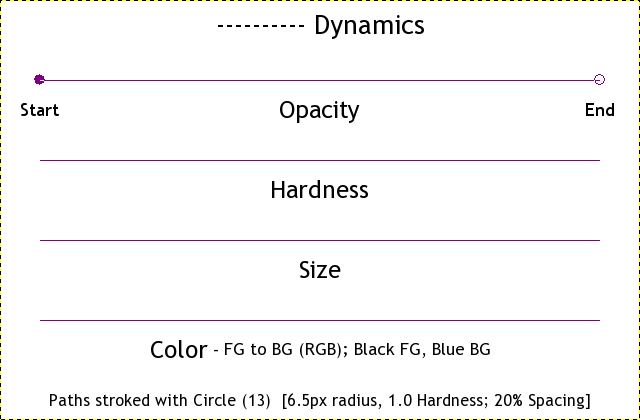
And here is a screen shot showing the paths I used to create the above images:
 Other Crib Sheets
This a crib sheet I created a couple of years ago with the effects that interested me the most. That crib sheet was made using GIMP 2.6.8. I just repeated it with GIMP 2.6.12 and I got slightly different results.
I haven't used 2.7 or 2.8 yet, so I don't know how they perform. (I'm waiting for a relatively bug-free version before I make the move to 2.8.)
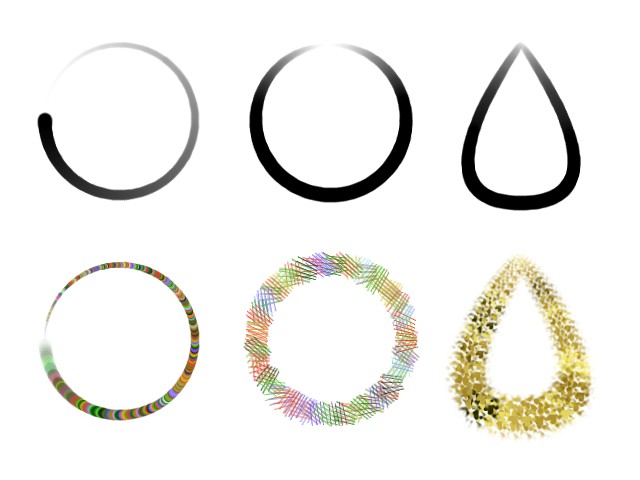
Using Brush DynamicsHere are some simple examples, rendered in GIMP 2.6.12 with standard brushes and gradients.
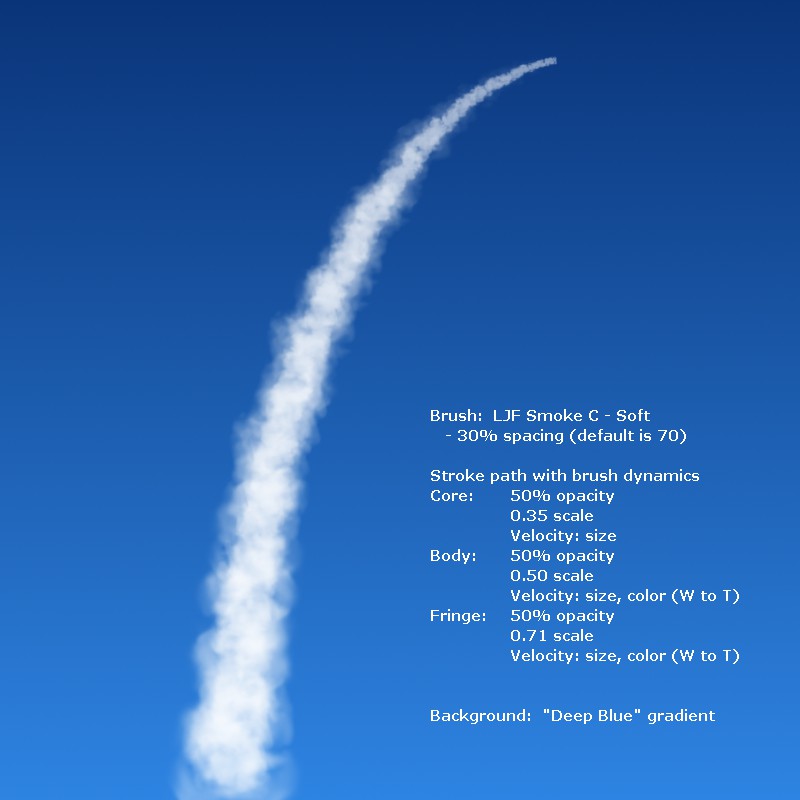
Several days ago I posted this crib sheet that I made for creating rocket trails using paths and brush dynamics. I think it is my rendition of a tutorial that I saw, but this file is almost two years old... The brush is one of the Animated Smoke brushes by LJFHutch and it is available on deviantART:
http://ljfhutch.deviantart.com/art/Gimp ... -162129054 (He has a number of other interesting brush sets that you might want to check out.)
 An Important Reminder:
 Reset your brush parameters when you are done! The easiest way is to use the reset button in the lower right corner of the brush options page.
Edit: Corrected the color gradient description for the examples; removed the help forum block at the beginning.