It is currently Fri Sep 25, 2026 3:50 pm


All times are UTC - 5 hours [ DST ]


Post new topic Reply to topic  [ 49 posts ]  Go to page Previous  1, 2, 3  Next
Author Message
 Post subject: Re: Engrave.
PostPosted: Sat Mar 14, 2015 6:10 am  (#21) 
Offline
GimpChat Member
User avatar

Joined: Jan 03, 2011
Posts: 1656
@dinasset : I don't get the point. You've said you compared two applications on the filter on two images with different sizes.
Maybe you can tell a bit more what steps you've done exactly to do your comparisons ?


Top
 Post subject: Re: Engrave.
PostPosted: Sat Mar 14, 2015 6:32 am  (#22) 
Offline
GimpChat Member
User avatar

Joined: Jan 20, 2013
Posts: 14835
Location: roma, italy
OK
I took the original image and ran the filter (with my preferred set-up: 150 perturbations)
got image a) : I like it
Then rescaled that image to a smaller size, no change in the resolution
ran the filter with same set-up
got image b) : not as nice as a) to my taste (I like to get many "drawing-lines")
Hence my question to you

_________________
"Where am I ?"


Top
 Post subject: Re: Engrave.
PostPosted: Sat Mar 14, 2015 7:29 am  (#23) 
Offline
GimpChat Member
User avatar

Joined: Jan 03, 2011
Posts: 1656
@dinasset. I got it. But really, the fact the result is different does not really surprise me.
Apart from trivial image filters that are working on a pixel-by-pixel level, most of the filters cannot render the same result when applied on images with different sizes.


Top
 Post subject: Re: Engrave.
PostPosted: Sat Mar 14, 2015 7:46 am  (#24) 
Offline
GimpChat Member
User avatar

Joined: Jan 20, 2013
Posts: 14835
Location: roma, italy
OK
I will try to "survive" by doing the following:
1: run the filter on the selected image
2: if I don't like the result (according to my personal taste)
2 a: double the size (keeping the resolution)
2 b: rerun the filter
3: repeat step 2 when the case (for instance, the initial image is very small)

_________________
"Where am I ?"


Top
 Post subject: Re: Engrave.
PostPosted: Sat Mar 14, 2015 12:41 pm  (#25) 
Offline
GimpChat Member
User avatar

Joined: Jan 03, 2011
Posts: 1656
I've added some new options to add a color layer behind the Black & White rendering done by the Engrave filter.
Now, you can do things like this in few clicks :

Attachment:
gmic_engrave.png
gmic_engrave.png [ 722.33 KiB | Viewed 1731 times ]


I'm really happy by what this filter can do.
I think everything is ready now for a stable 1.6.1.0 release on next monday :)


Top
 Post subject: Re: Engrave.
PostPosted: Sat Mar 14, 2015 1:07 pm  (#26) 
Offline
GimpChat Member
User avatar

Joined: Sep 24, 2010
Posts: 12846
Thanks David. Might play with it some later (have to run). :)

_________________
Lyle

Psalm 109:8

Image


Top
 Post subject: Re: Engrave.
PostPosted: Sat Mar 14, 2015 7:13 pm  (#27) 
Offline
Global Moderator
User avatar

Joined: Oct 02, 2014
Posts: 5051
Location: Sydney Australia
Same large vase I used in the hedcut thread, now engraved using the added colour option ...

Image

Thank you again for this (rapidly delivered and changing) script!!

_________________
Image

Respect should be offered freely but hard earned


Top
 Post subject: Re: Engrave.
PostPosted: Sat Mar 14, 2015 8:27 pm  (#28) 
Offline
GimpChat Member
User avatar

Joined: Apr 08, 2010
Posts: 5420
Location: Northwest Ohio
I have updated my GMiC but, unfortunately, this filter did not appear. I am still at 414.


Top
 Post subject: Re: Engrave.
PostPosted: Sat Mar 14, 2015 9:35 pm  (#29) 
Offline
Global Moderator
User avatar

Joined: Oct 02, 2014
Posts: 5051
Location: Sydney Australia
I took a lead from Issabella and tried a couple of shots of Sydney arcades ...

... the Strand Arcade from 3rd floor using the engrave colour options ...

Image

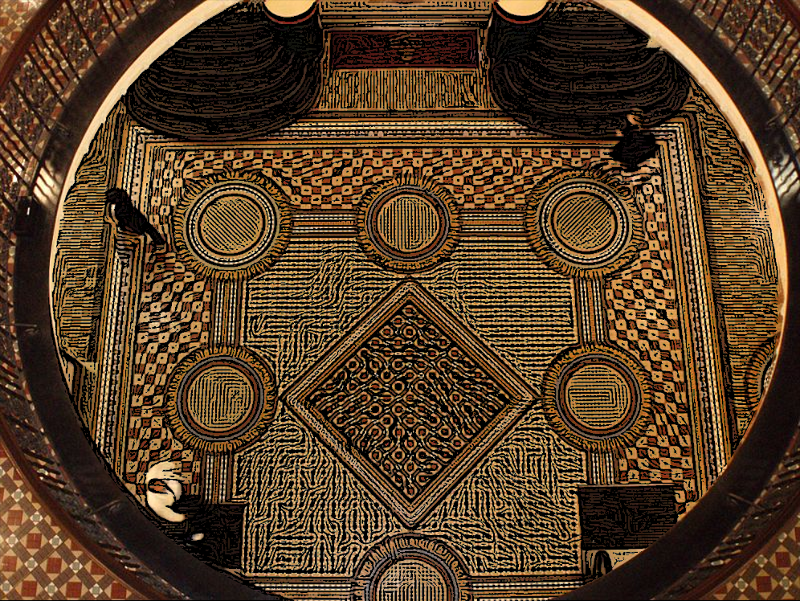
... and the centre of Queen Victoria Building looking down from second floor at the first floor tiled mosaics; second floor not engraved just for contrast. Added my own colour tint this time ...

Image

Just having a lot of fun with these GMIC functions!

_________________
Image

Respect should be offered freely but hard earned


Top
 Post subject: Re: Engrave.
PostPosted: Sun Mar 15, 2015 12:31 am  (#30) 
Offline
GimpChat Member
User avatar

Joined: Nov 16, 2011
Posts: 5127
Location: Metro Vancouver, BC
Nice work oldmangrumpy.

_________________
Image
Gimp 2.8.18, Linux, median user
Gimp Chat Tutorials Index
Spirit Bear (Kermode)


Top
 Post subject: Re: Engrave.
PostPosted: Sun Mar 15, 2015 12:46 am  (#31) 
Offline
GimpChat Member
User avatar

Joined: Sep 24, 2010
Posts: 12846
I too like the results OMG. Anyway, thought I would try a color but still I have some work to do to get it the way I want. :)

ref: http://www.fontplay.com/freephotos/seve ... 506-09.jpg


Attachments:
fp112506-09.png
fp112506-09.png [ 189.54 KiB | Viewed 1828 times ]

_________________
Lyle

Psalm 109:8

Image
Top
 Post subject: Re: Engrave.
PostPosted: Sun Mar 15, 2015 1:02 am  (#32) 
Offline
GimpChat Member
User avatar

Joined: Sep 24, 2010
Posts: 12846
ref: http://www.fontplay.com/freephotos/seve ... 206-06.jpg

Still like plain b/w better. :)


Attachments:
fp111206-06.png
fp111206-06.png [ 229.1 KiB | Viewed 1827 times ]

_________________
Lyle

Psalm 109:8

Image
Top
 Post subject: Re: Engrave.
PostPosted: Sun Mar 15, 2015 10:56 am  (#33) 
Offline
GimpChat Member
User avatar

Joined: Jan 03, 2011
Posts: 1656
Here is another attempt, with the filter + Manual color tweaking :

Attachment:
chimpanze_all.jpg
chimpanze_all.jpg [ 356.83 KiB | Viewed 1806 times ]


Attachment:
tiger_gmic.jpg
tiger_gmic.jpg [ 803.31 KiB | Viewed 1799 times ]


I'll try to do a <5mn tutorial video to show how this can be done :)


Top
 Post subject: Re: Engrave.
PostPosted: Sun Mar 15, 2015 3:51 pm  (#34) 
Offline
GimpChat Member
User avatar

Joined: Oct 06, 2013
Posts: 143
Shweet!
Using a foreground cut that I made for filter testing. Just Engrave with a lot of parameter tweaks plus layer Overlay. Amazing what happens with some layer fiddling. The Engrave filter gives great control over detail and texture once you get the hang of it.
Attachment:
0126c2a_engrave-ex1r.jpg
0126c2a_engrave-ex1r.jpg [ 55.66 KiB | Viewed 1788 times ]

_________________
Image


Top
 Post subject: Re: Engrave.
PostPosted: Sun Mar 15, 2015 4:09 pm  (#35) 
Offline
GimpChat Member
User avatar

Joined: Jan 03, 2011
Posts: 1656
Here is yet another attempt :

Attachment:
gmic_lion.jpg
gmic_lion.jpg [ 2.72 MiB | Viewed 1787 times ]


Top
 Post subject: Re: Engrave.
PostPosted: Sun Mar 15, 2015 4:18 pm  (#36) 
Offline
GimpChat Member
User avatar

Joined: Mar 01, 2014
Posts: 14198
Location: Spain, Aragón
Very nice this filter Engrave. Here other attempts :bigthup :bump


Attachments:
tumblr_m2j5bzOPyW1r14cy4o1_500_large-Engrave.jpg
tumblr_m2j5bzOPyW1r14cy4o1_500_large-Engrave.jpg [ 69.44 KiB | Viewed 1785 times ]
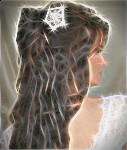
Rostro de perfil mujeres-engrave-colour-multiply.jpg
Rostro de perfil mujeres-engrave-colour-multiply.jpg [ 862.84 KiB | Viewed 1785 times ]

_________________
Image

Gimp 2.10.36 (samj) portable _ OS Windows 10 Home_ 64bits
Don’t be afraid to start over. It’s a new chance to rebuild what you want.
Top
 Post subject: Re: Engrave.
PostPosted: Mon Mar 16, 2015 11:18 am  (#37) 
Offline
GimpChat Member
User avatar

Joined: Jan 03, 2011
Posts: 1656
I've done a small tutorial video to show how to use the Engrave filter to create some comics-style pictures from photographs.
I hope this can give you some ideas ! :)

www.youtube.com Video from : www.youtube.com


Here is the comment associated to this video:
Quote:
This real-time video shows how to use the nice 'Engrave' filter, introduced in the latest version (1.6.1.0) of the G'MIC plug-in for GIMP, to convert photographs into comics-style pictures.
We apply it on two different photographs.

The conversion consists of several steps, basically:

1. We resize the image so that its resolution is not too big (a height of 800-1000 usually gives good results).

2. We first extract the foreground object to stylize from the background. This is quickly done through the G'MIC filter 'Contours / Foreground extraction'. The filter generates two layers (one for the foreground, one for the background), and we keep only the foreground one.

3. Then, we apply the filter 'Black & White / Engrave', to stylize our extracted foreground. The filter has been designed originally to create engraving pictures, so we have to tweak the parameters a little bit to have something that looks more like a comics. In particular, we have to lower the parameter 'Density' to achieve this.

4. We also activate the 'Add color background' option of the filter, that generates a color layer associated to the layer containing the black strokes on a white background. This decomposition is really useful because we can then work separately on the color or stroke layers after the filter application.

As you can see, it doesn't take too long to get fun results from real photographs!

Get the latest stable version (at least 1.6.1.0) of the G'MIC plug-in for GIMP at : http://gmic.eu/gimp.shtml

Credits:
- Image of the tiger by William Warby (https://www.flickr.com/photos/wwarby/7188591096/), distributed under CC BY-NC 2.0.
- Portrait of Mairi, by Patrick David (http://blog.patdavid.net/).
- Music: "Blue Danube" by Johann Strauss (taken from https://www.youtube.com/audiolibrary/music).


Top
 Post subject: Re: Engrave.
PostPosted: Mon Mar 16, 2015 4:28 pm  (#38) 
Offline
GimpChat Member
User avatar

Joined: Sep 24, 2010
Posts: 12846
Enjoyed the video David. Like your pick of Strauss too. :)

_________________
Lyle

Psalm 109:8

Image


Top
 Post subject: Re: Engrave.
PostPosted: Mon Mar 16, 2015 7:37 pm  (#39) 
Offline
Global Moderator
User avatar

Joined: Oct 02, 2014
Posts: 5051
Location: Sydney Australia
So I watched the video ... and it all looked so easy and so quick - so I tried to do the tut.

Found a suitable portrait and started using GMIC 'foreground extract' for the first time. Now 20 minutes later I have a complete mess of foreground/background layers ... nothing like what I wanted; looks like I need to do a basic 'GMIC foreground extract tut' first!

To quote the words of a popular song 'they knock me down but I get up again'!

Maybe I should have used a penguin.

_________________
Image

Respect should be offered freely but hard earned


Top
 Post subject: Re: Engrave.
PostPosted: Tue Mar 17, 2015 4:12 am  (#40) 
Offline
GimpChat Member

Joined: Jan 25, 2014
Posts: 78
This is really a nice filter. First you get a complete mess but tweaking it you're getting at least something. This is my try.
Image


Top
Post new topic Reply to topic  [ 49 posts ]  Go to page Previous  1, 2, 3  Next

All times are UTC - 5 hours [ DST ]


* Login  


Powered by phpBB3 © phpBB Group