Attached the XCF if you want to inspect it. It's done on 2.8.22, but should open in 2.8.14 without problems.
Feel free to ask anything, this isn't in-depth, I stormed through it in 2 minutes.
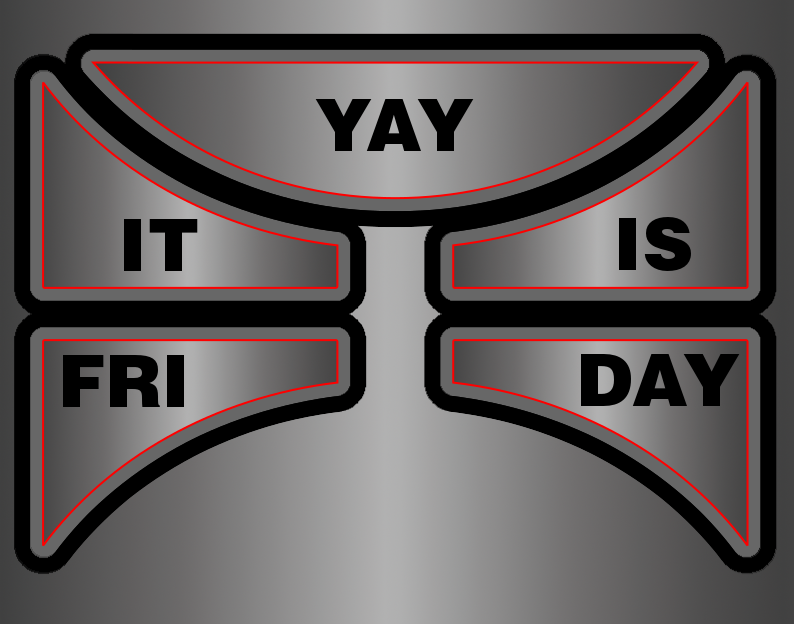
I would create the red lines as work paths for the buttons, using inkscape and import to Gimp.
You could do them in Gimp, with Arakne path creator and Ofnuts path tools if you want to try,
but I can promise you it takes more time. Depends on the complexity of your buttons, if they are basic shapes
you can also use JonStipe path shapes, LightningIsMyName has scripted a path shape package too.
The roundness of the thicker strokes indicates that the image may have been done with PS but it's hard to say.
Those thicker strokes are very easy to create once you have your paths.
Then just apply gradients on the button shapes.
Scripts used, not included in stock gimp used:
- Sample gradient along path by RobA (just realized not necessarily needed, the BG gradient looks also done with 2 colors)
- LayerFX.py by JonStipe
1. Blank canvas. Create your paths, or import them. Merge visible paths.
(You can open SVGs with Gimp and tick "import paths")
2. Created horizontal path across the bottom for the background layer:
Sample gradient along path (custom script by RobA), used it on bg layer.
3. New empty layer. Stroke paths. (red lines) used 2px
4. New empty layer below red lines, call it shapes, paths to selection, fill selection.
(color does not matter at this point, because you will apply gradients on them later)
5. Shapes layer selected, LayerFX: stroke (color #676767, position 90, size ~14)
6. Another run for blacks (color 000000, position 90, size around 32)
Arrange of layers from top to down: Red strokes, shapes, grey strokes, black strokes, background.
7. Lock alpha channel of shapes layer. Could have avoided this, but I merged all paths in the beginning.
Pick the dark and light greys from original side button image to replace your fore and background colors.
Use lasso selection on side shapes, and then gradient tool from shapes left edge to right. Repeat for the other side buttons.
8. Repeat same thing on top and bottom buttons. Or what ever gradient you want on them.
9. Add text.
 Login
Login Register
 Tweets
 FAQ
FAQ Advanced Search