It is currently Tue Jun 23, 2026 7:09 am


All times are UTC - 5 hours [ DST ]


Post new topic Reply to topic  [ 7 posts ] 
Author Message
 Post subject: Mapping x-location of pixels to hue slider
PostPosted: Sat Feb 22, 2025 9:30 pm  (#1) 
Offline
GimpChat Member

Joined: Feb 08, 2025
Posts: 14
GIMP Version: 2.10.38
Operating System: Windows
GIMP Experience: Intermediate Level

List any relevant plug-ins or scripts:
none

List any ERROR messages you received:
none


I would like to process an existing image by adjusting whatever parameters are controlled by the 'Hue' slider in Colors/Hue-Chroma, so that the far left of the layer (x=0) is processed with Hue -180, the center is unprocessed (Hue 0), and the far right (x=x_size) is processed with Hue 180, which means the two edges match.

I've done it manually, dividing the image up into ten steps. Make selection, adjust Colors/Hue-Chroma/Hue. They're far too coarse, but it's the general effect I want. As the layer is 3000 pixels wide, I'd like each band to be one step of hue adjustment wide, so 256 bands of 12 pixels or so. Interpolation or anti-aliasing would be even better, but isn't really necessary. And I suspect higher bit depths would give smoother results, but memory limits currently prevent that.

I can't get the gradient tool to do anything but bitmaps and masks, not hue adjustment to existing data. If there's other tools, or a plugin in in G'Mic, I haven't found them. I have pseudocode, more or less, but that's only about 5%-10% of a functional Gimp plugin or script, unless I'm missing a short version.

Is there a way to use existing Gimp tools or plugins to do this? I also have a black-white gradient on a separate layer, but I can't find a way to get that into a hue control.

(edit) I believe I've found a solution - a one-line script-fu thing that simply brute-forces selection-adjust hue in a loop across the image. It only works for this image, but that's sufficient for now.


Last edited by Cadwallader on Sat Feb 22, 2025 11:18 pm, edited 1 time in total.

Share on Facebook Share on Twitter Share on Orkut Share on Digg Share on MySpace Share on Delicious Share on Technorati
Top
 Post subject: Re: Mapping x-location of pixels to hue slider
PostPosted: Sat Feb 22, 2025 11:13 pm  (#2) 
Offline
GimpChat Member
User avatar

Joined: Jan 13, 2011
Posts: 2642
Location: Poland
I don't know how good you are at writing plugins.

As a possible solution, I propose combining two plugins after a minor modification

Rotate Hue Script
viewtopic.php?f=9&t=20420

Plug-in Striped Selection
viewtopic.php?f=9&t=21469

_________________
Image


Top
 Post subject: Re: Mapping x-location of pixels to hue slider
PostPosted: Sat Feb 22, 2025 11:23 pm  (#3) 
Offline
GimpChat Member

Joined: Feb 08, 2025
Posts: 14
Not good at writing plugins. I get the algorithms, but I'm totally unfamiliar with Gimp's innards and reference material. The method I came up with uses two methods I know from the menus, and a simple counting loop, in a one-line script. That I can handle, even in Scheme. (Did I mention I hate parentheses ever since Cakewalk CAL?) I'll eventually master registration, error handling, image type inspection, and all the other cruft necessary to make a general-purpose plugin, but not right now.


Top
 Post subject: Re: Mapping x-location of pixels to hue slider
PostPosted: Sun Feb 23, 2025 4:28 am  (#4) 
Offline
Script Coder
User avatar

Joined: Oct 25, 2010
Posts: 4812
Two general ways:

* Colors > Components > Decompose/recompose will create an image where three components are layers, and there are a couple of color models where one of the component is the Hue. You then replace the Hue layer, and recompose.
* In the layer blend modes, there are "LCH Hue" and "HSV hue" modes that both result in applying the Hue of the layer to the composite image below it. The `HSV Color` and `LCh color` apply both Hue and Saturation, if necessary. So you only need to add a new layer and fill it with whatever.

Attachment:
Blended.png
Blended.png [ 932.99 KiB | Viewed 3647 times ]

_________________
Image


Top
 Post subject: Re: Mapping x-location of pixels to hue slider
PostPosted: Sun Feb 23, 2025 5:27 am  (#5) 
Offline
GimpChat Member

Joined: Mar 04, 2011
Posts: 2604
A possible, might work for you.

Duplicated layer. A layer mask filled with bilinear gradient for the symmetry.

Attachment:
layermask.jpg
layermask.jpg [ 121.23 KiB | Viewed 3636 times ]


Top
 Post subject: Re: Mapping x-location of pixels to hue slider
PostPosted: Mon Feb 24, 2025 10:14 pm  (#6) 
Offline
GimpChat Member

Joined: Feb 08, 2025
Posts: 14
I got it, eventually, in a 'one-line' script-fu script. It turns out that carriage returns are just whitespace to the script-fu interpreter, so this just pasted in and ran. You have to set img to the image number from the title bar - I never did find a way to get that number from the command line. It's currently 2.

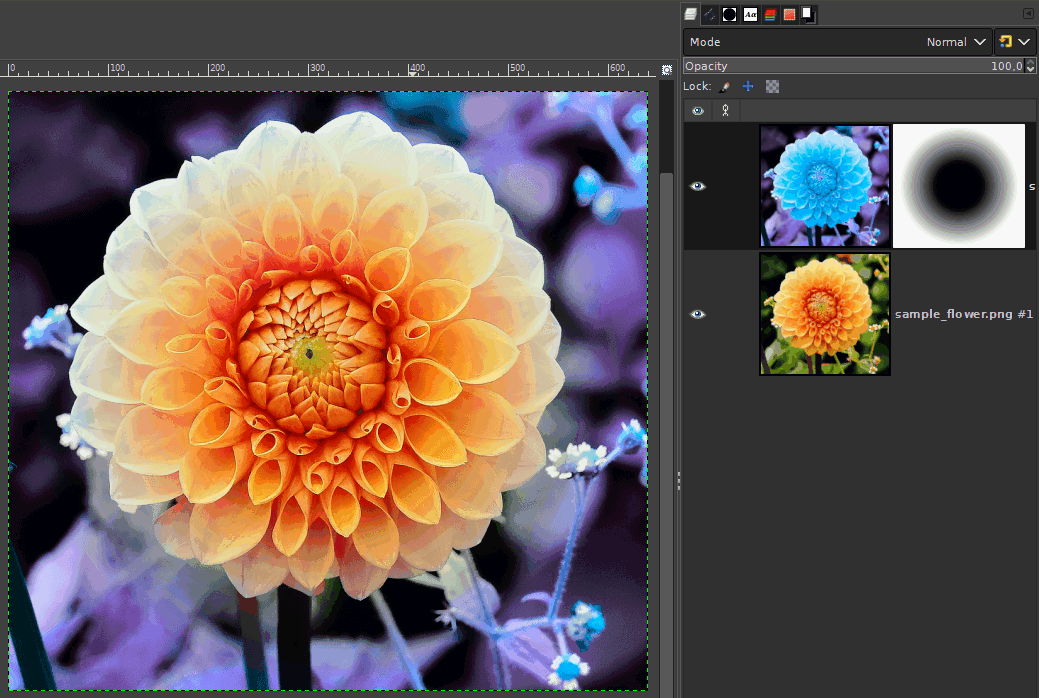
Delta 1 or 2 gets more artifacts than colors. It's not too impressive on large expanses of one color, like the grass at the bottom of the photo - that could as well be a semi-transparent color mask. It's best on multicolored things that obscure the rainbow effect. Or you can set it to a narrower range of hue.

The 180 constant is the hue slider range, ±180 degrees.

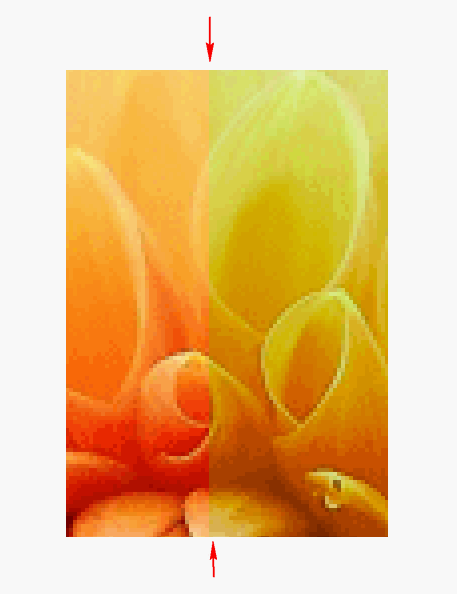
A lot of trouble for very little result.

(let* ( (img 2)
        (drw 0) (selmode 2) (idx 0) (x 0) (y 0) (h 0) (s 0) (delta 10)
    )
    (set! drw ( car ( gimp-image-get-active-drawable img ) ) )
    (set! x (car (gimp-drawable-width drw) ) )
    (set! y (car (gimp-drawable-height drw) ) )
    (set! h (- x (/ x 2) ) )
    (set! s (/ 180 h) )
    (while (< idx x)
        (gimp-image-select-rectangle img selmode idx 0 delta y)
        (gimp-drawable-hue-saturation drw 0 (* s (- idx h)) 0 0 0)
        (set! idx (+ idx delta) )
    )
)

hard
Attachment:
Rainbowed photo.jpg
Rainbowed photo.jpg [ 4.96 MiB | Viewed 3579 times ]


Top
 Post subject: Re: Mapping x-location of pixels to hue slider
PostPosted: Tue Feb 25, 2025 12:40 am  (#7) 
Offline
GimpChat Member
User avatar

Joined: Jan 13, 2011
Posts: 2642
Location: Poland
I definitely prefer to use the method presented by Rich2005. You get a live preview of the hue adjustment and the appearance of the mask.

Image

Slicing into strips has another limitation - if the hue step is greater than 10, you will see a dividing line:

Image

If Your goal is just to get a rainbow effect, the Ofnust method is better.

You can also combine both methods (mask to a new layer with a gradient). :yes

_________________
Image


Top
Post new topic Reply to topic  [ 7 posts ] 

All times are UTC - 5 hours [ DST ]


* Login  


Powered by phpBB3 © phpBB Group