Okay.
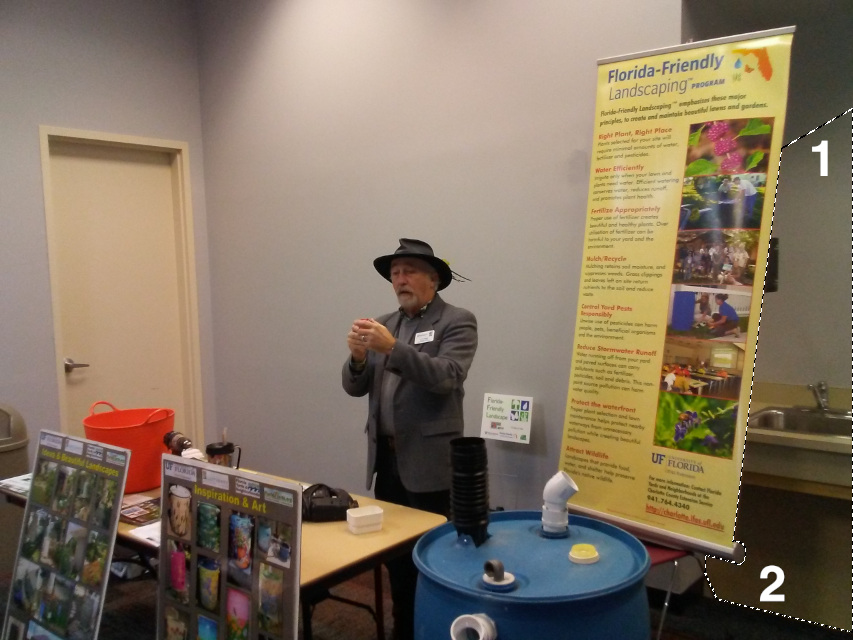
Here is a quick tut how I would remove the sink behind the poster.
I'm going to do this differently than the phone image, and use Gimp 2.10 because of the improved gradient tool.
The light source is coming from above, so we also need to get rid of the shadow below the sink.
1. Use color picker somewhere around number "1" to define your foreground color.
2. Hit x (exchanges foreground-background colors) and use color picker close to the floor (where I have marked 2).
3. Create a new transparent layer. Use free selection tool to create the area that will be fixed.
Note! I have my free selection tool set with antialias and 1px feather by default because I use it to make png cutouts.
4. Switch to the transparent new layer and select gradient tool from your tool box. (FG to BG, shape linear)
Drag and draw a gradient from the lower point to the upper point, slightly askew.
Move and play with the end points after drawing the gradient for best possible blend with the original wall color in the upper edge area.
Add 2 stops in the gradient line (you do this by clicking on the line) and change the color to a lighter tone.
You can pick the exact colors from the original layer, and make the gradient much better. I just picked a lighter tone for this example.
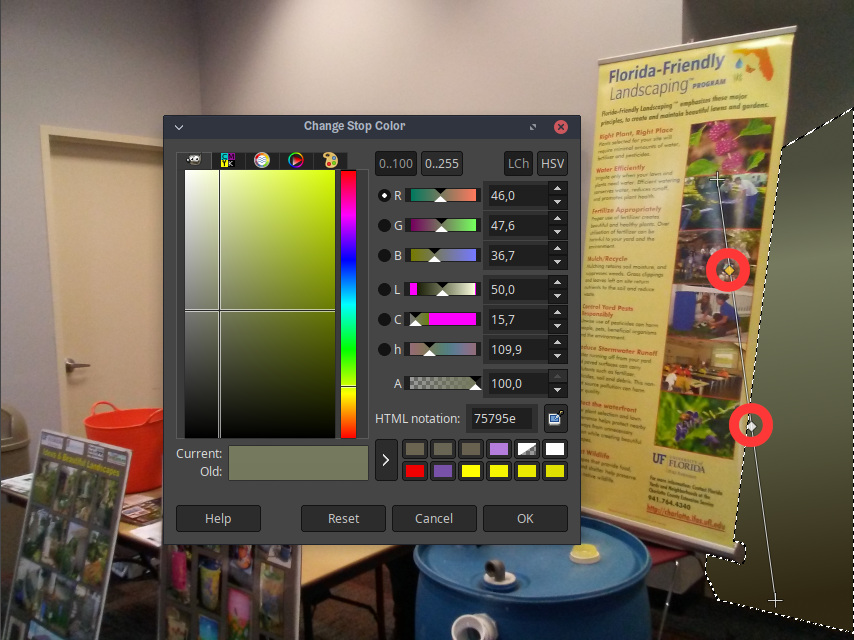
But there will be a visible difference anyway. Main problem is the grain of the original image.
Adding noise and a small blur.
5. Duplicate the gradient layer first and switch to it.
6. Filters/Noise/CIE Ich noise. Drop lightness to around 8-10, click OK.
7. Filters/Blur/Gaussian Blur. Size X 1.20, Size Y 1.20. Click OK.

A lot depends how well you got the gradient originally to blend in the upper area of the selection.
My gradient became too light, which is why I'm using Hue-Saturation to fix the lightness and possible hue change.
You could also use the Hue-Chroma or Brightness-Contrast if the difference is small.
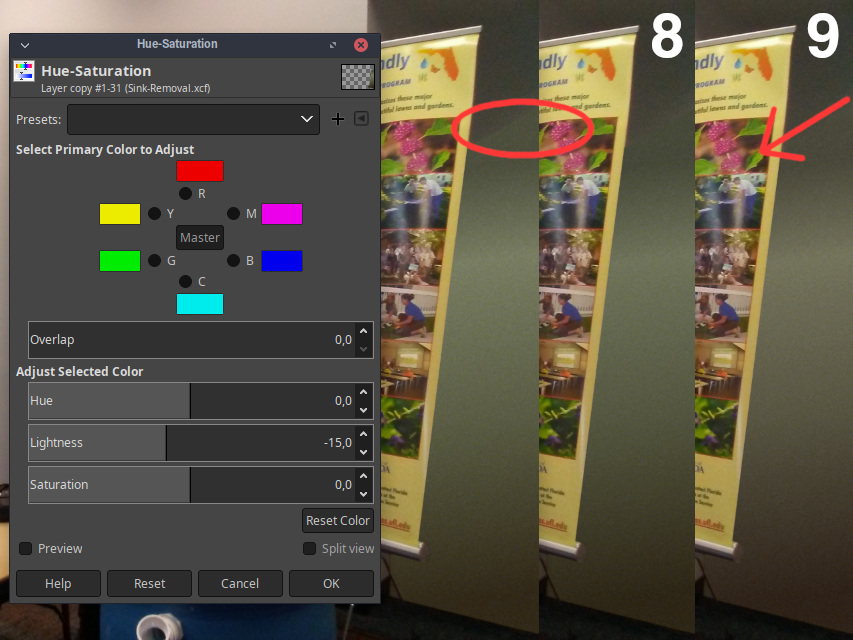
8. Colors/Hue-Saturation. Lightness -15 seems okay for this. Play with hue if needed. You may need to use different values.
9. Final touch. Select eraser tool and the softest round brush that has 025 hardness. Size around 100.
Swipe across the upper edge so that half of the eraser tip is over the gradient.
You can also experiment, and try to clean a larger area to expose more of the original image but be careful.
One more step to fix the sharper edge compared to the edge of the poster.
Layer/Transparency/Alpha to Selection. Select/Invert.
Select/Feather: 3px, click Delete.
There's some black box behind the poster, if it comes into view use 2px for feather.
You can also use small soft eraser and go along the edge.
The gradient could be better but it was just a small tut.

Alternate version, erased more aside of the poster in step 9.

If you don't mind the black box, or whatever that is behind the Florida poster you could make the selection area just above the sink.
Or you could get rid of whole background...and throw him in the Everglades.

 Login
 Register
 Tweets
 FAQ
 Advanced Search