It is currently Sat Aug 08, 2026 1:21 pm


All times are UTC - 5 hours [ DST ]


Post new topic Reply to topic  [ 15 posts ] 
Author Message
 Post subject: Custom Font Wibbler v0.1c Tabbed for Gimp 2.10
PostPosted: Sun Jan 25, 2026 3:14 pm  (#1) 
Offline
GimpChat Member
User avatar

Joined: Aug 08, 2016
Posts: 2855
Location: East Midlands of England
This is my take on the Path Wobbler plug-in that made use of Tim’s Wobble 3d plug-in. It does not require Tim’s filter to be installed and was intended to be more suitable for making custom fonts from custom paths.

Download, unzip and install to your user plug-ins folder:

Attachment:
Custom_Font_Path_Wibbler_v01c_Tabbed.zip [18.28 KiB]
Downloaded 76 times


Here is a pdf copy of this guide should you need one:

Attachment:
Wibbler Help.pdf [2.54 MiB]
Downloaded 141 times


Some resources to help (a custom font character path and some brushes - install these to your user brushes folder):

Attachment:
Resources.7z [921.58 KiB]
Downloaded 88 times


The Path Wibbler filter dialogs are very similar to the Wobbler dialogs since they provide similar options for adding random changes to the appearance of character shapes by altering the positions of the x/y co-ordinates of the anchors and handles that influence the shape of vectors in Gimp.

As with Wobbler the filter can be used to stroke skeleton character paths with the line or brush tool (using the char suffix)

Image

or to fill closed character paths (using the path suffix).

Image

This guide attempts to focus on some of the areas that Wibbler may be of use to making custom fonts.

1. Stroking character paths in their original form
2. Adding variety to character shapes
3. Adding textured edges with strokes
4. Using brushes
5. Stroking non-custom font character paths


The Filter Dialog Tabs:

Dialog Tab 1: Wibble and Stroke Options


Image

1. Set the amount of random variation for path anchors/handles
2. Target the adjustments in a much more specific way
3. Excludes certain anchor points from the filter
4. Use line or brush to stroke paths
5. Set the width for the line and brush stroke
6. Set the amount to reduce the stroke width used for each temporary path
7. Set an amount to reduce the fill width used for each temporary path
8. Set the number of temporary paths/layers

Dialog Tab 2: Brush, Colour and gradient Options


Image

1. Set the spacing between brush strokes
2. Use track direction or random brush angle
3. Set a random brush sizing
4. Decide where to take colour from - foreground/background/gradient
5. Gradient colours – random/ordered/restricted choice
6. Set the amount to reduce the stroke width used for each temporary path
7. Apply current gradient along stroke
8. Blur the strokes or fill layers as they are added

Dialog Tab 3: Opacity, Margins and path removing Options

Image

1. Set the style for the end cap when stroking with line
2. Set the style for joins when stroking with line
3. Set the base opacity level for stroking/filling paths
4. Set the options for using opacity
5. Left hand margin size for custom font making
6. Right hand margin size for custom font making
7. Set the width for the space character for custom font making
8. Remove paths used after use
9. Apply the filter to custom font paths or other paths

Section 1. Stroking character paths in their original form

You may have created your own set of character paths or downloaded a set of character paths from the custom path thread on GimpChat and want to make a custom font as a base for decorating with other tools.

Open a file containing character paths in Gimp 2.10 and select the colour you want to use to stroke the custom font: White is normally the colour used.

Open the filter dialog:

Filters>>Custom Fonts>>Constructing Tools>>Custom Font Wibbler v0.1c Tabbed...

Use the settings shown to create characters that follow the exact curves of the original vectors.

Image

Image

Weighting

If you need to create a custom font in different thicknesses or weights, simply change the stroke width on Tab 1 of the dialog.

The stroke width values used in the examples below: 80, 40 and 20.
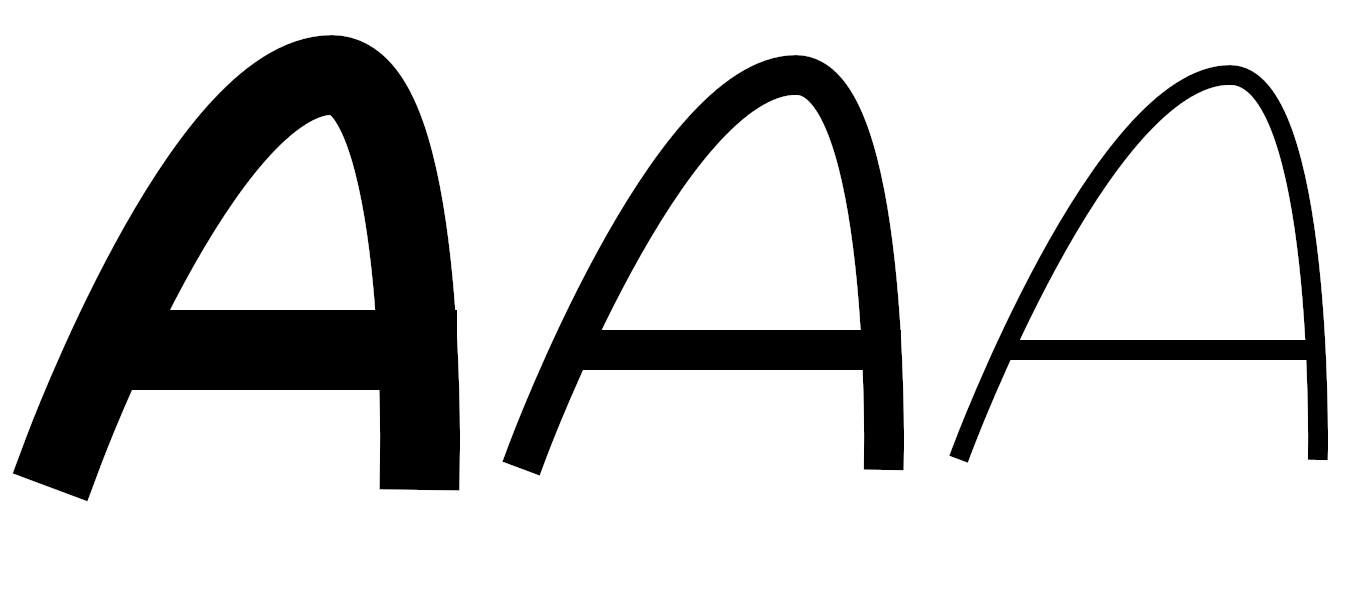
Image

Shaping

If you want to change the shaping of the strokes use a brush to stroke the paths (click on the ‘Stroke path method’ option on Tab 1 of the filter dialog).

Use a round brush with a hard edge to add rounded end caps to the strokes or use an angled thin rectangle brush to achieve more calligraphic outcomes. Set the brush spacing amount on Tab 2 to a value of 1 or 2. (The filter will take longer to complete its work at very small brush spacing values.)
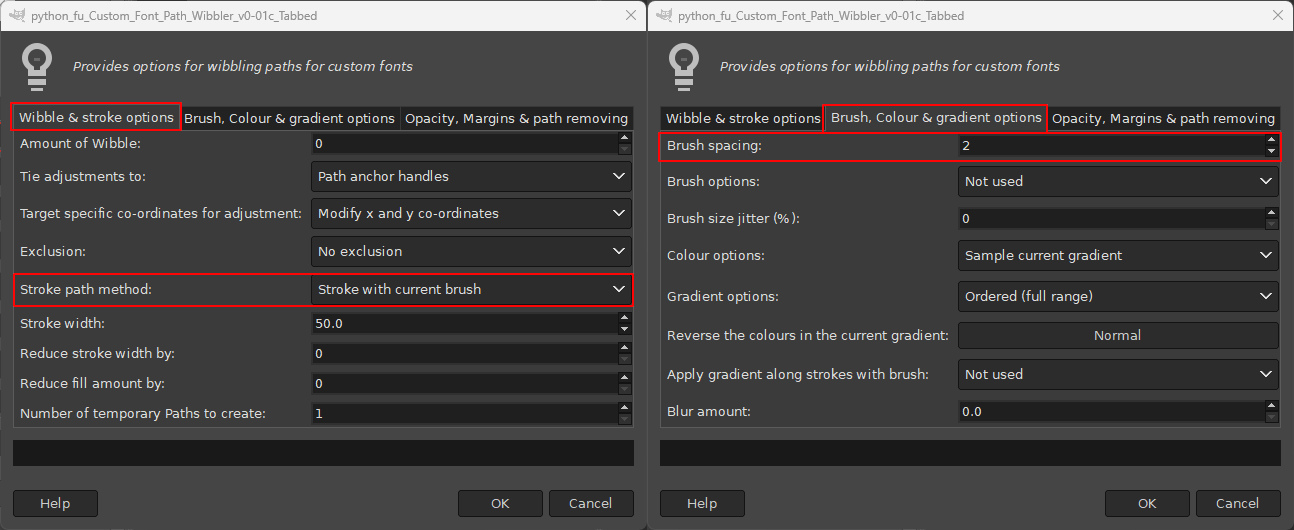
Image

Outcomes below were with a round brush and two differently angled rectangle brushes.
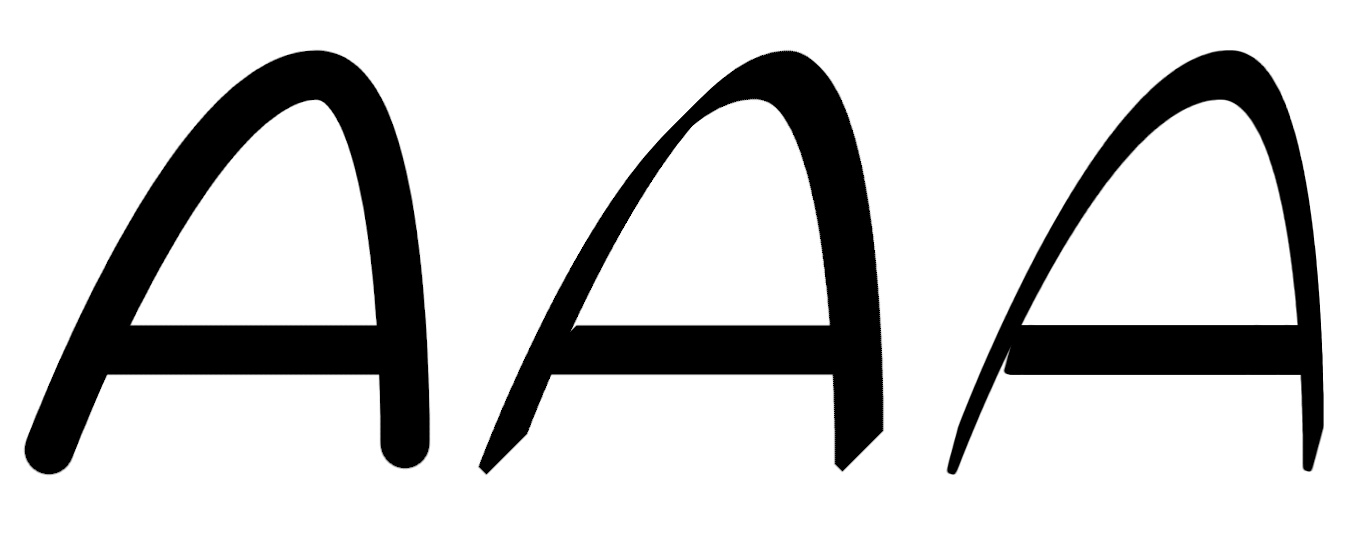
Image

Section 2: Adding variety to character shapes

To do this you need to increase the amount of wibble used on Tab 1.

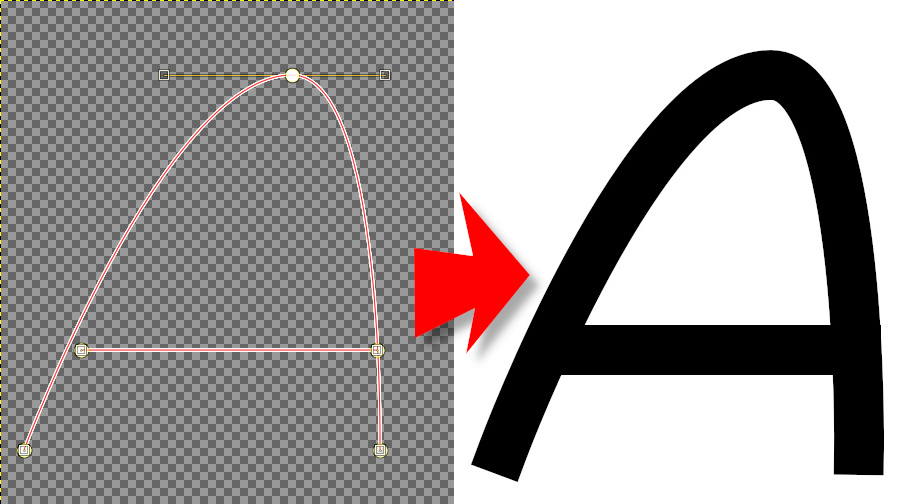
The default settings will randomly adjust all the position of the anchor handles that shape the path. The upper-case A shown below consists of five anchor points together with 10 control handles (the control handles for most of the anchors are difficult to see because they lie directly on top of the them).

To do this you need to increase the amount of wibble used on Tab 1.

The default settings will randomly adjust all the position of the anchor handles that shape the path. The upper-case A shown below consists of five anchor points together with 10 control handles (the control handles for most of the anchors are difficult to see because they lie directly on top of the them).

Image

The image below shows three versions of the character created by setting the ‘Amount of Wibble’ to its maximum value of 24 while leaving the number of paths set to 1.
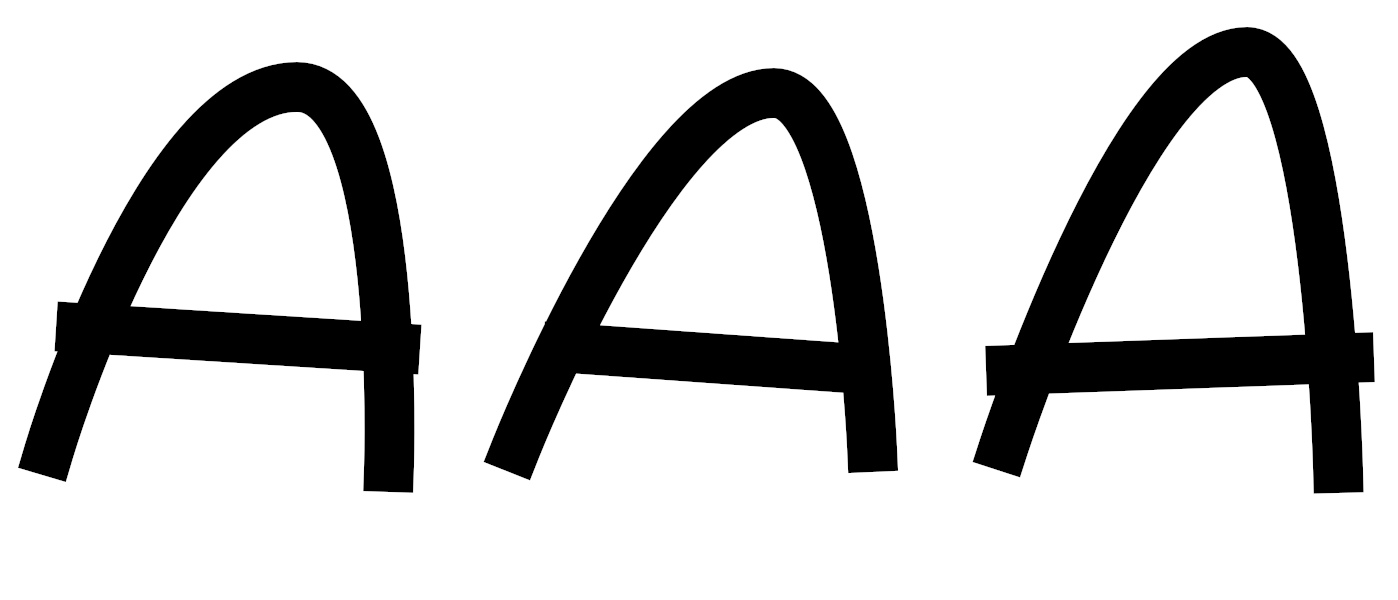
Image

By default the filter adjusts the x and y co-ordinates of the anchor handles. The image below shows three variations of the character generated by adjusting the position of the anchors themselves
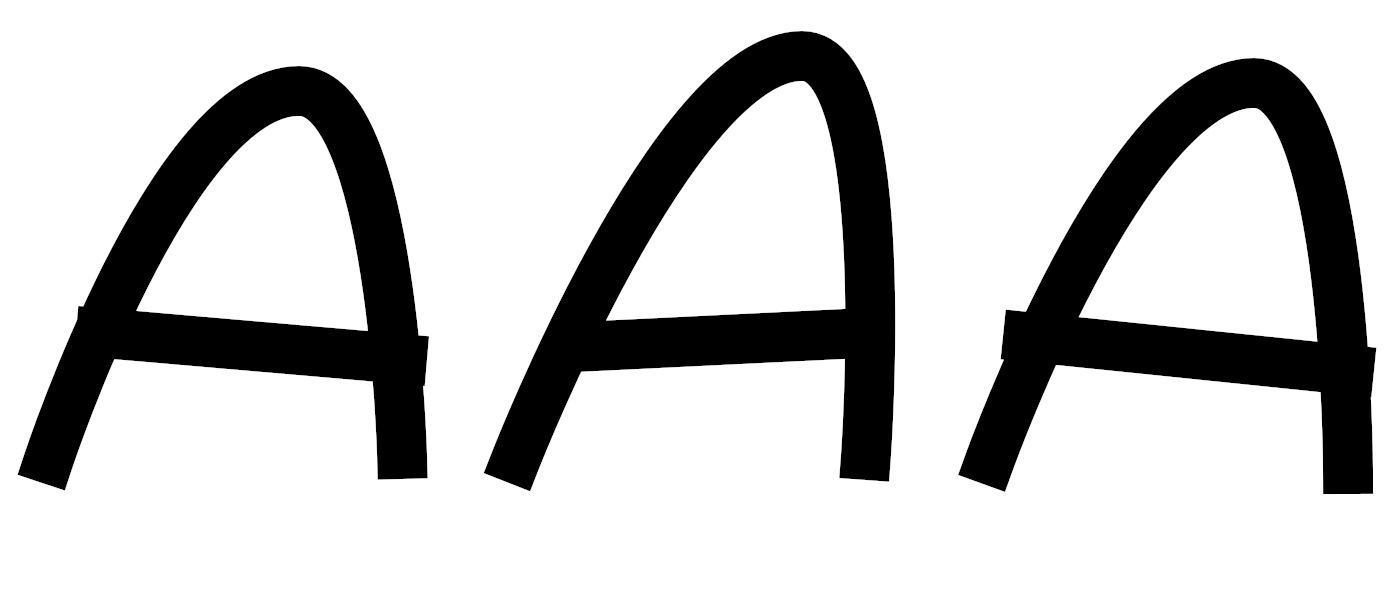
Image

And this next image show three versions of the character generated with adjustments made to both the handles and the anchors.

Image

Use the ‘Tie adjustments to’ option on Tab 1 of the filter to change the focus of the variations. If you want to be even more pedantic you can target the specific co-ordinates to add variety to by using the option with that name. The examples below target only the x co-ordinates.
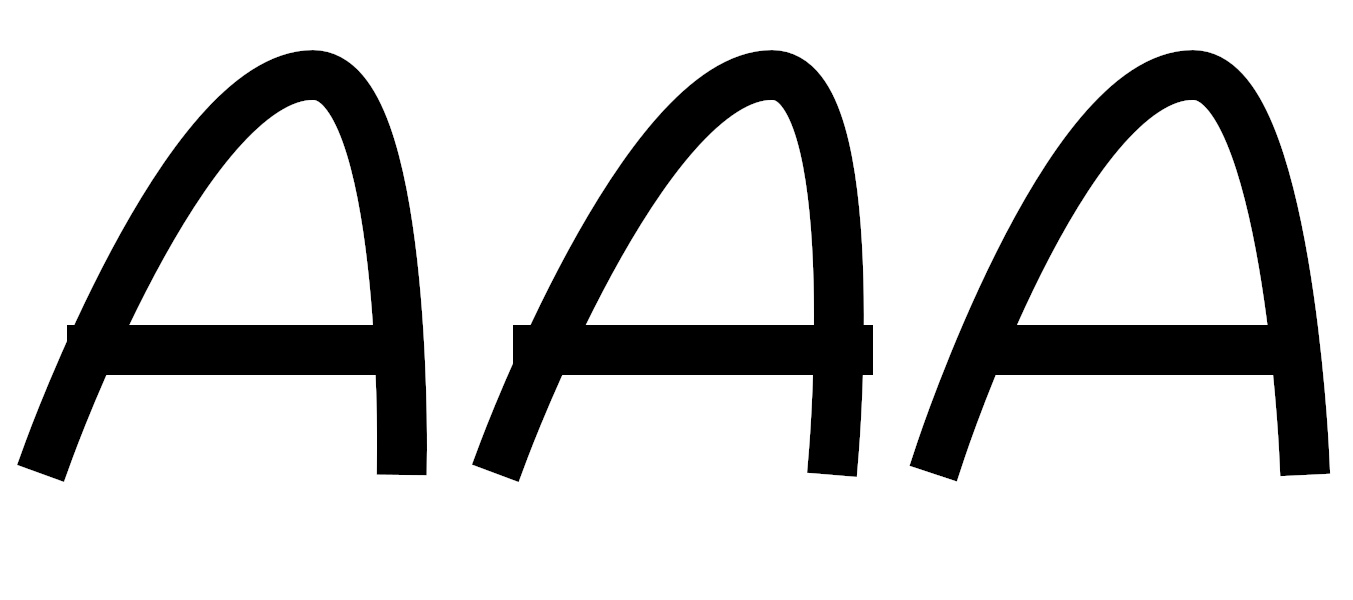
Image

3. Adding textured edges with strokes

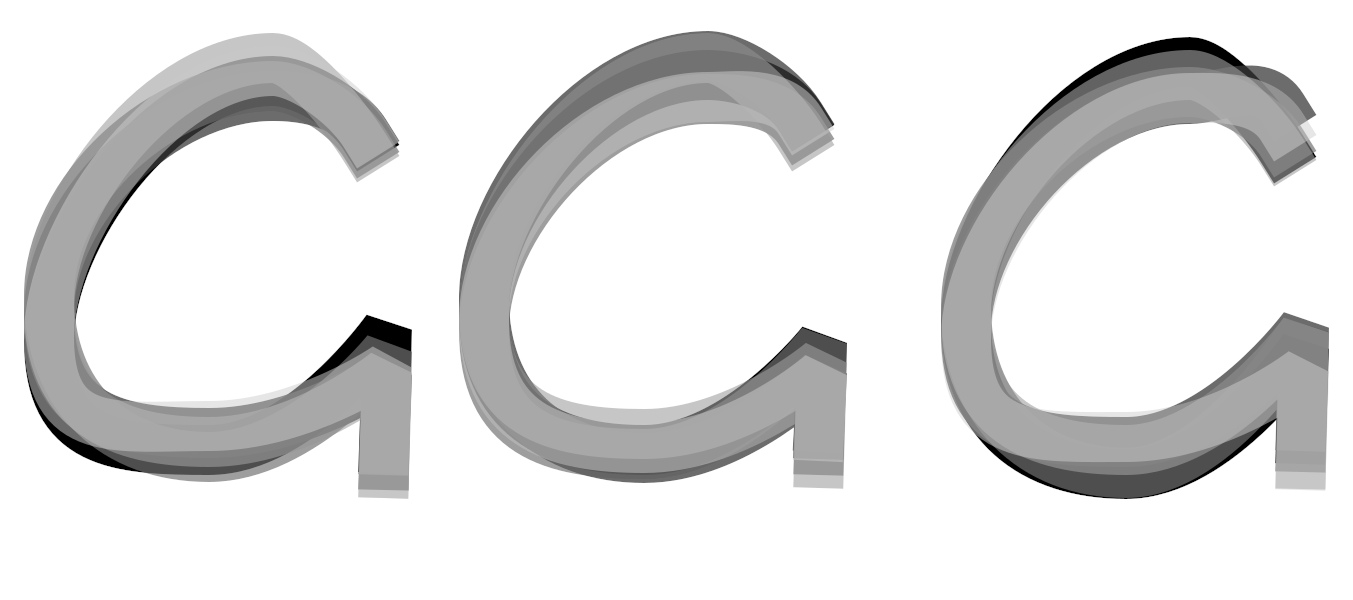
Some interesting effects can be achieved by overlaying different coloured strokes (taken from the currently selected gradient). This textured base can then be worked on by other decorative custom font filters.

Use the quicker ‘Stroke method’ set to line on Tab 1 to experiment with this approach and increase the number of temporary paths used to 5.

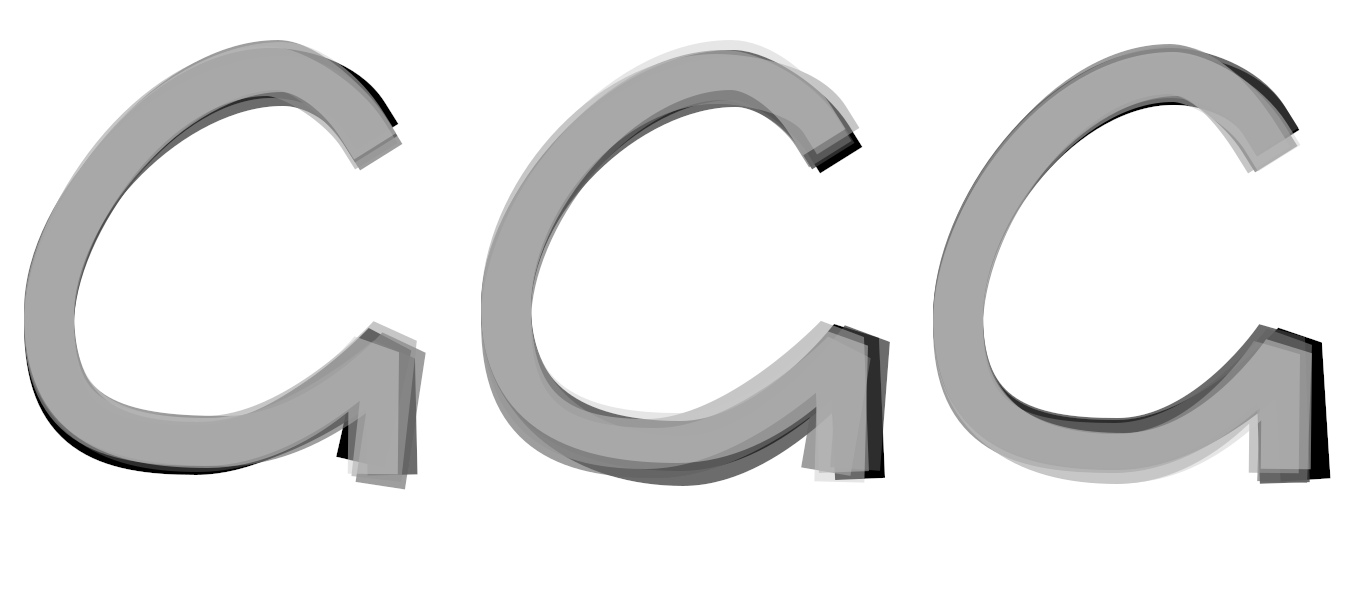
Image

Image

And the same effect but with a wibble value of 24:
Image

Reducing stroke width

The option to reduce the width of the stroke (for each temporary path) can also be employed to increase the effect of the textured edges as in the examples below where the value used is first 2, then 4 and finally 8.

Image

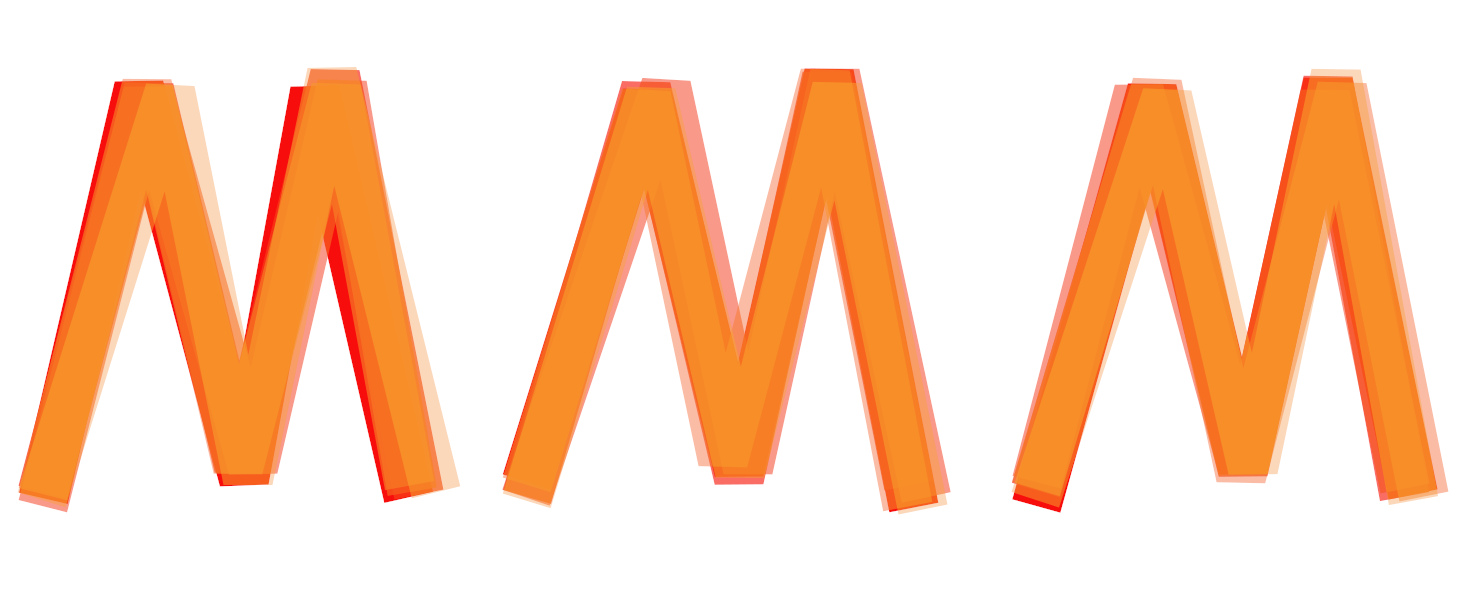
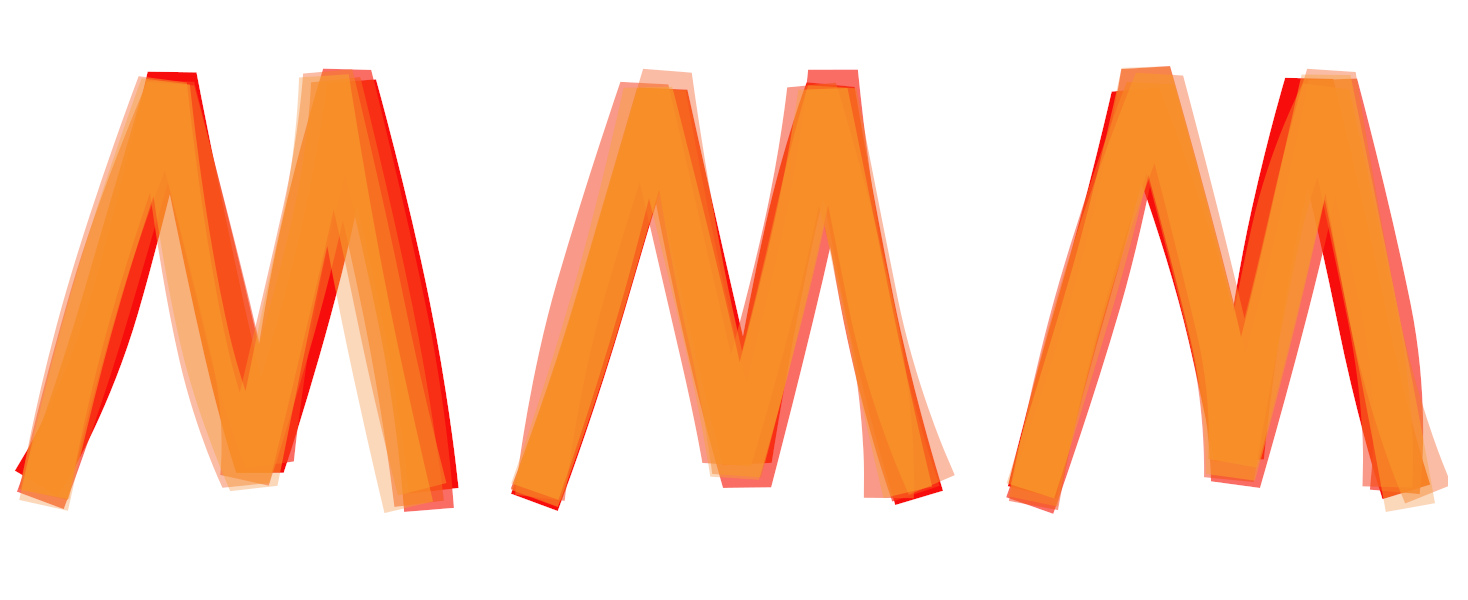
If you are a little underwhelmed by the wibble effect when using characters that use straight lines – such as with an uppercase ‘M’...
Image

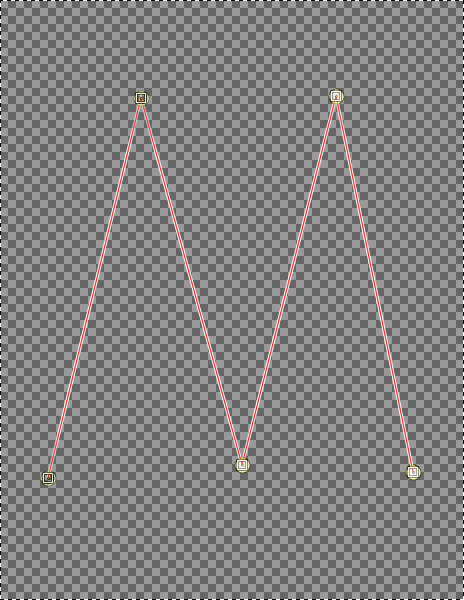
...it may be caused by using too few anchor points in the character path.
Image

I have a habit of using the bare minimum of anchors when creating custom paths – but this works less well when wibbling is required.
If you were to add additional anchors with the path tool by say clicking in the middle of each of the four straight path lines whilst holding down Ctrl before running the filter...

Image

…it would produce a more pleasing outcome (IMHO).
Image

Tab 2 Gradient options

By default the filter uses colours from the full range of the colours in the gradient in an ordered way; if the gradient begins with a dark colour then the filter will use a darker colour for its first layer and move on for each new temporary path using a lighter colour.

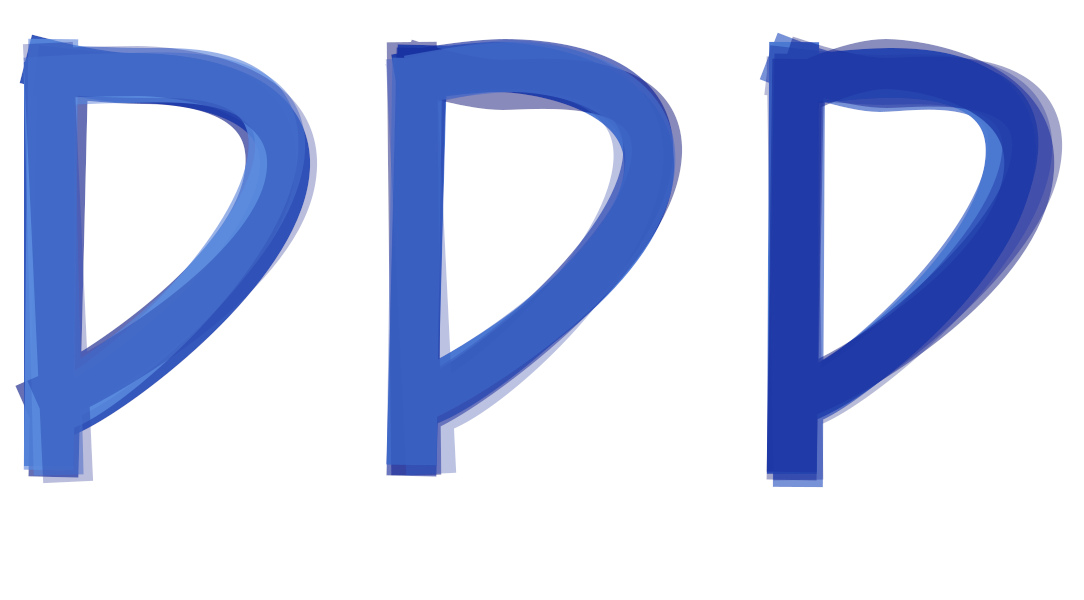
There are options on Tab 2 to use the gradient colours in a random way…
Image

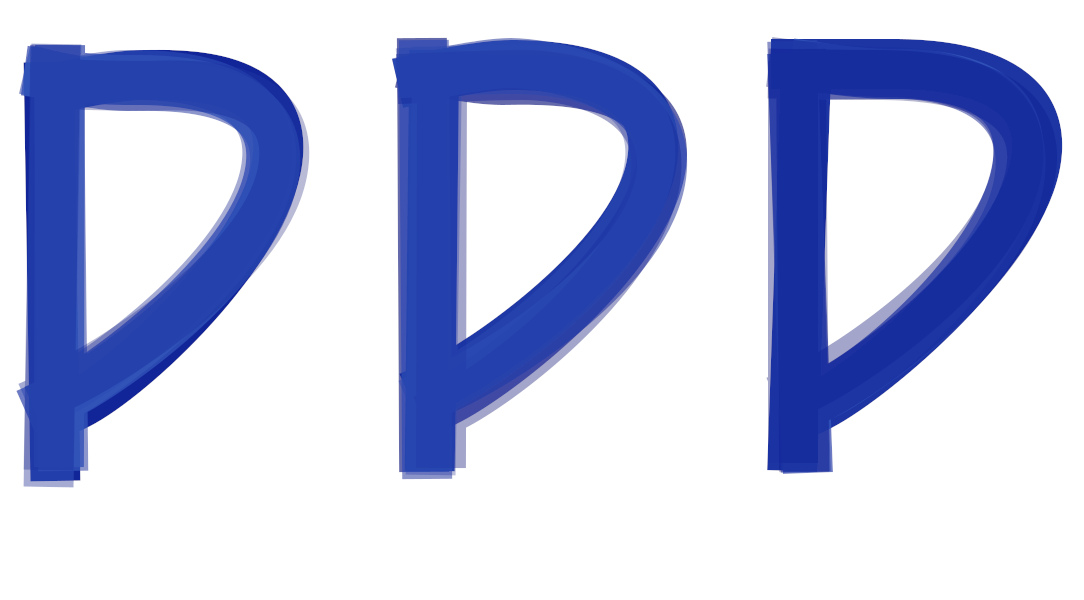
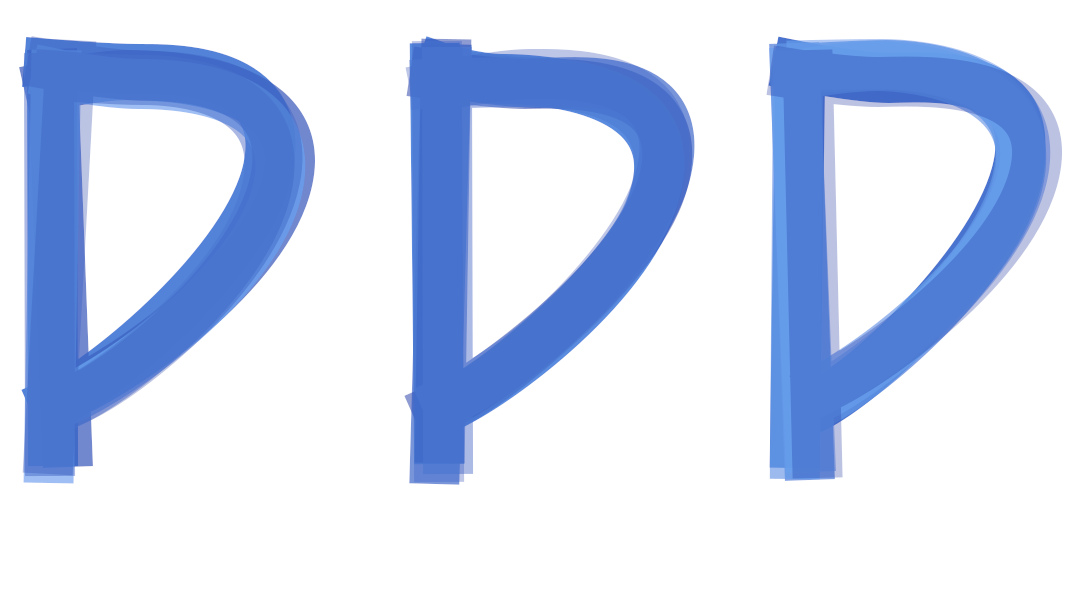
and to weight the choice of colour to either the first or second half of the gradient.

In the case of the gradient used above it would use darker colours for the first half…
Image

...and lighter colours for the second.
Image

There is also a ‘Reverse gradient’ option to experiment with.

4. Using brushes

This section deals with the two options intended for stroking character paths with brushes that paint objects or patterns along a path rather than those that paint with colour. The brushes may contain single objects or several objects (i.e. animated or pipe brushes).

Select a brush from the Gimp brushes dock. Test it on a single character path – since I have found that one or two brushes do not work with the filter and produce empty layers – to find the best brush spacing value. The path width, which determines the brush size used in Wibbler, influences the effect of the currently used brush spacing value.

There are two options that can be employed from the ‘Brush options’ drop-down menu on the second tab of the filter dialog.
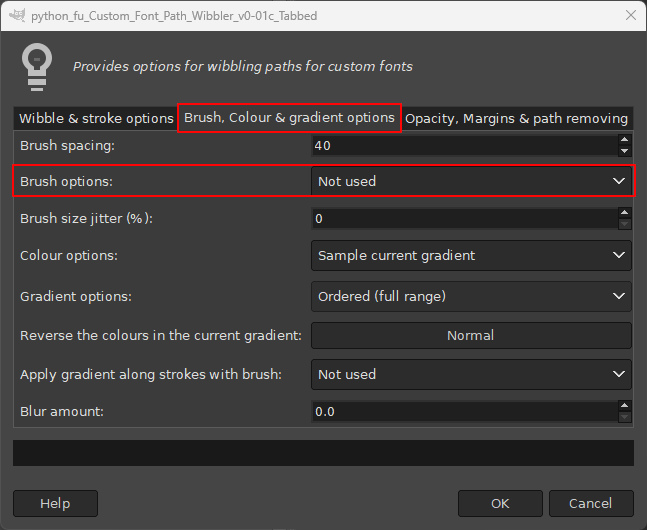
Image

Track direction

This option forces the brush to follow the direction of the path stroke. In my example I wanted the tiles in a mosaic tile brush to appear to just touch each other. Initially the brush spacing value was too small – the image below shows my attempts at reaching a successful outcome.
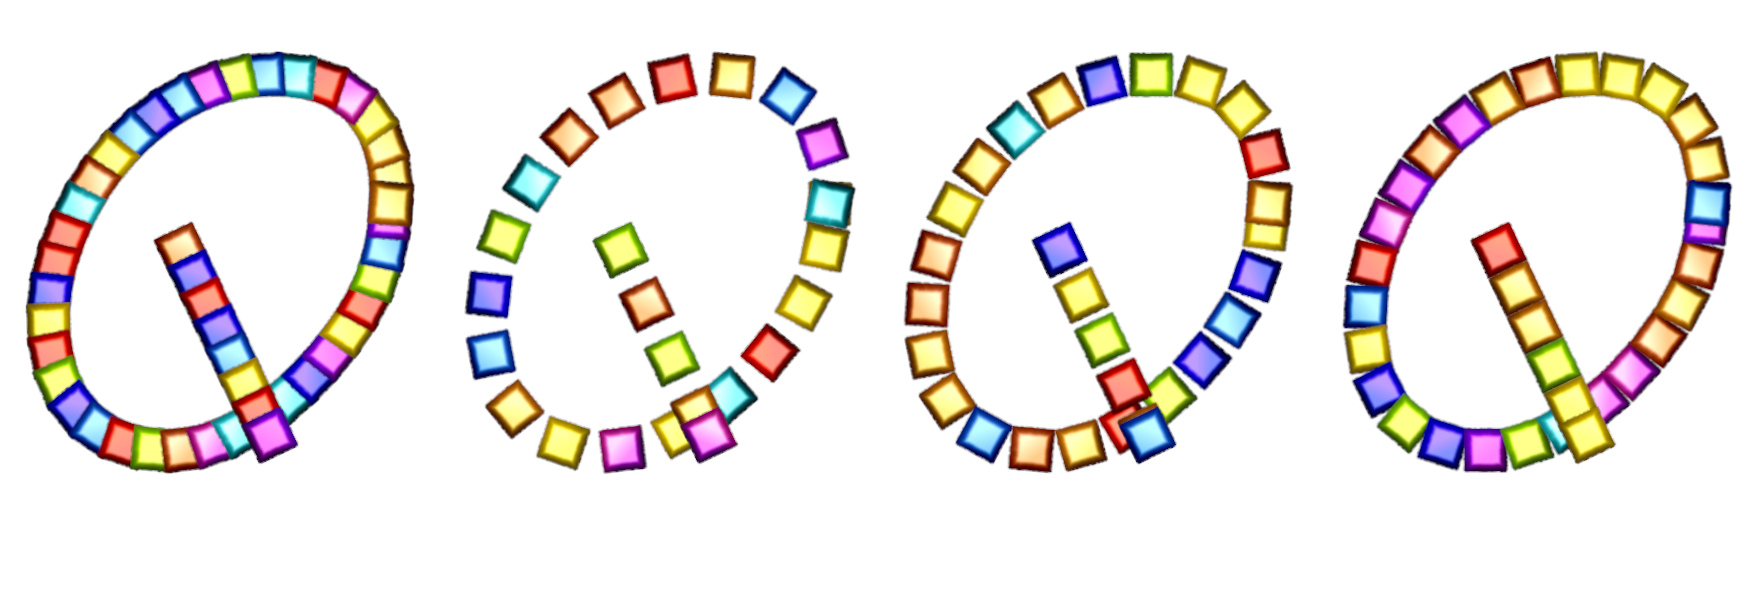
Image

Some examples of different brushes used with track direction.

Image

Random Brush Angle


This brush option was initially intended for use with naturalistic styled brushes to combine the results with other custom font bases but there are also many abstract brushes that produce excellent results.

The following examples show brushed characters combined with a line stroked character.

An example without using the rotation option:
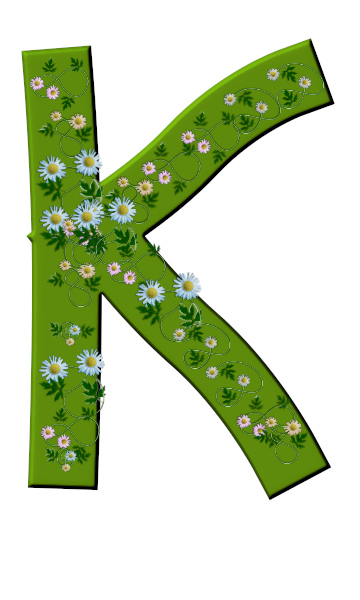
Image

And with rotation:

Image

And with the additional use of the brush size jitter option.
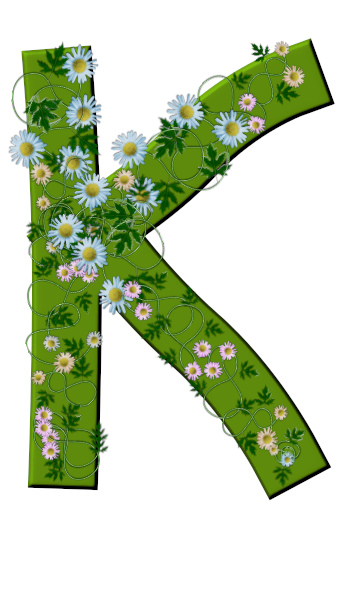
Image

An example of a final form: A 3d version of the stroked characters combined with a brushed floral layer and drop shadow:

Image

5. Other options

Stroke along path

There is an option to stroke a character with the brush and spread the gradient colour along each stroke of the character path or along the whole character path.

Image

Image

Stroking non-character paths

The older Wobbler filter required the renaming of paths (i.e paths that did not end with ‘ char’ or ‘ path’) but Wibbler provides an option on Tab 3 of the dialog to use these paths.

Image

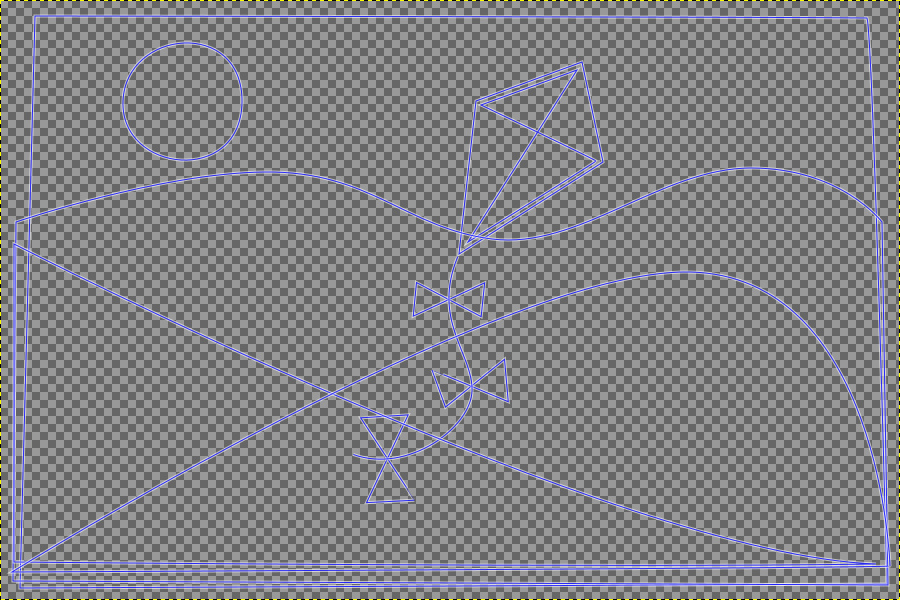
You can select an option to fill or to not fill all the available paths (although paths that are not closed will never be filled). Take the four paths shown below:

Image

The default option will apply the filter to custom paths only (adding a space character) and ignore the other paths.

Image

The second option, ‘All paths and fill’, will fill non-custom paths where appropriate.

Image

The third option, ‘All paths and no fill’, will stroke non-custom paths.

Image

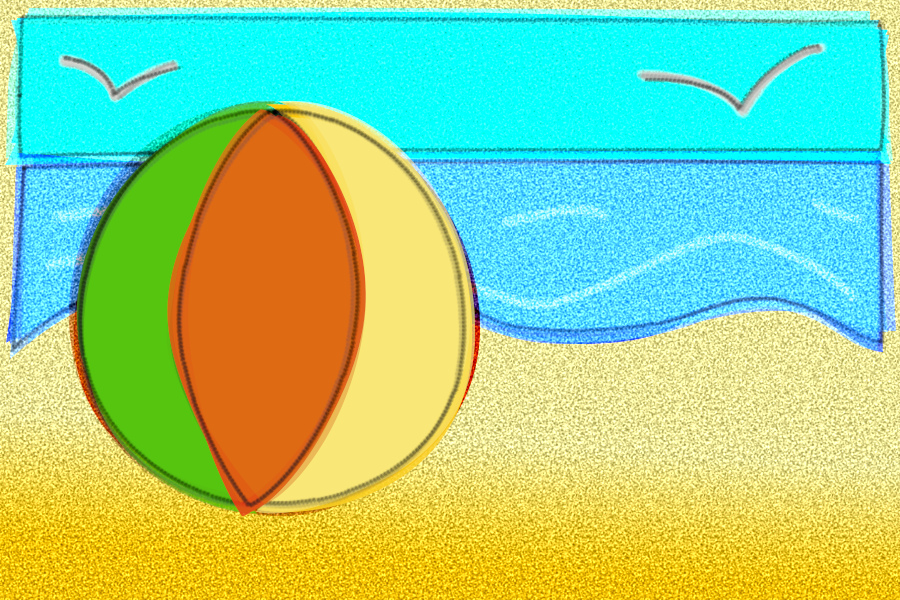
Quite interesting images can be built up by stroking/filling ordinary paths with the filter:
Image

See the separate guide for more information about using Wibbler to create images.

_________________
Image
"Let no one steal your dreams."
Paul Cookson

Custom Font Links
2.10 Tools
Character Paths
White Bases


Last edited by Skinnyhouse on Mon Jan 26, 2026 4:11 am, edited 2 times in total.

Share on Facebook Share on Twitter Share on Orkut Share on Digg Share on MySpace Share on Delicious Share on Technorati
Top
 Post subject: Re: Custom Font Wibbler v0.1c Tabbed for Gimp 2.10
PostPosted: Mon Jan 26, 2026 3:18 am  (#2) 
Offline
GimpChat Member
User avatar

Joined: Mar 01, 2014
Posts: 14113
Location: Spain, Aragón
Congratulations Skinnyhouse on this new work you've done. A tool that offers so many possibilities is an impressive achievement. :jumpclap
I appreciate the time and patience you invested in creating it. :coolthup

I'll start practicing it to see if I can get good results. Your guide will be great help to understand each option.

Thank you very much.

_________________
Image

Gimp 2.10.30(samj) portable _ OS Windows 10 Home_ 64bits
Don’t be afraid to start over. It’s a new chance to rebuild what you want.


Top
 Post subject: Re: Custom Font Wibbler v0.1c Tabbed for Gimp 2.10
PostPosted: Mon Jan 26, 2026 4:14 am  (#3) 
Offline
GimpChat Member
User avatar

Joined: Aug 08, 2016
Posts: 2855
Location: East Midlands of England
Always grateful for your support Issa.
:tyspin

Have finished updating post#1 and placed some resources near the top that may be of use.

_________________
Image
"Let no one steal your dreams."
Paul Cookson

Custom Font Links
2.10 Tools
Character Paths
White Bases


Top
 Post subject: Re: Custom Font Wibbler v0.1c Tabbed for Gimp 2.10
PostPosted: Mon Jan 26, 2026 5:15 am  (#4) 
Offline
GimpChat Member
User avatar

Joined: Aug 08, 2016
Posts: 2855
Location: East Midlands of England
Here is a guide to using Wibbler when creating stylized images. It illustrates the steps that I used when making a simple kite scene.

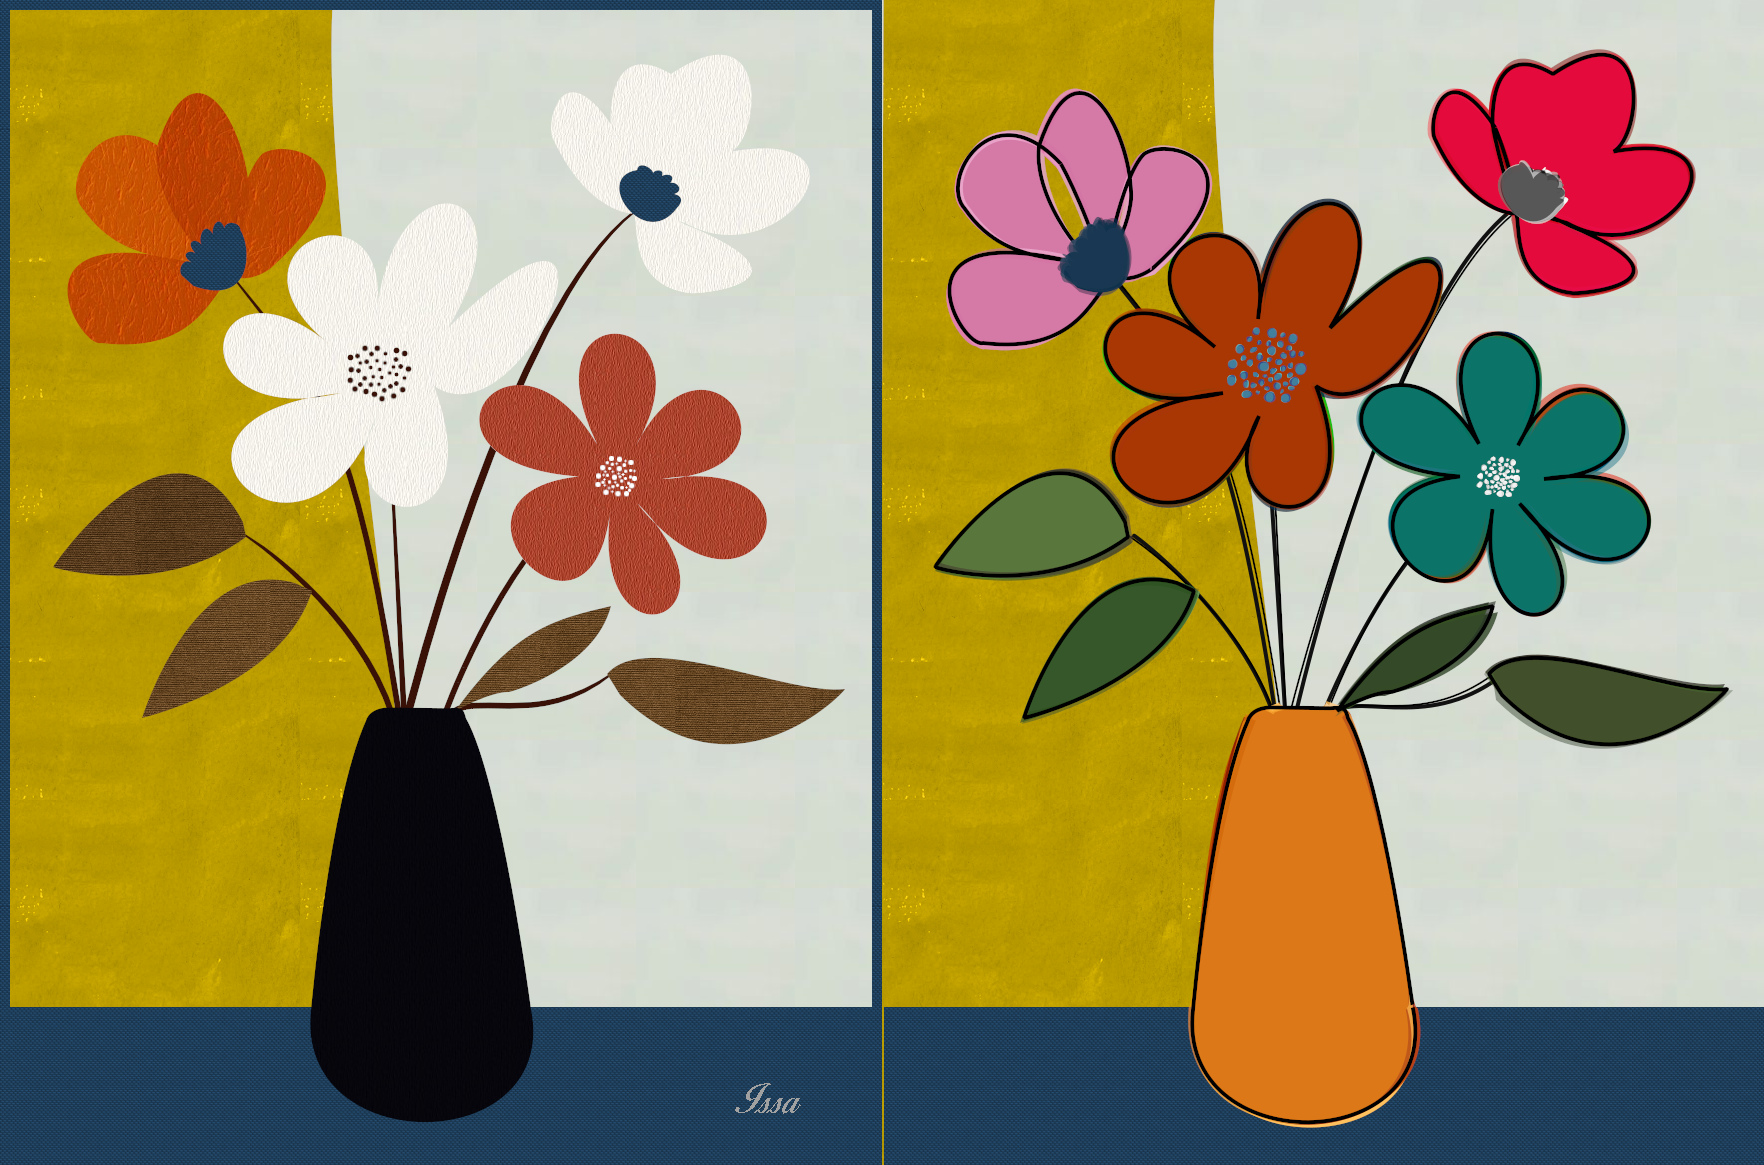
I have placed two xcf files in the resources folder which you could make use of, but if you want other sources of paths for images then Issabella has generously uploaded the path files for her boho style thread 'Landscapes and Shapes': A perfect place to gather suitable path resources.
Attachment:
Resources.7z [606.21 KiB]
Downloaded 71 times


A pdf version of this guide:

Attachment:
PictureMakingWibbler.pdf [786.24 KiB]
Downloaded 110 times


The stroked paths...

Image

With a few adjustments you can easily create other variations.

Image

Things to bear in mind when making pictures:

The wibble factor adds variation to the path shape - bigger paths can take more wibble.
Increase the number of temporary paths used to apply a wider range of colours taken from the current gradient.
Increase the value used for ‘Reduce the stroke width’ (this also affects the size of filled areas) to add variety – once again bigger paths can take larger values.
Use the random gradient options often produces better results.
Work from back to the foreground objects when applying fills or lines to your paths.
It can save time if you apply the filter to a number of paths that will use the same colour.

My workflow for the kite scene:

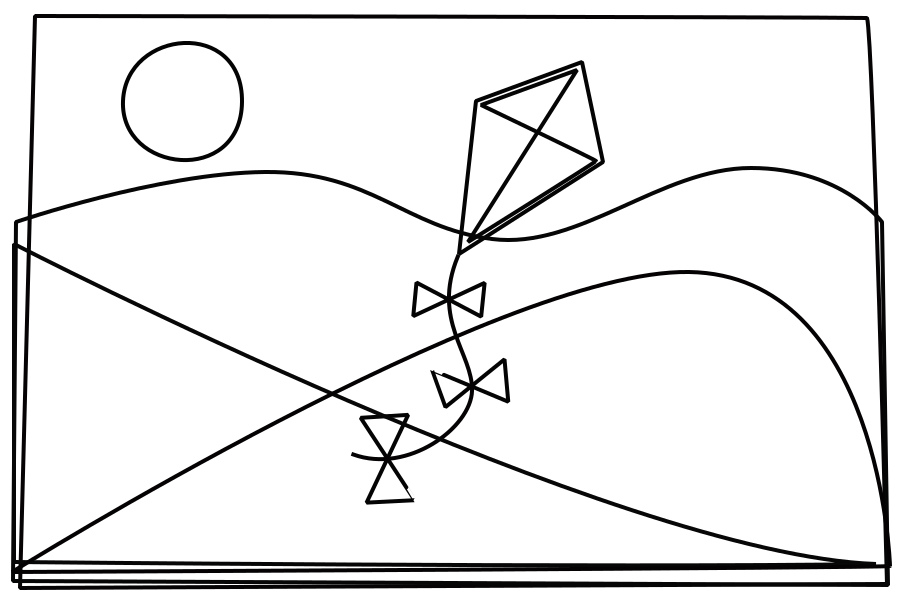
1) Create a new image and add a set of paths with the path tool (obviously) and save it. This will act as the source image:

Image

2) Create another new image (same dimensions) and add a suitable background. Think of this as the destination image:

Image

3) Starting at the back of the image, copy the sky rectangle path and paste that path to the new image. Select the colours to use as the foreground and background colours with the default FG to BG (RGB) gradient tool.

4) Open the Wibbler filter dialog and use the following values/options:

Tab 1
Amount of wibble: 12
Tie adjustments to: Path anchors and handles
Reduce fill width: 20
Number of Temporary paths: 7
Tab 2
Gradient options: Ordered (full range)
Tab 3
Apply to: All paths and fill

Click on the ‘OK’ button on the filter dialog (to run the filter). N.B. All paths will
be deleted by default after stroking.

Image

Use undo if you are not happy with the results and need to enter different values.

5) Create another new image – think of this as a temporary image. Return to the source image to copy the two hills paths across to the temporary image. Select a light and a dark green for the foreground and background colours in Gimp.


6) Open the Wibbler filter dialog and use the following values/options:

Tab 1
Amount of wibble: 12
Tie adjustments to: Path anchors and handles
Reduce fill width: 5
Number of Temporary paths: 7
Tab 2
Gradient options: Random (full range)
Tab 3
Apply to: All paths and fill

7) Copy each of the layers and paste them as new layers into the destination image.

Image

Delete these two layers from the temporary image.

8) Copy the next path (horizon) from the source image to the temporary image and select a new greens for the foreground and background colours.

Run the filter again with the same options as in Step 7.


9) Copy this layer and paste it as a new layer into the destination image. Re-order the layer to position this horizon layer below the hills layers.

Image

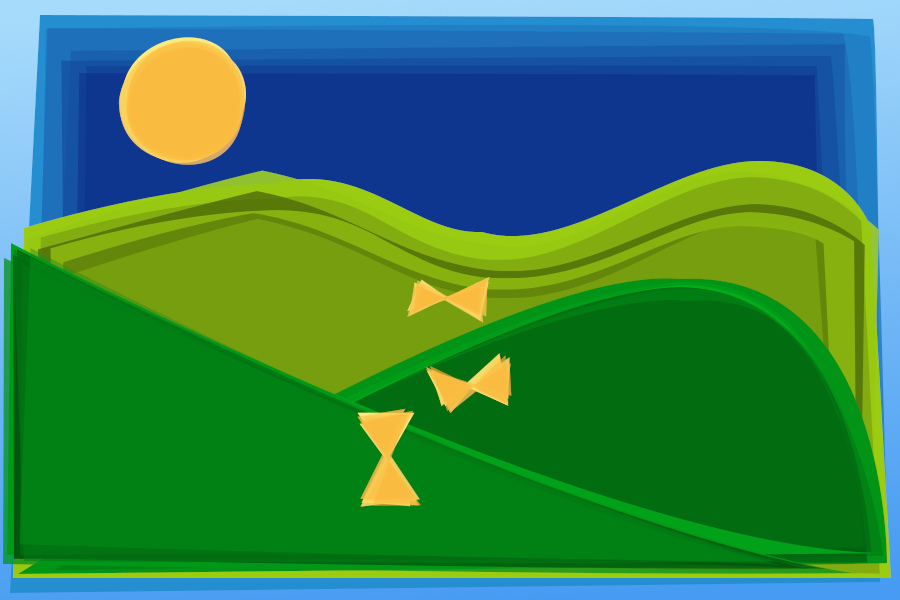
10) Select shades of sunny yellow for the Gimp foreground and background colours then copy and paste the two paths that can be stroked in shades of yellow – the sun and ribbons on the kite – to the temporary image after removing the existing temporary layer.

11) Call up the filter dialog. These are smaller path objects so adjust the values accordingly.

Tab 1
Amount of wibble: 6
Tie adjustments to: Path anchors and handles
Reduce fill width: 0
Number of Temporary paths: 7
Tab 2
Gradient options: Random (full range)
Tab 3
Apply to: All paths and fill

12) Copy and paste the two layers into the destination image (and then delete them from the temporary image).

Image

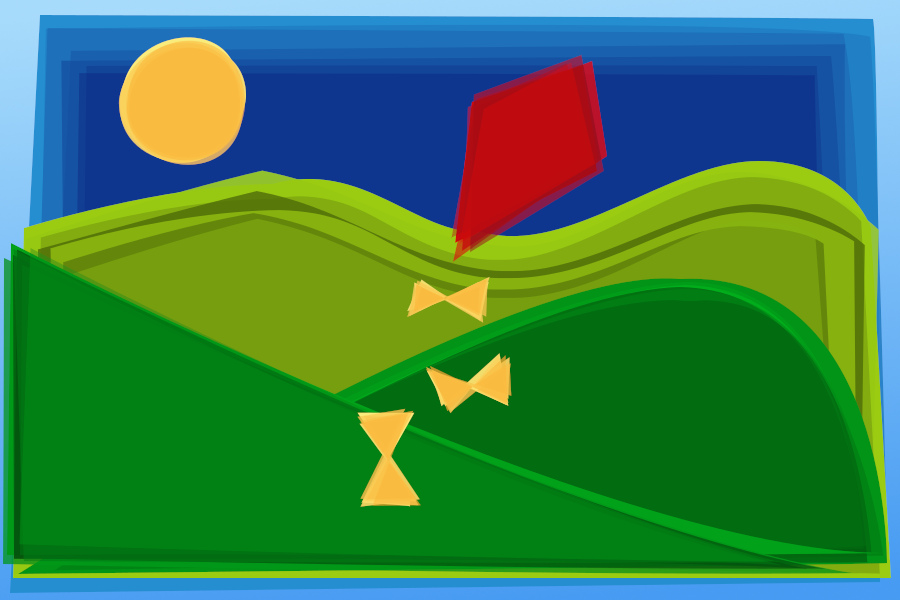
13) Change Gimp’s foreground and background colours to shades of red then copy and paste the kite path from the source image to the temporary image.

Call up the filter:

Tab 1
Amount of wibble: 6
Tie adjustments to: Path anchors and handles
Reduce fill width: 2
Number of Temporary paths: 7
Tab 2
Gradient options: Random (full range)
Tab 3
Apply to: All paths and fill

Copy the layer and paste it to the destination image and delete it from the temporary image.

Image

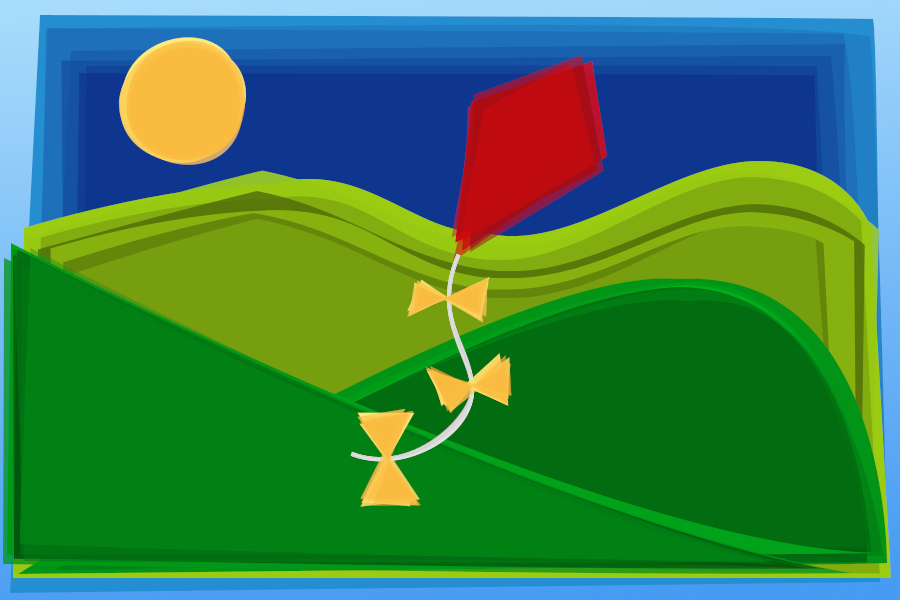
14) Change Gimp’s foreground and background colours to shades of white and light grey then copy and paste the bow string path from the source image to the temporary image.

Call up the filter:

Tab 1
Amount of wibble: 6
Tie adjustments to: Path anchors and handles
Reduce stroke width: 0
Stroke width: 4
Number of Temporary paths: 4
Tab 2
Gradient options: Random (full range)
Tab 3
Apply to: All paths and no fill

Copy the layer and paste it to the destination image and delete it from the temporary image. Raise or lower the position of this string layer so that it sits below the kite and ribbons.

Image

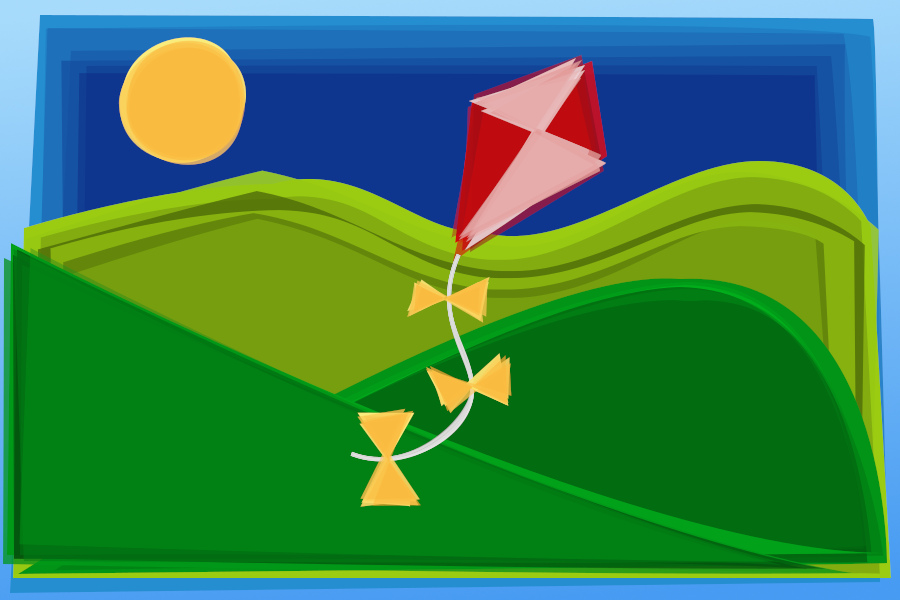
Copy and paste the kite pattern from the source image to the temporary image. Use shades of pink for the foreground and background colours,

Call up the filter:

Tab 1
Amount of wibble: 6
Tie adjustments to: Path anchors and handles
Reduce fill width: 2
Number of Temporary paths: 7
Tab 2
Gradient options: Random (full range)
Tab 3
Apply to: All paths and fill

Copy the layer and paste it to the destination image and delete it from the temporary image. Check if the layer is in the correct order i.e. above/in front of the string layer.

Image

Adding the lines...

Set the foreground/background colour to blacks and return to the source image. Use the following values for the filter:

Tab 1
Amount of wibble: 4
Tie adjustments to: Path anchors and handles
Reduce stroke width: 0
Stroke width: 4
Number of Temporary paths: 1
Tab 2
Gradient options: Ordered (full range)
Tab 3
Apply to: All paths and no fill

Hit ‘OK’.

Image

Delete the lined layer for the sky area (optional).

There are two options for applying the lined layers to the destination image: Copy each layer from the source image to the destination image or save the image and use ‘Open as Layers’ from the destination image to add the lined layers in one go.

Re-order layers if necessary.

Image

Have fun...

_________________
Image
"Let no one steal your dreams."
Paul Cookson

Custom Font Links
2.10 Tools
Character Paths
White Bases


Top
 Post subject: Re: Custom Font Wibbler v0.1c Tabbed for Gimp 2.10
PostPosted: Mon Jan 26, 2026 11:55 am  (#5) 
Offline
GimpChat Member
User avatar

Joined: Jan 01, 2026
Posts: 571
How do you setup this in Gimp 3 if it will work in Gimp 3?
I'm new to gimp and it would be nice to post how to set up some of these things.
With some simple information like what they will and will not work with and what
to expect along with a image where it can be found in Gimp. I put it in my Plugin folder with the
name of the file as the folder name and it doesn't show up in Gimp.

Attachment:
grass field.jpg
grass field.jpg [ 1.32 MiB | Viewed 2531 times ]

Does that mean it's not going to work in Gimp 3? Can someone help me, I'm
trying to avoid being caught by that smart Cat again. But it looks like it might be hopeless.
It says it was created in 1997; it is getting kind of old.
Maybe it's not needed anymore because it's been replacement with something better.

_________________
Image
Gimp 3.2.4 with Nik Collection and G'mic-QT
Windows 11 Pro with 32 Gigs of RAM
Intel(R) Core(TM) Ultra 7
Previous Paint Shop Pro User v9 - 2023


Last edited by TeaMouse on Mon Jan 26, 2026 12:25 pm, edited 1 time in total.

Top
 Post subject: Re: Custom Font Wibbler v0.1c Tabbed for Gimp 2.10
PostPosted: Mon Jan 26, 2026 12:22 pm  (#6) 
Offline
GimpChat Member
User avatar

Joined: Aug 08, 2016
Posts: 2855
Location: East Midlands of England
It's for Gimp 2.10 TeaMouse and won't work in Gimp 3.0...

_________________
Image
"Let no one steal your dreams."
Paul Cookson

Custom Font Links
2.10 Tools
Character Paths
White Bases


Top
 Post subject: Re: Custom Font Wibbler v0.1c Tabbed for Gimp 2.10
PostPosted: Mon Jan 26, 2026 12:26 pm  (#7) 
Offline
GimpChat Member
User avatar

Joined: Jan 01, 2026
Posts: 571
Thank you.

_________________
Image
Gimp 3.2.4 with Nik Collection and G'mic-QT
Windows 11 Pro with 32 Gigs of RAM
Intel(R) Core(TM) Ultra 7
Previous Paint Shop Pro User v9 - 2023


Top
 Post subject: Re: Custom Font Wibbler v0.1c Tabbed for Gimp 2.10
PostPosted: Tue Jan 27, 2026 3:53 am  (#8) 
Offline
GimpChat Member
User avatar

Joined: Mar 01, 2014
Posts: 14113
Location: Spain, Aragón
Skinnyhouse, here my first try. It has been really funny the process and I appreciate much your talent and creativity to make this plug-in. :jumpclap
I'll play it as I love it. :hi5
Your PDF is really helpful. Much work :)
TeaMouse, I like your signature. :bigthup


Attachments:
butterfly-spring-air_Issa_Skinnyhouse-Tutorial.jpg
butterfly-spring-air_Issa_Skinnyhouse-Tutorial.jpg [ 281.84 KiB | Viewed 2474 times ]

_________________
Image

Gimp 2.10.30(samj) portable _ OS Windows 10 Home_ 64bits
Don’t be afraid to start over. It’s a new chance to rebuild what you want.
Top
 Post subject: Re: Custom Font Wibbler v0.1c Tabbed for Gimp 2.10
PostPosted: Tue Jan 27, 2026 6:17 am  (#9) 
Offline
GimpChat Member
User avatar

Joined: Aug 08, 2016
Posts: 2855
Location: East Midlands of England
Thought you might enjoy the fun Issa... :yes
Love the contribution. :kpix
Here's another one of yours that I used with different gradients and the random gradient option.
Lot of scope for using all those gradients lying around.

Image

_________________
Image
"Let no one steal your dreams."
Paul Cookson

Custom Font Links
2.10 Tools
Character Paths
White Bases


Top
 Post subject: Re: Custom Font Wibbler v0.1c Tabbed for Gimp 2.10
PostPosted: Tue Jan 27, 2026 7:03 am  (#10) 
Offline
Global Moderator
User avatar

Joined: May 16, 2010
Posts: 16152
A most excellent plug-in addition to Custom Font making Skinnyhouse. Congratulations on your success! :)
Also thank you for sharing it.

TeaMouse, you can install Gimp-2.10 along side of Gimp-3.0 with no problems usually. So that means you can join in on the artistic fun. New contributors are always welcome.

Unfortunately the Custom Font SCM plug-in has not been re-written for Gimp-3.0 and probably never will i am guessing. So that means you have to use each Custom Font, in Gimp-2.10. Because Gimp-3.0 will not open the older Gimp-2.10 workfiles. (XCF FILES)

_________________
Image


Top
 Post subject: Re: Custom Font Wibbler v0.1c Tabbed for Gimp 2.10
PostPosted: Wed Jan 28, 2026 4:06 am  (#11) 
Offline
GimpChat Member
User avatar

Joined: Aug 08, 2016
Posts: 2855
Location: East Midlands of England
Issa posted a problem she was having with a couple of cropped characters on the custom font thread.

This is an issue that can easily be fixed thankfully and is a result of the way in which the Wibbler, Wobbler and Paths to Layers plug-ins all calculate the margins for the characters.

The thing is I still do this myself - almost carried away with the pleasure of creating the character path!

The margins are worked out from the path anchor points on the most left-hand and most right hand position.

To put it right just add an extra point anchor with the path tool to the existing paths (Ctrl + click) and re-save the file. Job done!

Image

_________________
Image
"Let no one steal your dreams."
Paul Cookson

Custom Font Links
2.10 Tools
Character Paths
White Bases


Top
 Post subject: Re: Custom Font Wibbler v0.1c Tabbed for Gimp 2.10
PostPosted: Wed Jan 28, 2026 4:50 am  (#12) 
Offline
GimpChat Member
User avatar

Joined: Mar 01, 2014
Posts: 14113
Location: Spain, Aragón
How smart you are! Thank you so much. :clap

_________________
Image

Gimp 2.10.30(samj) portable _ OS Windows 10 Home_ 64bits
Don’t be afraid to start over. It’s a new chance to rebuild what you want.


Top
 Post subject: Re: Custom Font Wibbler v0.1c Tabbed for Gimp 2.10
PostPosted: Wed Jan 28, 2026 2:44 pm  (#13) 
Offline
GimpChat Member
User avatar

Joined: Aug 08, 2016
Posts: 2855
Location: East Midlands of England
Another hijack from Issa's thread...
To test out an option for tapering brushed line strokes in the next version...

Image

_________________
Image
"Let no one steal your dreams."
Paul Cookson

Custom Font Links
2.10 Tools
Character Paths
White Bases


Top
 Post subject: Re: Custom Font Wibbler v0.1c Tabbed for Gimp 2.10
PostPosted: Thu Jan 29, 2026 3:19 am  (#14) 
Offline
GimpChat Member
User avatar

Joined: Mar 01, 2014
Posts: 14113
Location: Spain, Aragón
I love the new look on it using Wibbler. Skinnyhouse :clap

_________________
Image

Gimp 2.10.30(samj) portable _ OS Windows 10 Home_ 64bits
Don’t be afraid to start over. It’s a new chance to rebuild what you want.


Top
 Post subject: Re: Custom Font Wibbler v0.1c Tabbed for Gimp 2.10
PostPosted: Sun Feb 01, 2026 3:41 am  (#15) 
Offline
GimpChat Member
User avatar

Joined: Mar 01, 2014
Posts: 14113
Location: Spain, Aragón
I miss the brushed line strokes. :)


Attachments:
Playing with_Wibbler_Issa.jpg
Playing with_Wibbler_Issa.jpg [ 143.62 KiB | Viewed 2114 times ]

_________________
Image

Gimp 2.10.30(samj) portable _ OS Windows 10 Home_ 64bits
Don’t be afraid to start over. It’s a new chance to rebuild what you want.
Top
Post new topic Reply to topic  [ 15 posts ] 

All times are UTC - 5 hours [ DST ]


* Login  


Powered by phpBB3 © phpBB Group