It is currently Fri Aug 14, 2026 8:31 am


All times are UTC - 5 hours [ DST ]


Post new topic Reply to topic  [ 12 posts ] 
Author Message
 Post subject: Gmic- GRAPHIC BOOST
PostPosted: Sun Jan 09, 2011 5:21 pm  (#1) 
Offline
GimpChat Member

Joined: Apr 12, 2010
Posts: 5870
New version for Graphic Boost:

new default
changes in merging modes
added "SWAP layers" option for merging

Image
Graphic Boost by PhotoComiX, on Flickr

I planned the filter mainly for painting or illustration effects, often quite dramatic but they may be faded over the original for less extrem results

HOW TO USE

The filter is modular here what each module does

Image
Graphic Boost - controls by PhotoComiX, on Flickr


is for pre sharpen the original (more exactly a virtual copy of the original)
It uses a variant of unsharp mask that may enhance and darken the outlines


Image


Size = control the radius of the blurring using unsharp
Higher the value more intense the sharpening...and more chance to have color shift or create noise
Darken = control the intensity of the darkening ...too high values may create too thick and jaggy outlines


Image


this create a duplicate of the sharpened original and apply a filter, the gmic BW pencil
If you don't know that filter..is similar to a " Artistic" variant of a edge detection filter

controls are the same used in that filter

Size = the size of the pencil, the thickness of his line
Usually are not needed to high values, very low values can be a good start
Amplitude = harder to define the effect even if is strong, also here the most useful range is usually
between very low (not 0 ,but close) and low values

3° (optional)

Image


This allow to smooth the pencil layer,
use GREYCstoration aka Anisotropic Smoothing:
will smooth the image but following the image structure and respecting the edges.

Control

Activate Pencil Smoother
= activate or disactivate all other controls of this modulo

Pencil Smoother Sharpness = Set the treashould for the egdes to be respected
what below that values would be smoothed
Pencil Smoother Edge Protection = "Anisotropy" would be more correct, apply the blur following the image structure
Higher the values more the blur is forced to follow the image structure
Pencil Smoother Smootness = The quantity of blur, higher the values more intense the blur

The smoothing is only applied to the "pencil" layer and even with dramatic setting will not blur the original


Image


It is to chose how merge the 2 layers

SWAP layers position = Swap the position of the 2 "virtual" layers before merging
this change the effect of the Merging Option and of the Intensity slider:
at 100% Intensity (= Opacity ) a few modes give same result even with swapped layers,
but when opacity is lowered using the Intensity slider, the layer position become ALWAYS relavant, and "SWAP" may give a dramatic change

Chose Merging = to chose the merging mode

Intensity = basically correspond to the opacity slider for merging mode
Lowering from 100% will fade the effect on the original OR on the effect layer (to change what in the BG use SWAP )

5° optional

Image


option for a final smoothing
The command are identical to 3° MODULO but the effect is now applied to the combination

#########################################################################

below (or here http://pastebin.com/AU0ehMvE ) the code
(for How To use see viewtopic.php?f=9&t=978 )

########################################################################
#@gimp Graphic_Boost : gimp_boost1, gimp_boost1(0)
#@gimp : sep = separator ()
#@gimp : note = note("Unsharp Mask controls")
#@gimp : Radius = float(1.25,0,20)
#@gimp : Darken = float(1.50,0,10)
#@gimp : sep = separator()
#@gimp : note = note("BW_Pencil Controls")
#@gimp : Pencil Size = float(0.15,0,4)
#@gimp : Pencil Amplitude = float(14,0,200)
#@gimp : sep = separator ()
#@gimp : Activate "Pencil Smoother" = bool(false)
#@gimp : note = note(" If unchecked the 3 sliders below are disabled ")
#@gimp : Pencil Smoother Sharpness = float(0.5,0,2)
#@gimp : Pencil Smoother Edge Protection = float(0.45,0,1)
#@gimp : Pencil Smoother Smoothness = float (0.78,0,10)
#@gimp : sep = separator ()
#@gimp : note = note("Merging Options")
#@gimp : SWAP layers = bool (True)
#@gimp : note = note (""Swap" change the effect of Merging and Intesity")
#@gimp : Merging Option = choice( Hard Light, Multiply,Color Burn ,Overlay ,Value, Darken ,Stamp )
#@gimp : Intensity = float(1,0,1)

#@gimp : sep = separator ()
#@gimp : Add Painter's Touch = bool(true)
#@gimp : note = note("If unchecked the 3 sliders below are disabled")
#@gimp : sep = separator ()
#@gimp : Painter's Touch Sharpness = float(0.5,0,2)
#@gimp : Painter's Edge Protection Flow = float(0.45,0,1)
#@gimp : Painter's Smoothness =float(0.78,0,10)
#@gimp : sep = separator(), note = note("<small>Author : <i>PhotoComiX</i>. Last update : <i>2011/1/10 </i>.</small>")
#@gimp : note = link("Filter explained here","http://www.gimpchat.com/viewtopic.php?f=9&t=775")

gimp_boost1 :
-repeat @# -l[$>] -split_opacity -l[0]
-gimp_unsharp 1,$1,30,3,0,$2,0.40,1,0,0,0
--gimp_pencilbw $3,$4,0,0,0
-if {$5==0} -gimp_do_nothing[1] -elif {$5==1} -gimp_anisotropic_smoothing[1] 60,$6,$7,$8,1.1,0.8,30,2,0,1,1,0,1,0 -endif
-if {$9==0} -gimp_do_nothing -elif {$9==1} -reverse[-1,-2] -endif
# Hard Light, Multiply,Color Burn ,Overlay ,Value, Darken ,Stamp )
-if {$10==0} -gimp_compose_hardlight[1,0] $11
-elif {$10==1} -gimp_compose_multiply[1,0] $11
-elif {$10==2} -gimp_compose_colorburn[1,0] $11
-elif {$10==3} -gimp_compose_overlay[1,0] $11
-elif {$10==4} -gimp_compose_value[1,0] $11
-elif {$10==5} -gimp_compose_darken[1,0] $11
-elif {$10==6} -gimp_compose_stamp[1,0] $11 -endif
-if {$12==0} -gimp_do_nothing -elif {$12==1} -gimp_anisotropic_smoothing 60,$13,$14,$15,1.1,0.8,30,2,0,1,1,0,1,0 -endif
-endl -a c -endl -done

################################################################################

_________________
My 3D Gallery on Deviantart http://photocomix2.deviantart.com/
Main gallery http://www.flickriver.com/photos/photocomix-mandala/
Mandala and simmetry http://www.flickriver.com/photos/photocomix_mandala/

Image

Mrs Wilbress


Last edited by PhotoComix on Tue Feb 08, 2011 6:52 am, edited 14 times in total.

Share on Facebook Share on Twitter Share on Orkut Share on Digg Share on MySpace Share on Delicious Share on Technorati
Top
 Post subject: Re: Gmic- GRAPHIC BOOST - How To & Preset Gallery
PostPosted: Sun Jan 09, 2011 10:30 pm  (#2) 
Offline
GimpChat Member

Joined: Apr 12, 2010
Posts: 5870
A TIP

i suggest to modify the output option (under the preview window) from default to "New layer" or "New active layer"
that will preserve always the original
and allow to keep trace of what done(the setting used as somehow saved in the layer name, but that would no help anymore if tyou use several filter on same layer )

PRESET GALLERY

To give some starting point to experiment here some examples of before after and relative preset


1) PORTRAIT DRAMA

I suggest if you want use on a close up to work on bigger size possible and then scale down about 50%

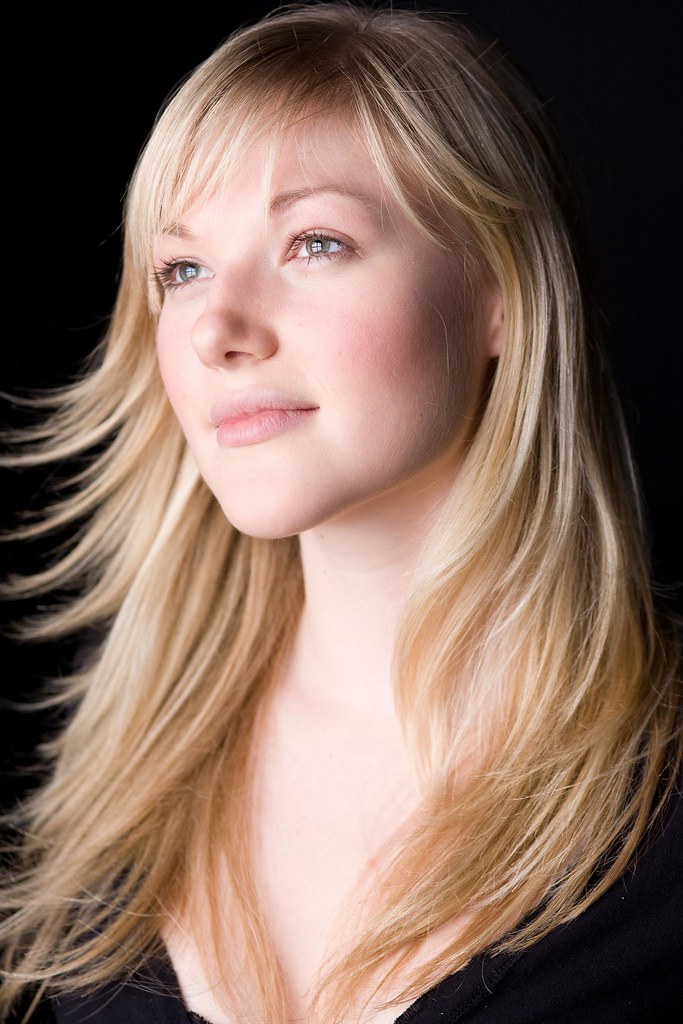
ORIGINAL

Image
Stay Golden by inorman88, on Flickr

Image
Portrait_drama-res by PhotoComiX, on Flickr

Image
pranav 2_000003 by PhotoComiX, on Flickr


Image
Portrait drama by PhotoComiX, on Flickr

Image
Meerkat at North Carolina Zoo by jimbowen0306, on Flickr

Image
Mekraat_Portrait drama by PhotoComiX, on Flickr

Image
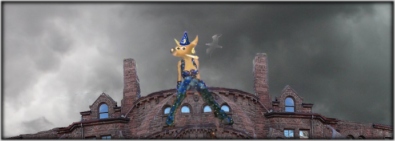
Plaza de la Mercè, Barri Gòtic / Spain, Barcelona by flydime, on Flickr

Attachment:
street portrait drama.jpg
street portrait drama.jpg [ 589.26 KiB | Viewed 6633 times ]


PRESET
{GB- portarait drama}{Graphic_Boost}{gimp_boost1}{gimp_boost1}{1.9802}{1.36364}{0.727273}{16.8317}{1}{0.254545}{0.842178}{5.36364}{0}{2}{0.963636}{0}{0.536364}{0.818182}{1.54545}
###############################################################
PS
i have problem to organize the material (to preserve the layer names when exporting the layer as png or jpg )
It is a nightmare match the images with the effect used, even if is recorded

i hope in some script script ,at least to extract all layers names from a xcf and save somewhere as text file

in the while i upladed a Mekraat.xcf here http://www.box.net/shared/sfslkllqoa with some effects

_________________
My 3D Gallery on Deviantart http://photocomix2.deviantart.com/
Main gallery http://www.flickriver.com/photos/photocomix-mandala/
Mandala and simmetry http://www.flickriver.com/photos/photocomix_mandala/

Image

Mrs Wilbress


Top
 Post subject: Re: Gmic- GRAPHIC BOOST - How To & Preset Gallery
PostPosted: Mon Jan 10, 2011 11:12 am  (#3) 
Offline
Global Moderator
User avatar

Joined: May 16, 2010
Posts: 16158
Thanks PC, these are fantastic filter effects. =)

_________________
Image


Top
 Post subject: Re: Gmic- GRAPHIC BOOST - How To & Preset Gallery
PostPosted: Mon Jan 10, 2011 6:36 pm  (#4) 
Offline
GimpChat Member

Joined: Apr 12, 2010
Posts: 5870
Actually i did a lot of presets but match the presets with the before/after images is really time wasting.
I am searching help to automatize, a simple variation of a a " export layers as Png (or jpg) "script would do the trick

Just by using the layer's names when saving
Save automatically in the same place of the opened image without requiring a dialog would be fine

manually is really a nightmare

_________________
My 3D Gallery on Deviantart http://photocomix2.deviantart.com/
Main gallery http://www.flickriver.com/photos/photocomix-mandala/
Mandala and simmetry http://www.flickriver.com/photos/photocomix_mandala/

Image

Mrs Wilbress


Top
 Post subject: Re: Gmic- GRAPHIC BOOST - How To & Preset Gallery
PostPosted: Mon Jan 10, 2011 11:29 pm  (#5) 
Offline
GimpChat Member

Joined: Aug 13, 2010
Posts: 23
thanks PC for all the details on what exactly your filter is doing.

_________________
My photostream: http://flickr.com/neychurluvr/ | I have plenty of CC licensed pictures for your use :-)


Top
 Post subject: Re: Gmic- GRAPHIC BOOST - How To & Preset Gallery
PostPosted: Fri Jan 14, 2011 9:19 am  (#6) 
Offline
GimpChat Member

Joined: Apr 12, 2010
Posts: 5870
Maybe the illustrations will disappear from message 2 for about 24h

Please be patient , i am working to organize the material but the first attempt was too messy
Now thank to Payneky (see viewtopic.php?f=9&t=978&start=30 ) i have the instruments to make order, so i will fix soon

_________________
My 3D Gallery on Deviantart http://photocomix2.deviantart.com/
Main gallery http://www.flickriver.com/photos/photocomix-mandala/
Mandala and simmetry http://www.flickriver.com/photos/photocomix_mandala/

Image

Mrs Wilbress


Top
 Post subject: Re: Gmic- GRAPHIC BOOST
PostPosted: Fri May 16, 2014 11:13 am  (#7) 
Offline
GimpChat Member
User avatar

Joined: Mar 10, 2014
Posts: 845
I find this old filter ( 2011) very interesting thank you PhotoComix!

Image

original:
Image


Top
 Post subject: Re: Gmic- GRAPHIC BOOST
PostPosted: Sat May 17, 2014 1:14 am  (#8) 
Offline
GimpChat Member
User avatar

Joined: Aug 30, 2012
Posts: 2174
Thanks for the filter update and the tutorial on how to use it.

_________________
Image


Top
 Post subject: Re: Gmic- GRAPHIC BOOST
PostPosted: Sun Jun 15, 2014 12:01 pm  (#9) 
Offline
New Member

Joined: Jun 15, 2014
Posts: 3
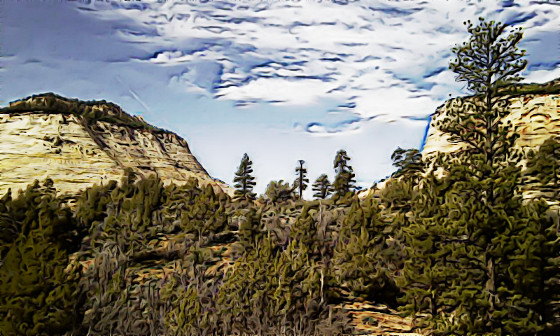
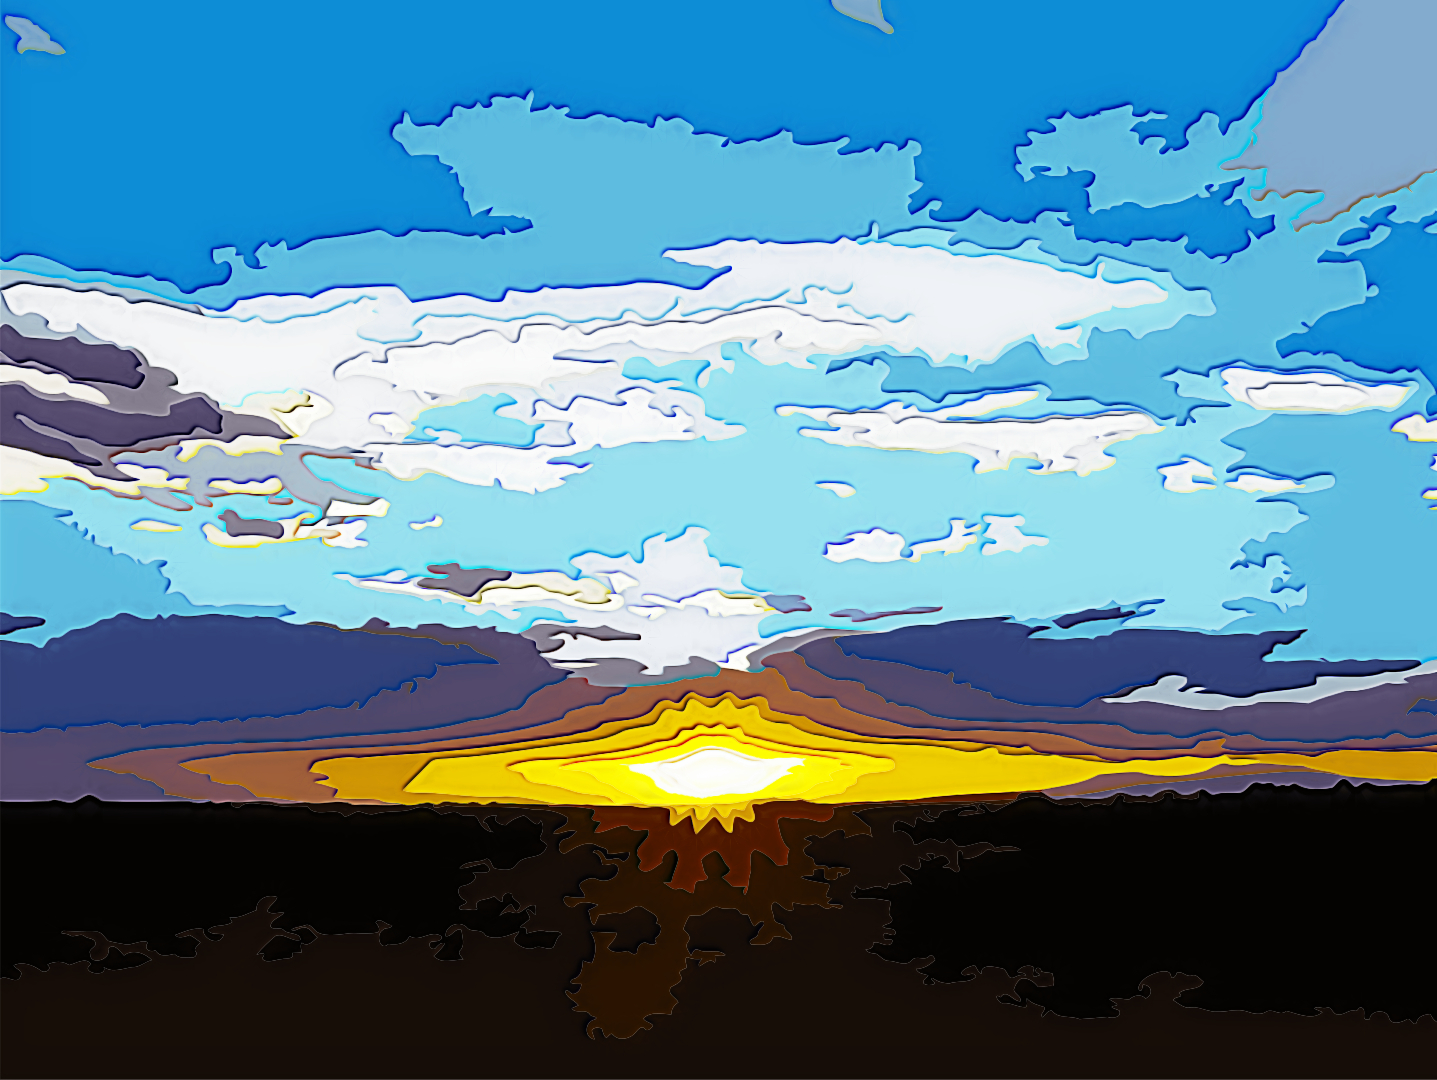
I have a question about scaling up graphic boost settings so that a desired effect in a small image file can be duplicated in a larger version of the same image. I like the effect using the default graphic boost settings applied to this 1437 x 1080 image:

Image

Now I would like to get the same effect in a 13000 pixel wide version of the same image. If I leave the settings as is and apply them to the larger image, I get this image:

Image

I tried scaling up some of the settings but it doesn't produce the desired effect.

Which settings should I change, and in what way, to get the same effect in the larger image?
TIA,
David


Top
 Post subject: Gmic GRAPHIC BOOST problem from command line
PostPosted: Mon Jun 16, 2014 2:48 pm  (#10) 
Offline
New Member

Joined: Jun 15, 2014
Posts: 3
I am running GIMP 2.8 on a Windows 7 64 bit box and have installed the G'MIC plugin v1.5.9.1 win32 version for Win 64 bit. I also downloaded the stand-alone G'MIC command line utility v1.5.9.2. in GIMP I get the G'MIC window and select Verbose (logfile) from the Output Messages dropdown. I select Graphic Boost and leave all of the default settings as is. After clicking Apply I inspect the logfile and find this:

[gmic_gimp]./apply/ -v -99 -gimp_graphic_boost4 1.25,2,0,0.15,14,0,1,0.5,0.45,2,0,1,0,1,1,1,0.5,0.45,1

Using this I compose this line of code in a command prompt window: (after changing the directory to the one containing the gmic.exe file):

gmic C:\Users\David\Desktop\Sunset\Tiles\myimagefile.bmp -gimp_graphic_boost4 1.25,2,0,0.15,14,0,1,0.5,0.45,2,0,1,0,1,1,1,0.5,0.45,1 -o C:\Users\David\Desktop\Sunset\Tiles\myimagefile2.bmp

I get this error message:
[gmic] *** Error in ./ *** Unknown command or filename '-gimp_graphic_boost4'

I have tried other G'MIC filters using this series of steps, with no problems.
What am I doing wrong?

David


Top
 Post subject: Re: Gmic- GRAPHIC BOOST
PostPosted: Wed Jun 18, 2014 4:23 pm  (#11) 
Offline
GimpChat Member
User avatar

Joined: Mar 15, 2014
Posts: 115
Location: Brooklyn, NY
Hello David,
G'MIC includes commands from various sources, and the repertoire of commands available to gmic when invoked from the command line is often not the same as those available to the interpreter when it is run from within gimp-gmic. In short, '-gimp_graphic_boost4' is known to the interpreter in the gimp-gmic environment, but not in the command line environment.
Fortunately, not a difficult problem to fix. Here is some general background information from the G'MIC wiki:

http://sourceforge.net/p/gmic/wiki/The%20command%20line%20behind%20the%20Gimp%20plug-in/#4-sometimes-it-doesnt-work

When you update your gimp-gmic plug-in, it downloads a .gmic source file named updatexxxx.gmic, where 'xxxx' is the current version number (1592 as of this writing). Linux users will find this in their home directories ($HOME/.updatexxxx.gmic); I don't have a Windows7 box handy at the moment, but I believe the target folder in your case would be your Application Data folder in your User directory. This file contains the complete gimp-gmic environment. To bring commands defined in that environment to your gmic command line session, use the -command (-m)
command. Your command line would look something like
C:\<stuff> >gmic -m <path-to-your-updatexxxx.gmic>/gmicxxxx.gmic -gimp_graphic_boost4' <parameters>
You can get diagnostics if you add the -debug command. If the interpreter is finding the command definition in its environment, you should see a line like this near the top of the stream (there will be a lot of lines in the stream!)
[gmic]-0./ Import custom commands from file <path to your application data>/updatexxxx.gmic'
<awful lot of stuff....>
<gmic>-0./ Found custom command 'gimp_graphic_boost4: <command implementation>
If you don't see "Found custom command..." then There Are Issues Of A Varied Sort mainly involving the updatexxxx.gmic itself not being found or not parsing correctly (highly unlikely, but possible).

Sorry I can't be more explanatory on the particulars of where the update file would be in your Windows environment. Perhaps others can chime in. Let us know if this helps in any way.

Garry


Top
 Post subject: Re: Gmic- GRAPHIC BOOST
PostPosted: Wed Jun 18, 2014 7:10 pm  (#12) 
Offline
New Member

Joined: Jun 15, 2014
Posts: 3
Great, thanks for the information.


Top
Post new topic Reply to topic  [ 12 posts ] 

All times are UTC - 5 hours [ DST ]


* Login  


Powered by phpBB3 © phpBB Group