It is currently Fri Sep 25, 2026 11:42 am


All times are UTC - 5 hours [ DST ]


Post new topic Reply to topic  [ 30 posts ]  Go to page Previous  1, 2
Author Message
 Post subject: Re: Christmas Holly
PostPosted: Wed Nov 19, 2014 10:43 am  (#21) 
Offline
GimpChat Member
User avatar

Joined: Apr 08, 2010
Posts: 5420
Location: Northwest Ohio
Not only a tutorial,I would really love to know if there is an explanation (with pics, lol, I'm not asking for much) of each slider and what higher and lower settings will do. Even when I play around, I forget what numbers did what.


Top
 Post subject: Re: Christmas Holly
PostPosted: Wed Nov 19, 2014 1:35 pm  (#22) 
Offline
GimpChat Member
User avatar

Joined: Apr 08, 2010
Posts: 5420
Location: Northwest Ohio
I tried this with some clip art, and it's easier than using a photo. The turkey came out as expected but not sure why the heart and star are blurry. They are brushes stamped on their own layer and then I used the same brl as I did on the clip art part. Any clue as to why they blurred? The brushes do not look blurred before the filter.
Image


Top
 Post subject: Re: Christmas Holly
PostPosted: Wed Nov 19, 2014 2:17 pm  (#23) 
Offline
GimpChat Member
User avatar

Joined: Apr 07, 2010
Posts: 14182
Nice job on figuring it out 2-ton.
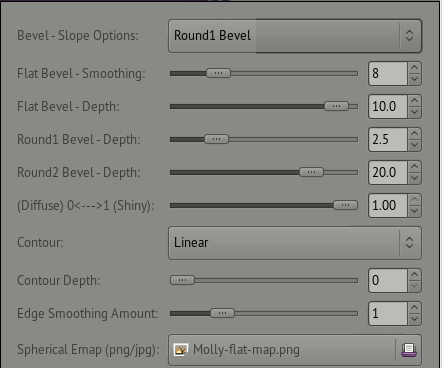
I made my hearts on a transparent layer, alpha to selection > shrink 2 or 3 run the script with these settings.
Image

round bevel2 > Round bevel depth 2.5
Image


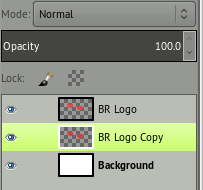
After you run the BRL, right click on your BR logo copy, click on the eye and alpha to selection,
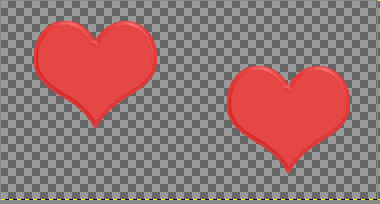
Use your color picker to select the red you used for the heart and fill that layer. You will notice sharper edges after you do that. You can merge the two or leave them, doesn't matter.

Then your hearts
Image

If you want smoother edges on your turkey, do the same thing, select and shrink 3 pixels or more, whatever works best.

_________________
Image


Top
 Post subject: Re: Christmas Holly
PostPosted: Wed Nov 19, 2014 3:03 pm  (#24) 
Offline
GimpChat Member
User avatar

Joined: Apr 08, 2010
Posts: 5420
Location: Northwest Ohio
Aha, I bet the brush edges were blurred so they wouldn't have jaggies. Next time I will shrink the selection. I still want to try to get better at using this process on photos.


Top
 Post subject: Re: Christmas Holly
PostPosted: Wed Nov 19, 2014 3:33 pm  (#25) 
Offline
GimpChat Founder
User avatar

Joined: May 22, 2008
Posts: 5241
Location: Gimpville
Wallace wrote:
I made some Christmas Holly. Using BRL on the berries and leaves.
Image

Nice! :bigthup

_________________
“If you reach for the stars, you just might land on a decently sized hill.” - Stuart Hill


Top
 Post subject: Re: Christmas Holly
PostPosted: Wed Nov 19, 2014 4:30 pm  (#26) 
Offline
GimpChat Member
User avatar

Joined: Apr 07, 2010
Posts: 14182
2-ton wrote:
Aha, I bet the brush edges were blurred so they wouldn't have jaggies. Next time I will shrink the selection. I still want to try to get better at using this process on photos.

2-ton, try doing one exactly like I showed you above and your will see the difference. You can edit>undo as many times as you want so keep changing the depth or any of the other settings until you are happy with it. Some things work better on larger images, some don't, It is all trial and error.

_________________
Image


Top
 Post subject: Re: Christmas Holly
PostPosted: Wed Nov 19, 2014 4:34 pm  (#27) 
Offline
GimpChat Member
User avatar

Joined: Apr 08, 2010
Posts: 5420
Location: Northwest Ohio
I think my computer is a little weak to overdo the undo too much! I also have a really hard time trying to make paths to fill with color. I always seem to have little dips where the different curve parts come together. I want a private tutor standing next to me as I work, lol.


Top
 Post subject: Re: Christmas Holly
PostPosted: Wed Nov 19, 2014 4:54 pm  (#28) 
Offline
GimpChat Member
User avatar

Joined: Apr 08, 2010
Posts: 5420
Location: Northwest Ohio
followed your instructions step by step...success, thanks Molly! This works well for single items, but I can see myself getting all mixed up when trying to do a somewhat complicated picture. I now see why the default is always blue...it's the major color on the default gradient, and that is what is used if I don't pick an e-map. And I still would love to see examples of what the sliders do without messing around for hours. I am impatient and lazy.

Image


Top
 Post subject: Re: Christmas Holly
PostPosted: Wed Nov 19, 2014 5:00 pm  (#29) 
Offline
GimpChat Member
User avatar

Joined: Apr 07, 2010
Posts: 14182
You have to set your fg and background to two different shades, double click the gradient and set it to fg to bg RGB

_________________
Image


Top
 Post subject: Re: Christmas Holly
PostPosted: Wed Nov 19, 2014 5:36 pm  (#30) 
Offline
GimpChat Member

Joined: Feb 28, 2014
Posts: 137
Thanks, Wallace. Before I replied, you'd supplied (but the page wasn't refreshed so I didn't see). Beveling I understand somewhat but never thought to use it on other things. Will have to play with this :).

_________________
Margaret McGaffey Fisk
steampunk, fantasy, science fiction, and romance author
Tales to Tide You Over


Top
Post new topic Reply to topic  [ 30 posts ]  Go to page Previous  1, 2

All times are UTC - 5 hours [ DST ]


* Login  


Powered by phpBB3 © phpBB Group