I used the
Path Tool 
.
To create a path,
around the icon's outer perimeter.
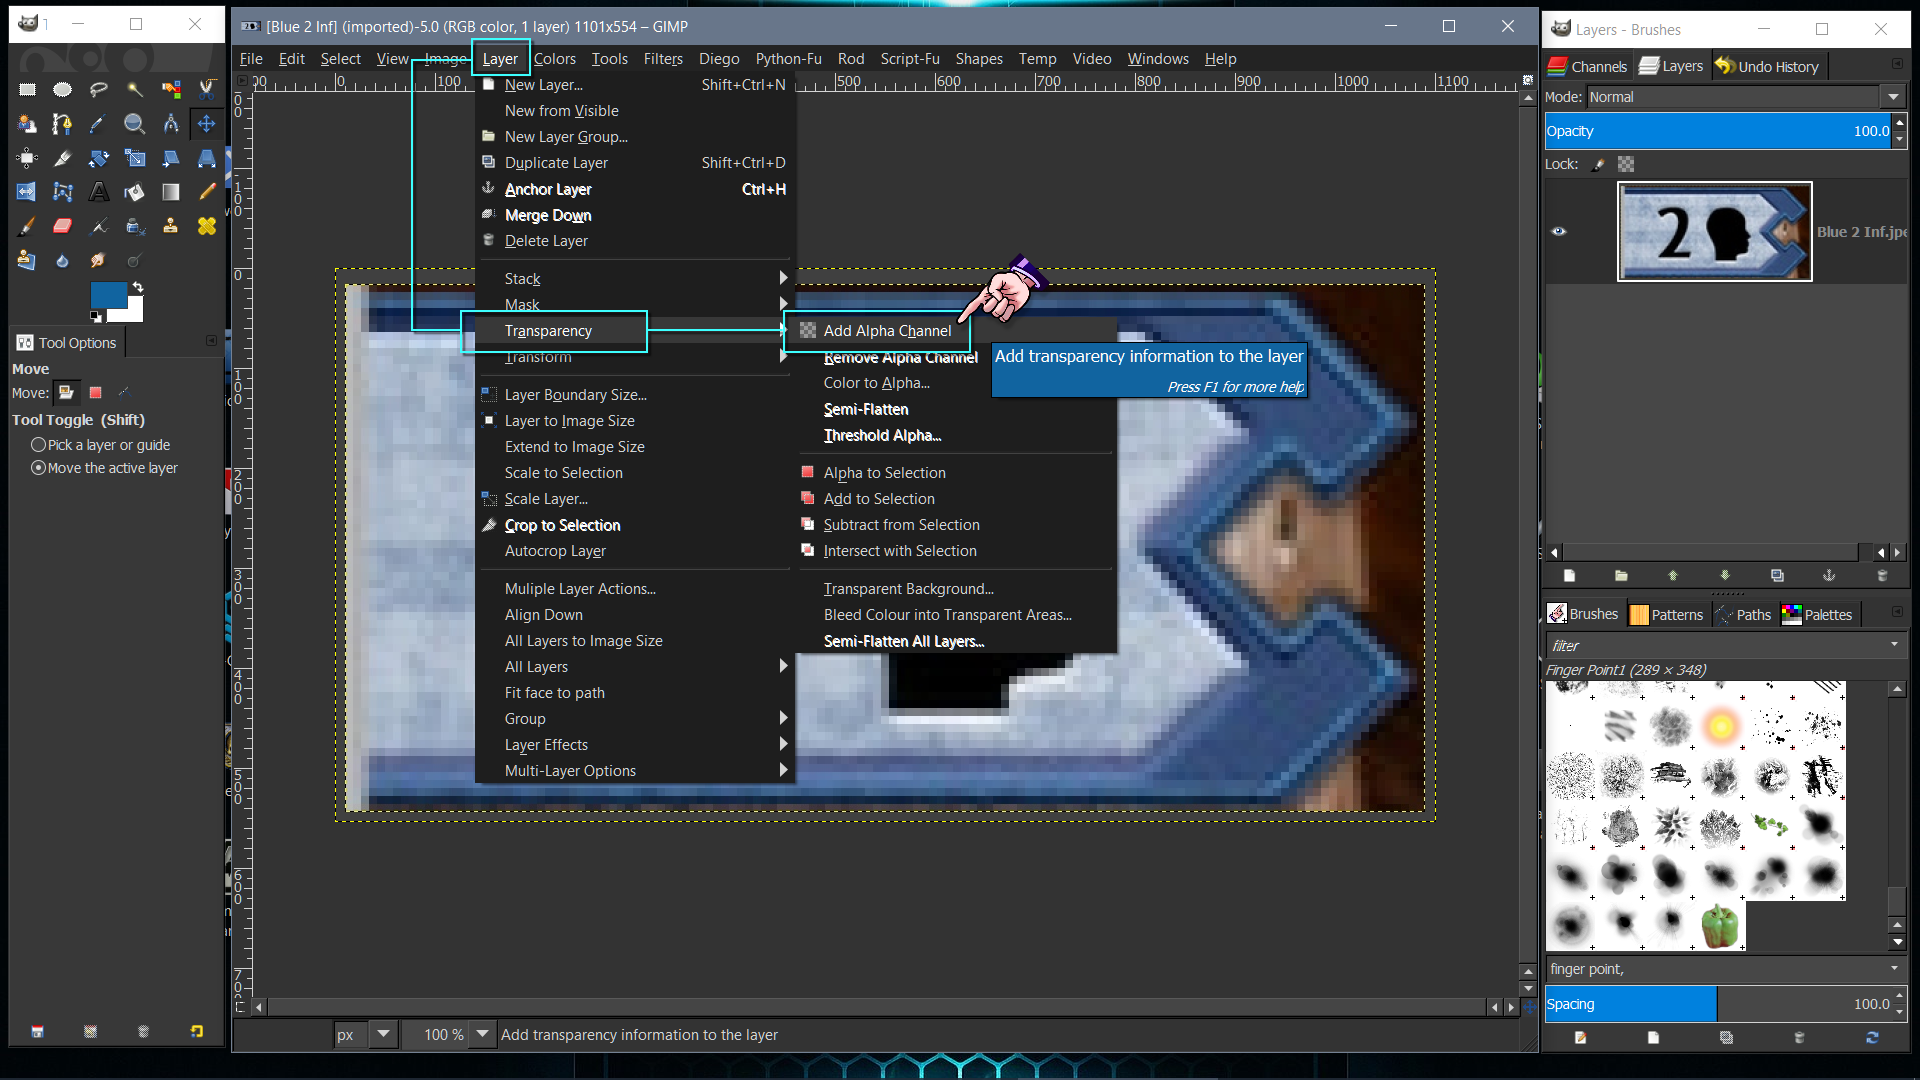
First add an
Alpha Channel to the image.
Go to:
Layer >
Transparency >
Add alpha channel.
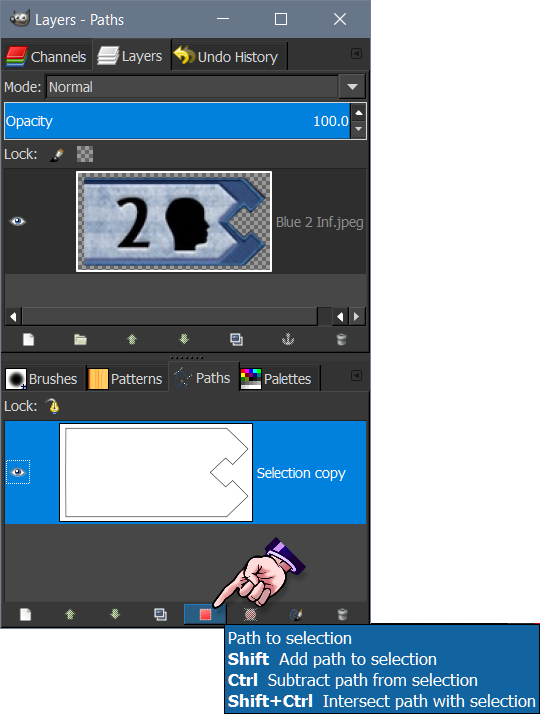
Make a selection from this path.
Using the
Path to Selection icon seen in the screenshot below.
Inverted the selection,
by going to:
Select >
Invert.
Then cleared the unwanted outer brown portion of the image.

Attachment:
File comment: This is a PNG
 Blue 2 Inf.png [ 255.77 KiB | Viewed 2928 times ]
This is only one of many ways this can be done.
It can also be done using a
Layer Mask.
 Login
Login Register
 Tweets
 FAQ
FAQ Advanced Search